光线投射阴影#
许多游戏的一个共同效果是 ray-casting 。使用户只能直接看到他们视线中的内容。
这可以使用以下命令快速完成 着色器 。这些是在显卡上运行的小程序。他们可以利用 图形处理单元 。GPU有很多专门用于处理图形的微型CPU,速度比主计算机的CPU快得多。
启动程序#
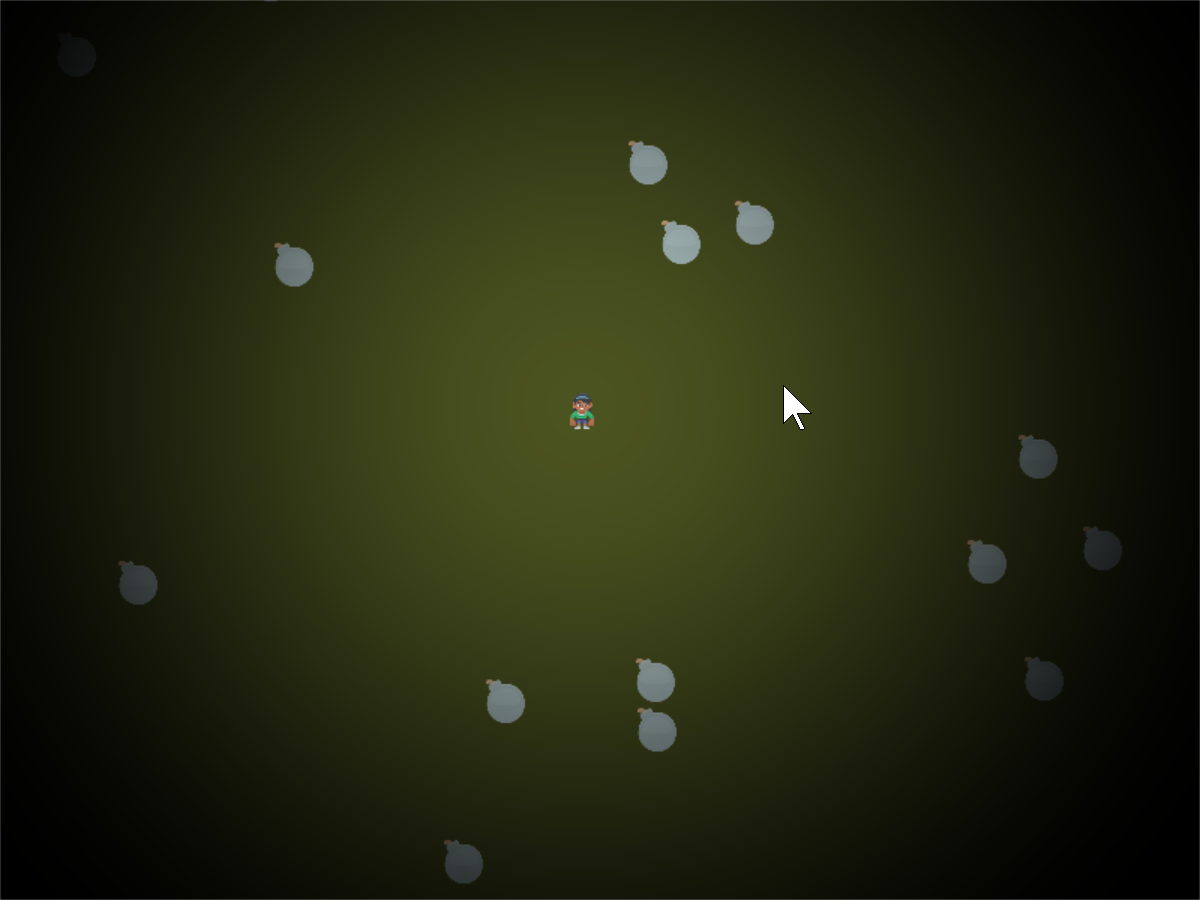
在我们开始添加阴影之前,我们需要一个好的启动程序。让我们创建一些板条箱来遮挡我们的视线,一些炸弹来隐藏在其中,以及一个玩家角色:
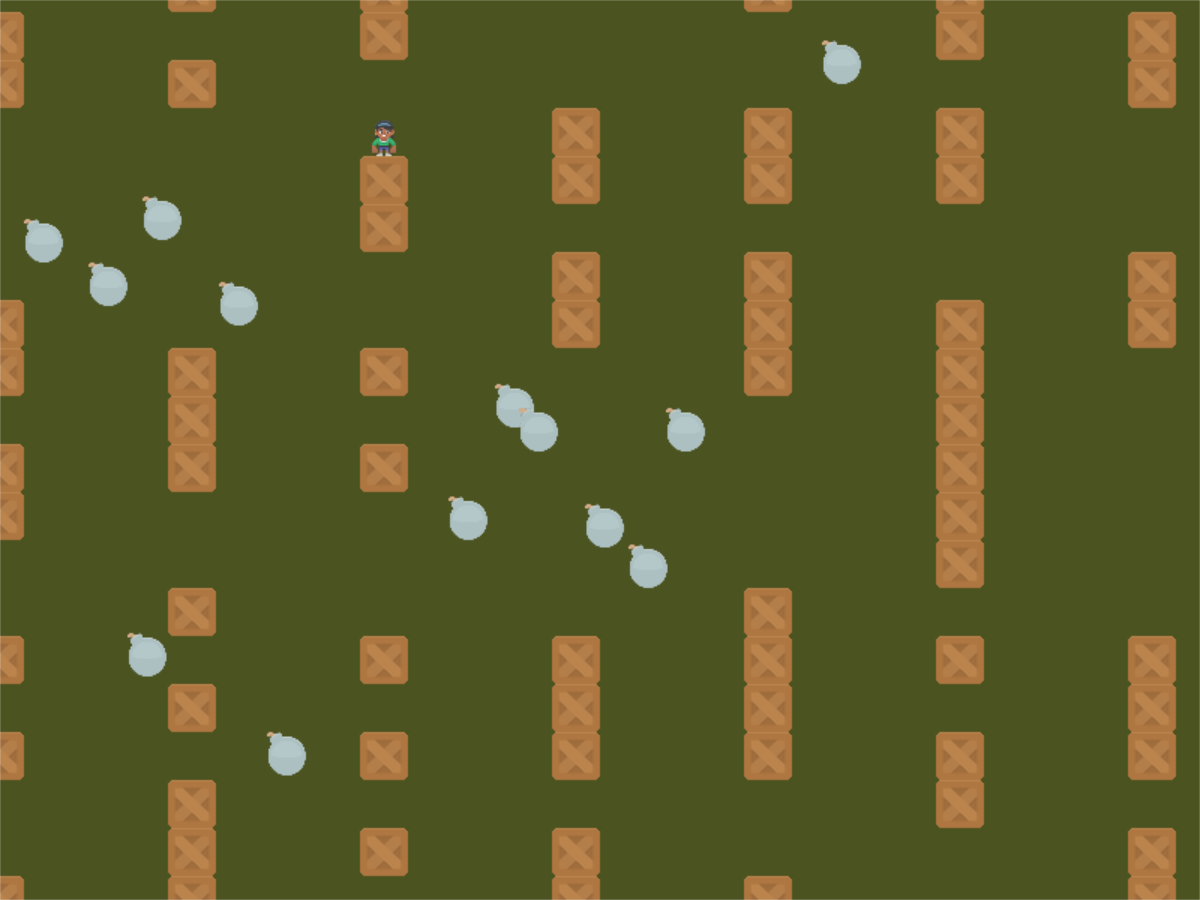
有关此启动计划的列表,请访问 光线投射开始文件 。
步骤1:在ShaderTool中加载项#
现在,让我们创建一个着色器。我们可以使用Arcade的 Shadertoy 班级。
我们将修改前面的程序以导入ShaderToy类:
from arcade.experimental import Shadertoy
接下来,我们将需要一些与着色器相关的变量。除了保存着色器的变量外,我们还需要跟踪一对夫妇 帧缓冲区对象 (FBOS)。可以将图像数据存储在FBO中并将其发送到着色器程序。显卡上有一个FBO。在那里操纵FBO比在加载到主内存中的FBO快得多。
ShaderToy有四个内置的 频道 我们的着色器程序可以与之配合使用。可以将通道映射到FBO。这允许我们将图像数据传递到着色器程序以供其处理。这四个通道的编号是从0到3。
我们将使用两个通道来投射阴影。我们将使用 channel0 变量来保持我们可以投射阴影的障碍。我们将使用 channel1 变量来控制地面、炸弹或任何我们想要隐藏在阴影中的东西。
    def __init__(self, width, height, title):
        super().__init__(width, height, title)

        # The shader toy and 'channels' we'll be using
        self.shadertoy = None
        self.channel0 = None
        self.channel1 = None
        self.load_shader()

        # Sprites and sprite lists
        self.player_sprite = None
        self.wall_list = arcade.SpriteList()
        self.player_list = arcade.SpriteList()
        self.bomb_list = arcade.SpriteList()
        self.physics_engine = None

        self.generate_sprites()
        self.background_color = arcade.color.ARMY_GREEN
这些只是空的占位符。我们将加载着色器并创建FBO来保存我们发送给着色器的 load_shader 方法:此代码创建着色器和FBO:
    def load_shader(self):
        # Size of the window
        window_size = self.get_size()

        # Create the shader toy, passing in a path for the shader source
        self.shadertoy = Shadertoy.create_from_file(window_size, "step_01.glsl")

        # Create the channels 0 and 1 frame buffers.
        # Make the buffer the size of the window, with 4 channels (RGBA)
        self.channel0 = self.shadertoy.ctx.framebuffer(
            color_attachments=[self.shadertoy.ctx.texture(window_size, components=4)]
        )
        self.channel1 = self.shadertoy.ctx.framebuffer(
            color_attachments=[self.shadertoy.ctx.texture(window_size, components=4)]
        )

        # Assign the frame buffers to the channels
        self.shadertoy.channel_0 = self.channel0.color_attachments[0]
        self.shadertoy.channel_1 = self.channel1.color_attachments[0]
正如您将注意到的,该方法从另一个文件加载“GLSL”程序。我们的光线投射程序将由两个文件组成。一个文件将保存我们的Python程序,另一个文件将保存我们的Shader程序。着色器程序是用一种称为OpenGL着色语言(GLSL)的语言编写的。这种语言的语法类似于C、Java或C#。
我们的第一个着色器将是直接的。它只会从通道0获取输入并将其复制到输出。
void mainImage( out vec4 fragColor, in vec2 fragCoord )
{
    vec2 normalizedFragCoord = fragCoord/iResolution.xy;
    fragColor = texture(iChannel0, normalizedFragCoord);
}
该着色器如何工作?对于我们输出中的每个点,这 mainImage 函数运行并计算我们的输出颜色。对于800x600像素的窗口,此函数为每帧运行480,000次。现代图形处理器可以有500-5000个“核心”,可以并行计算这些点,以实现更快的处理速度。
我们正在计算的当前坐标,我们引入了一个名为 fragCoord 。该函数需要计算此坐标的颜色并将其存储为输出变量 fragColor 。您可以在参数中看到输入和输出变量 mainImage 功能。请注意,输入数据被标记为 in 并将输出数据标记为 out 。这可能与您所习惯的有所不同。
这个 vec2 数据类型是由两个数字组成的数组。同样,还有 vec3 和 vec4 数据类型。它们可以用来存储坐标,也可以存储颜色。
或者第一步是将x,y坐标归一化为介于0.0和1.0之间的数字。我们存储在其中的归一化两个数字x/y向量 normalizedFragCoord 。
vec2 p = fragCoord/iResolution.xy;
我们需要在这一点上抓住颜色 curPoint 来自通道0 FBO。我们可以使用内置的 texture 功能:
texture(iChannel0, curPoint)
然后我们把它存储到我们的“Out” fragColor 变量,我们就完成了:
fragColor = texture(iChannel0, normalizedCoord);
现在我们已经有了着色器、几个FBO和初始的GLSL程序,我们可以返回到我们的Python程序并更新绘图代码以使用它们:
    def on_draw(self):
        # Select the channel 0 frame buffer to draw on
        self.channel0.use()
        self.channel0.clear()
        # Draw the walls
        self.wall_list.draw()

        # Select this window to draw on
        self.use()
        # Clear to background color
        self.clear()
        # Run the shader and render to the window
        self.shadertoy.render()
当我们奔跑的时候 self.channel0.use() ,所有后续绘制命令将不会绘制到屏幕,而是绘制到我们的FBO图像缓冲区。当我们奔跑的时候 self.use() 我们会继续在我们的窗户上画画。
运行该程序时,我们的输出应该如下所示:
第一步 ← Full listing of where we are right now
Step_01.py差异 ← What we changed to get here
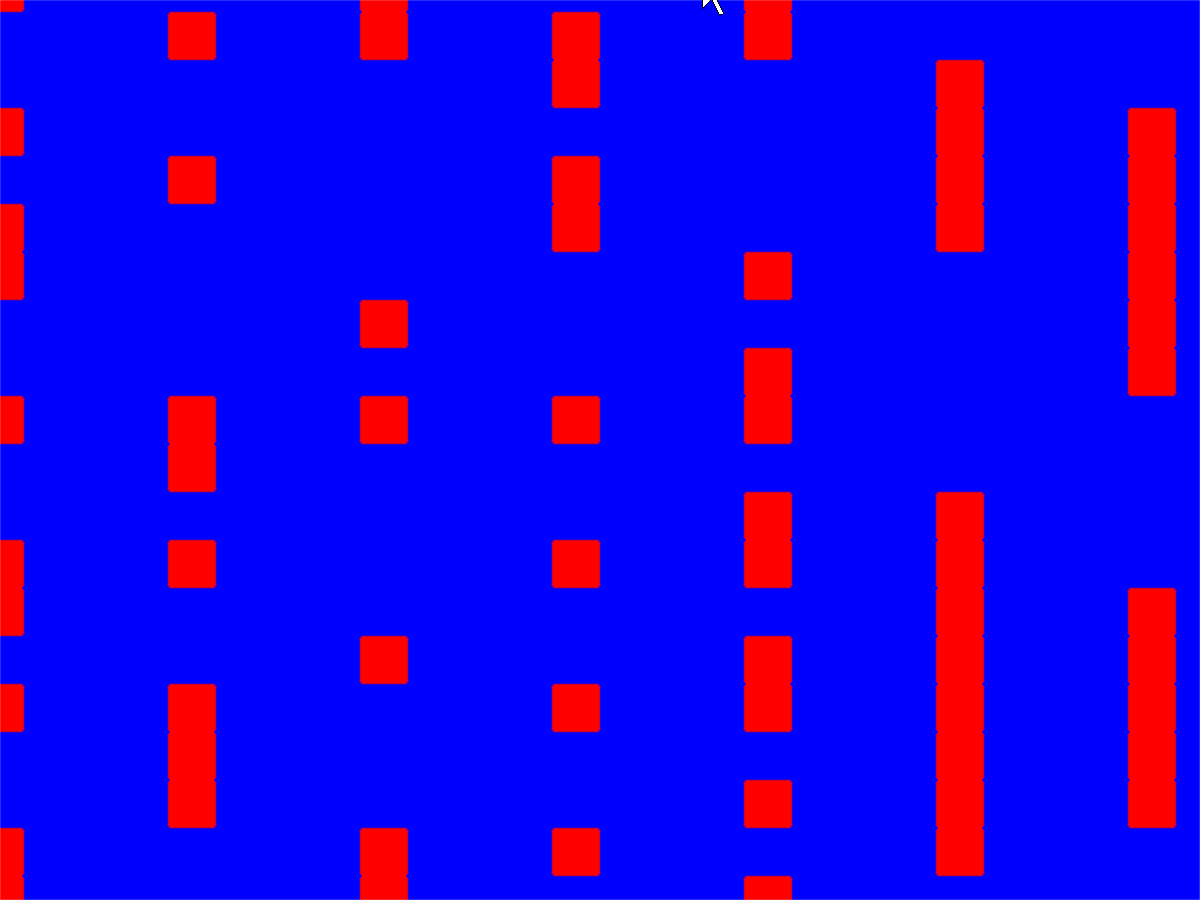
步骤2:简单的着色器实验#
我们如何知道我们的着色器真的在工作?因为它只是直接复制所有的东西,所以很难说。
我们可以修改着色器以获取当前纹理颜色并将其存储在变量中 inColor 。一种颜色有四种成分,红、绿、蓝和阿尔法。如果Alpha高于零,我们可以输出红色。如果Alpha为零,则输出蓝色。
备注
OpenGL中的颜色以RGB或RGBA格式指定。但是,每个分量都是一个从0.0到1.0的浮点数,而不是从0到255的数字。
void mainImage( out vec4 fragColor, in vec2 fragCoord )
{
    vec2 normalizedFragCoord = fragCoord/iResolution.xy;
    vec4 inColor = texture(iChannel0, normalizedFragCoord);
    if (inColor.a > 0.0)
        // Set to a red color
        fragColor = vec4(1.0, 0.0, 0.0, 1.0);
    else
        // Set to a blue color
        fragColor = vec4(0.0, 0.0, 1.0, 1.0);
}
为我们提供了一个如下所示的结果图像:
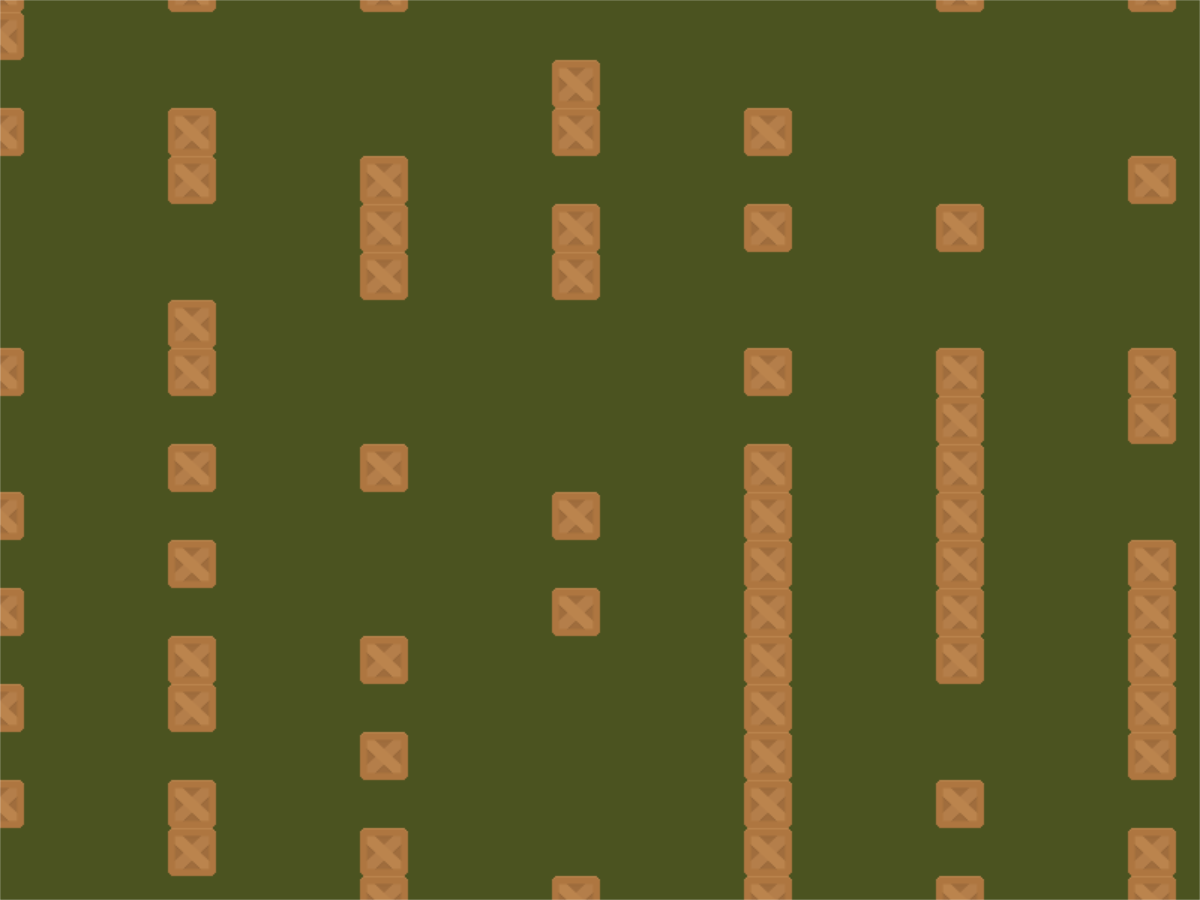
步骤3:创建灯光#
我们的下一步是创建灯光。我们将在没有灯光(黑色)和我们在通道1中画的任何东西之间褪色。
在这一步中,我们还不会担心绘制墙。
这一步需要我们向着色器传递额外的数据。我们将使用以下工具完成此操作 制服 。我们会通过的 哪里 光是,光是光 size 。
我们首先在着色器程序中声明和使用变量。
// x, y position of the light
uniform vec2 lightPosition;
// Size of light in pixels
uniform float lightSize;
接下来,我们需要知道这个点离光有多远。我们通过从灯光位置减去这个点来做到这一点。我们可以对向量进行数学运算,所以我们只需减法。然后我们使用内置的 length 函数以获取此向量的长度的浮点数。
    // Distance in pixels to the light
    float distanceToLight = length(lightPosition - fragCoord);
接下来,我们需要获得要计算的像素的坐标,但是 规格化 。坐标的范围为0.0到1.0,窗口的左下角为(0,0),右上角为(1,1)。在着色器中使用规格化坐标可以轻松地进行缩放。
    // Normalize the fragment coordinate from (0.0, 0.0) to (1.0, 1.0)
    vec2 normalizedFragCoord = fragCoord/iResolution.xy;
然后我们需要计算有多少光落在这个坐标上。这个数字也将被正常化。数字0.0将处于完全阴影中,数字1.0将完全亮起。
我们将使用内置的 smoothstep 我们的光有多大,以及我们离光有多远的函数。然后将其从数字0.0缩放到1.0。
如果我们离灯光有0.0个像素,我们会得到一个0.0。如果我们在离灯光一半的地方,我们会得到0.5。如果我们在灯光的边缘,我们将获得1.0。如果我们超出了灯光的边缘,我们会得到1.0。
不幸的是,这与我们想要的相去甚远。我们希望中心为1.0,灯光外为0.0。因此,从1.0中简单地减去就可以解决这个问题。
    // Start our mixing variable at 1.0
    float lightAmount = 1.0;

    // Find out how much light we have based on the distance to our light
    lightAmount *= 1.0 - smoothstep(0.0, lightSize, distanceToLight);
接下来,我们将使用内置的 mix 函数和 lightAmount 变量以在通道1中的任何颜色和黑色阴影颜色之间切换。
    // We'll alternate our display between black and whatever is in channel 1
    vec4 blackColor = vec4(0.0, 0.0, 0.0, 1.0);

    // Our fragment color will be somewhere between black and channel 1
    // dependent on the value of b.
    fragColor = mix(blackColor, texture(iChannel1, normalizedFragCoord), lightAmount);
最后,我们将返回到Python程序并更新我们的 on_draw 执行以下操作的方法:
把炸弹引到第一频道。
使用制服发送球员的位置和灯光的大小。
在窗口上绘制玩家角色。
    def on_draw(self):
        # Select the channel 0 frame buffer to draw on
        self.channel0.use()
        self.channel0.clear()
        # Draw the walls
        self.wall_list.draw()

        self.channel1.use()
        self.channel1.clear()
        # Draw the bombs
        self.bomb_list.draw()

        # Select this window to draw on
        self.use()
        # Clear to background color
        self.clear()
        # Run the shader and render to the window
        self.shadertoy.program['lightPosition'] = self.player_sprite.position
        self.shadertoy.program['lightSize'] = 300
        self.shadertoy.render()
        # Draw the player
        self.player_list.draw()
备注
如果使用设置统一变量 program ,该变量必须存在于GLSL程序中, 并被利用 否则您将得到一个错误。GLSL编译器将自动删除未使用的变量,即使您已经声明了某个变量,但程序显示缺少该变量时,会导致令人困惑的错误。
第3步: Python ← Full listing of where we are right now with the Python program
Step_03.py差异 ← What we changed to get here
第3步GLSL ← Full listing of where we are right now with the GLSL program
Step_03.glsl差异 ← What we changed to get here
第四步:给墙壁加上阴影#
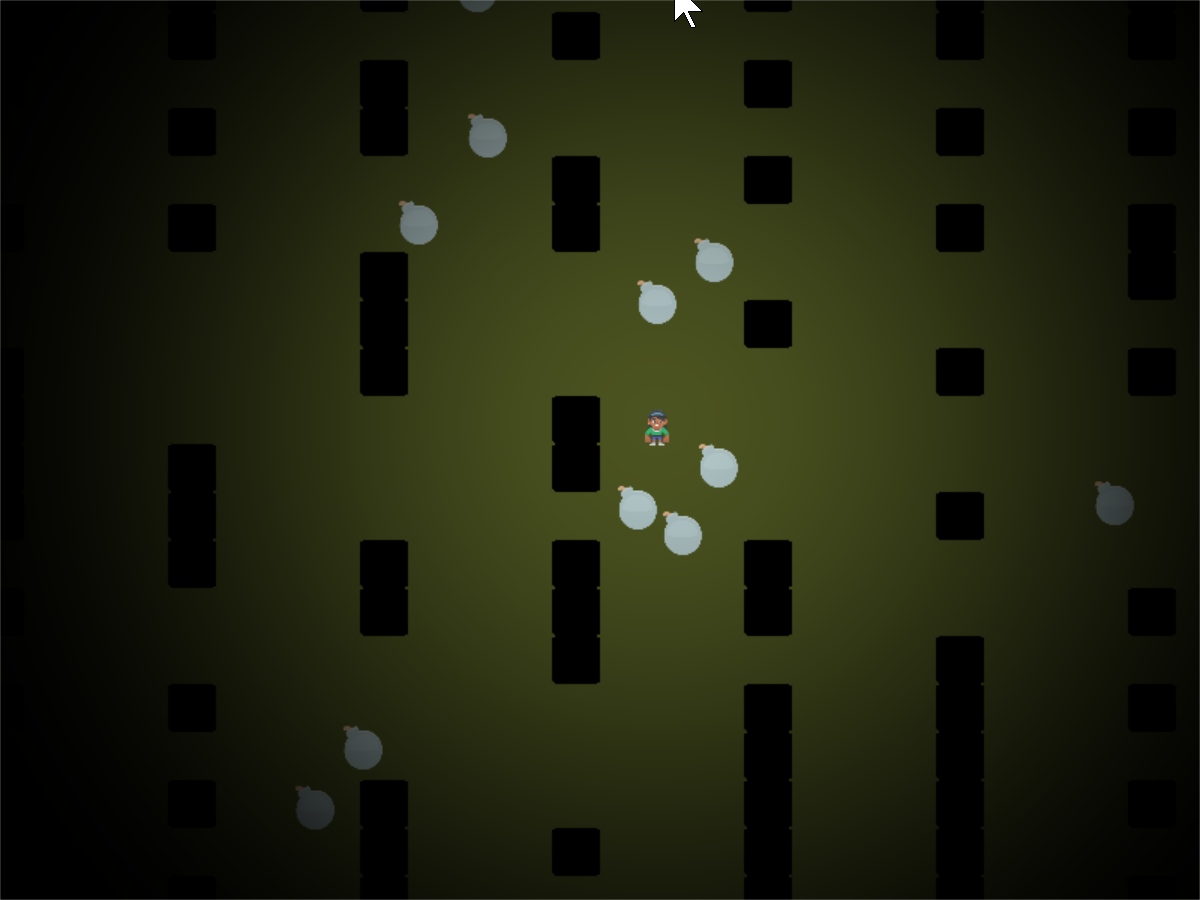
在此步骤中,除了灯光之外,我们还希望墙显示在阴影中。为此,我们根本不需要更改我们的Python程序,只需要更改GLSL程序。
首先,我们将在GLSL程序中添加一个 terrain 功能。这将对通道0进行采样。如果那里的像素的Alpha为0.1或更大(光线的障碍物),我们将使用 step 函数,并获得1.0。否则,我们将得到0.0。然后,由于我们希望颠倒这一点,(0.0表示障碍,1.0表示无障碍),我们将从1.0中减去:
float terrain(vec2 samplePoint)
{
    float samplePointAlpha = texture(iChannel0, samplePoint).a;
    float sampleStepped = step(0.1, samplePointAlpha);
    float returnValue = 1.0 - sampleStepped;

    return returnValue;
}
接下来,我们将考虑到光的这一障碍。所以我们的光量将是与光的距离的组合,如果这个像素上有障碍物。
    // Start our mixing variable at 1.0
    float lightAmount = 1.0;

    float shadowAmount = terrain(normalizedFragCoord);
    lightAmount *= shadowAmount;

    // Find out how much light we have based on the distance to our light
    lightAmount *= 1.0 - smoothstep(0.0, lightSize, distanceToLight);
第4步GLSL ← Full listing of where we are right now with the GLSL program
Step_04.glsl差异 ← What we changed to get here
第五步:投射阴影#

现在是时候投下阴影了。
这涉及到大量的“抽样”。我们从当前点开始,在灯光所在的位置画一条线。我们将沿着这条线对“N”次进行采样。如果我们发现障碍物,我们的坐标一定在阴影里。

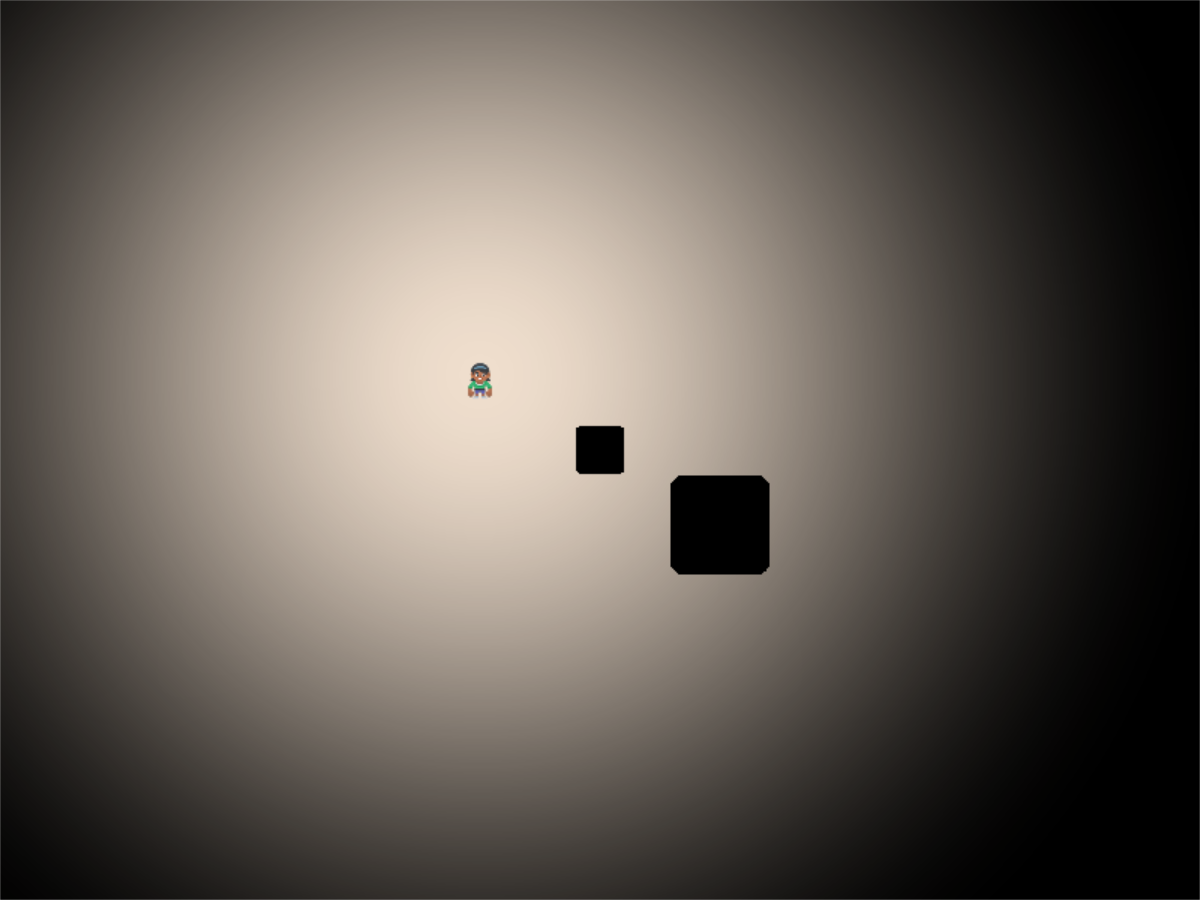
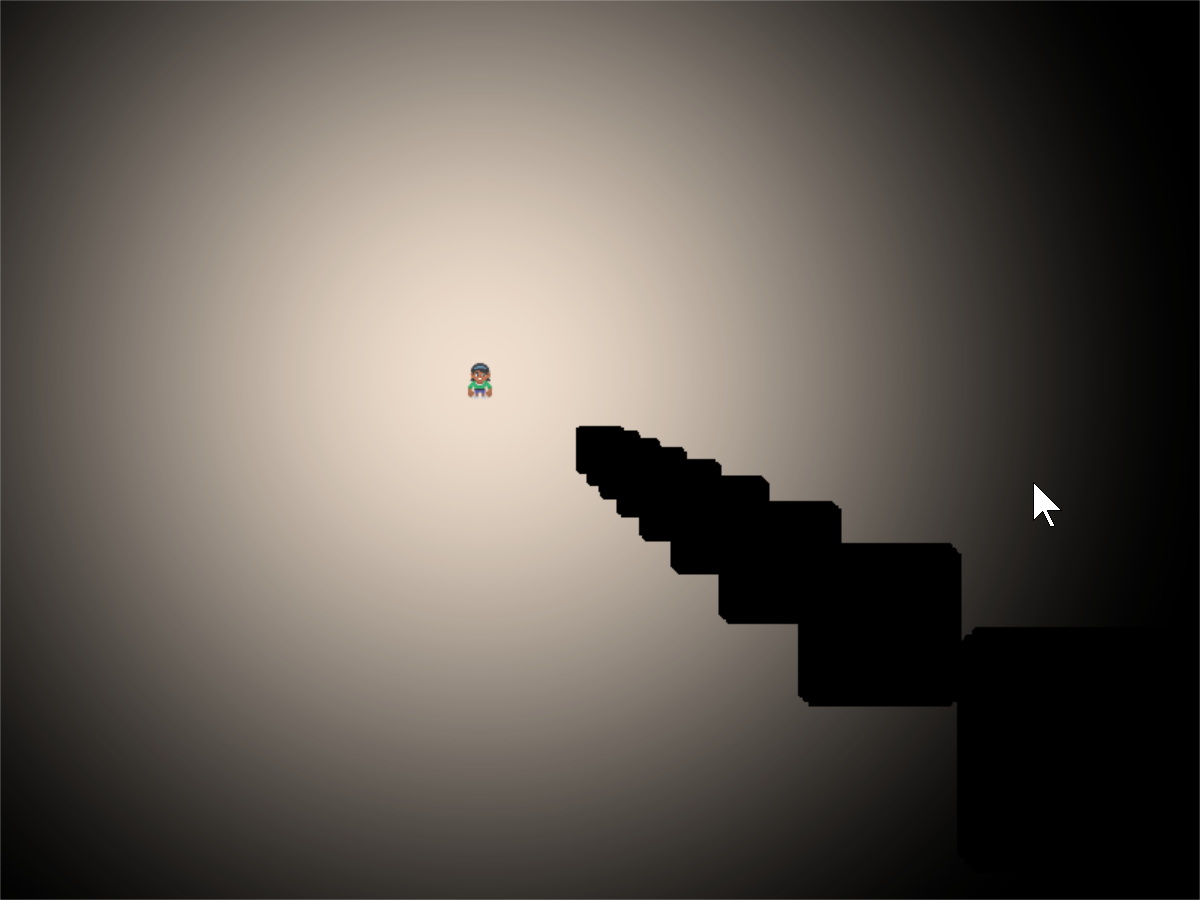
我们要抽检几次?如果我们没有足够的采样次数,我们就会错过障碍,最终得到奇怪的阴影。第一张图片是如果我们只采样两次的话。一次是我们所在的地方,一次是在中间:
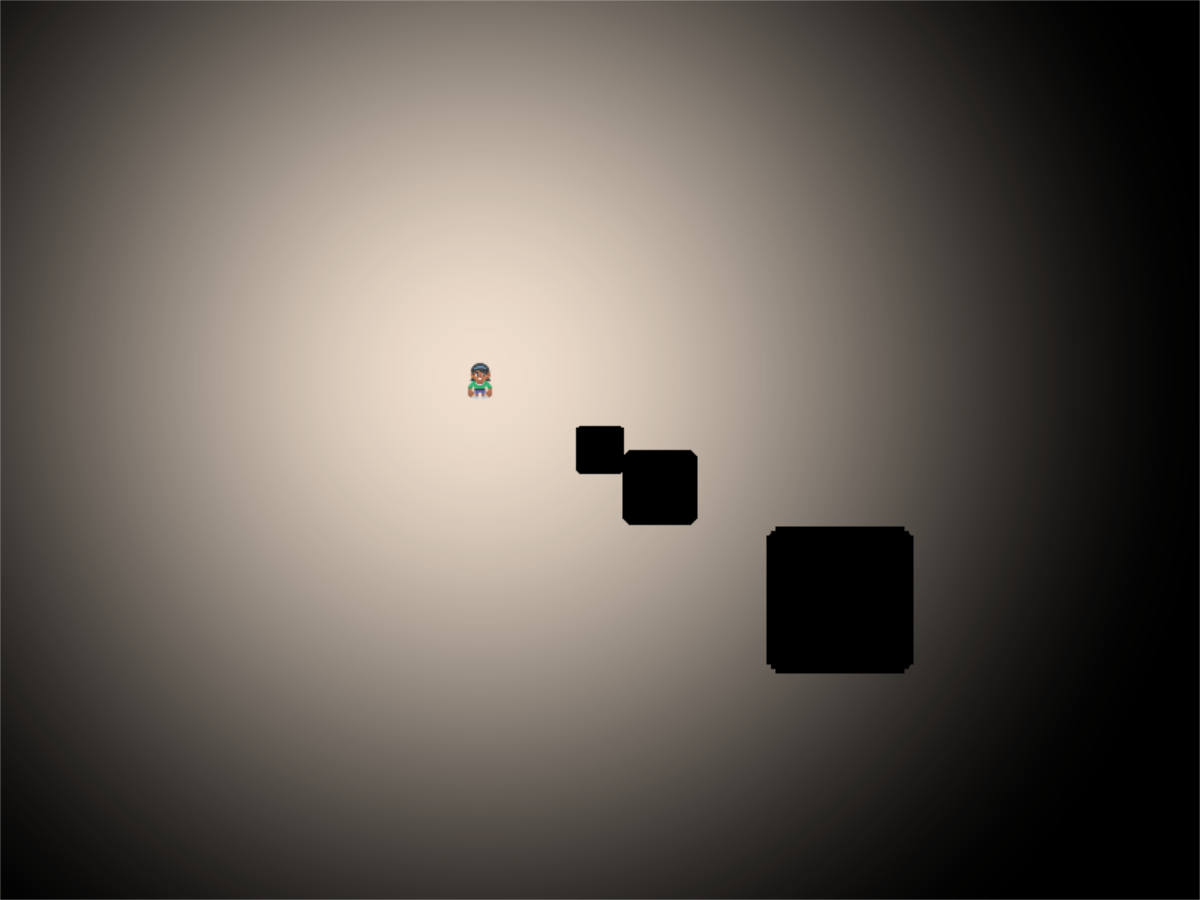
如果N为3,则最终得到阴影的3个副本:
N为10:
我们可以使用N为500来获得高质量的阴影。如果你的障碍很小,而光线范围很大,我们可能需要更多。
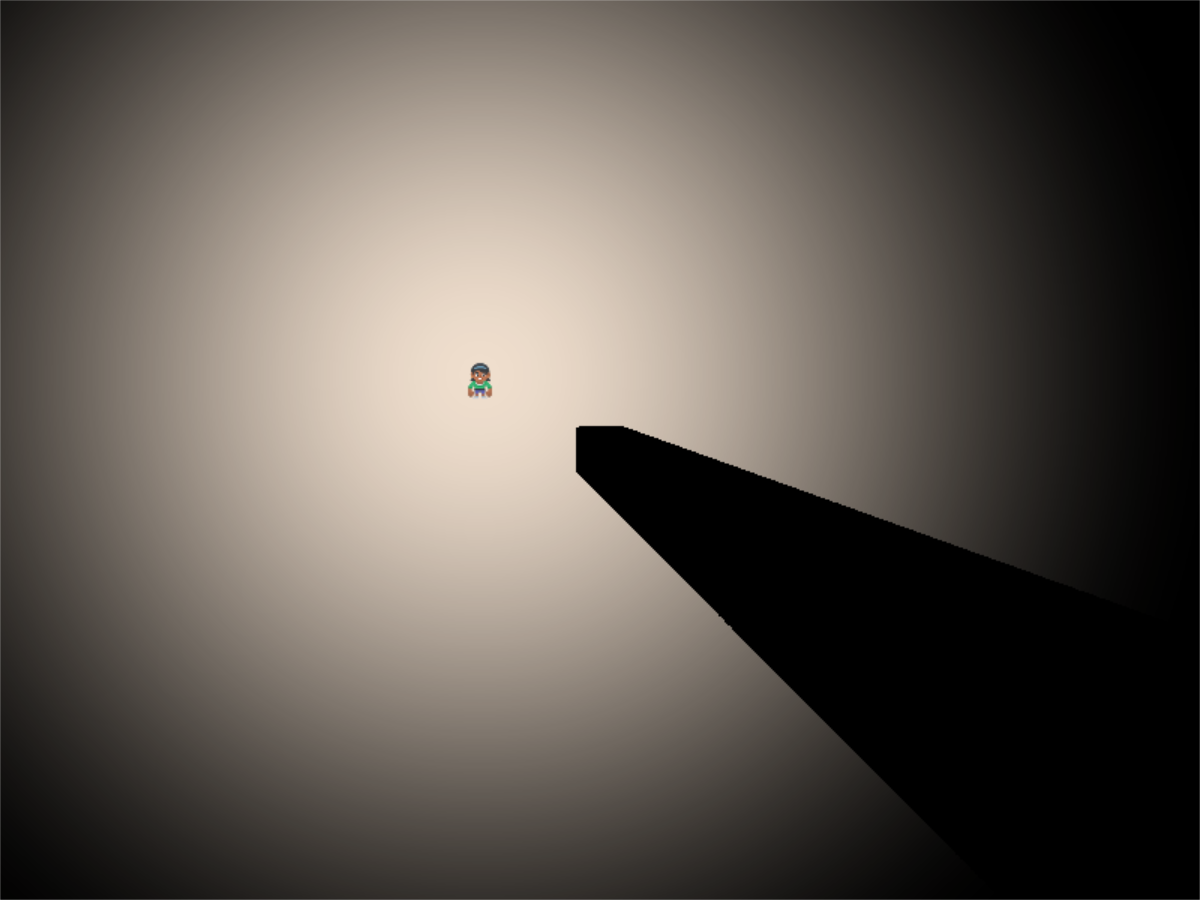
请记住,这是一个速度方面的权衡。对于800x600像素,我们需要计算48万像素。如果这些像素中的每个像素都有一个循环,可以进行500个采样,那么我们每帧采样480,000×500=240,000个采样,或每秒1,440万个采样,使用现代显卡仍然很难做到这一点。
但如果你扩大规模呢?一台4k显示器每秒需要2470亿个样本!可以进行一些优化,例如退出 for 循环一旦我们在阴影中,并且不计算超出光线范围的点。我们在这里不讨论这一点,但即使使用2D,了解着色器正在做什么以保持合理的性能也是很重要的。
第5步GLSL ← Full listing of where we are right now with the GLSL program
Step_05.glsl差异 ← What we changed to get here
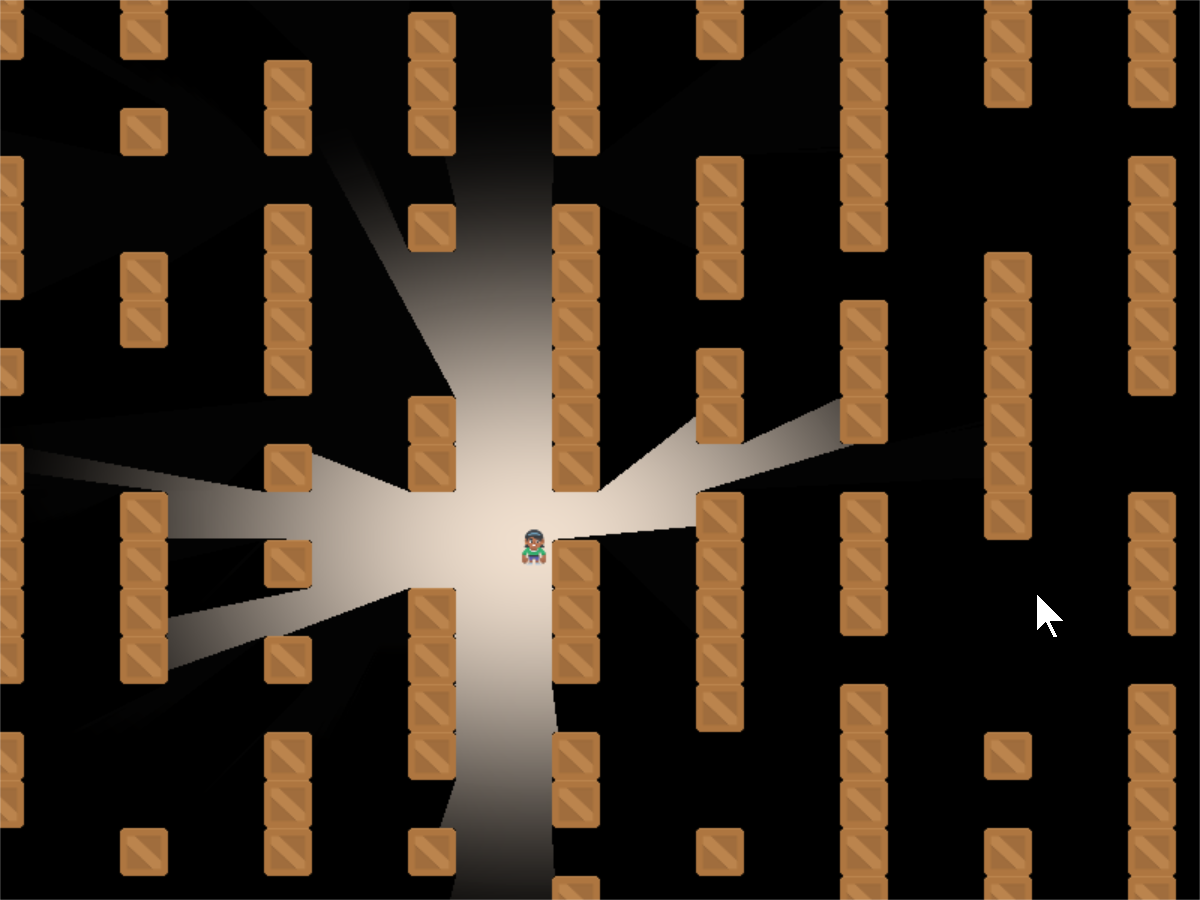
第6步:柔和阴影和墙面绘制#

只需多加一行代码,我们就可以软化阴影,使它们不会有如此“硬”的边缘。
为此,请修改 terrain 函数在我们的GLSL程序中。我们将返回0.0或0.98,而不是返回0.0或1.0。这允许边缘仅部分阻挡灯光。
float terrain(vec2 samplePoint)
{
    float samplePointAlpha = texture(iChannel0, samplePoint).a;
    float sampleStepped = step(0.1, samplePointAlpha);
    float returnValue = 1.0 - sampleStepped;

    // Soften the shadows. Comment out for hard shadows.
    // The closer the first number is to 1.0, the softer the shadows.
    returnValue = mix(0.98, 1.0, returnValue);
然后我们可以继续在屏幕上画出障碍物,这样我们就可以看到是什么在投射阴影。
    def on_draw(self):
        # Select the channel 0 frame buffer to draw on
        self.channel0.use()
        self.channel0.clear()
        # Draw the walls
        self.wall_list.draw()

        self.channel1.use()
        self.channel1.clear()
        # Draw the bombs
        self.bomb_list.draw()

        # Select this window to draw on
        self.use()
        # Clear to background color
        self.clear()
        # Run the shader and render to the window
        self.shadertoy.program['lightPosition'] = self.player_sprite.position
        self.shadertoy.program['lightSize'] = 300
        self.shadertoy.render()

        # Draw the walls
        self.wall_list.draw()

        # Draw the player
        self.player_list.draw()
第6步: Python ← Full listing of where we are right now with the Python program
第6步GLSL ← Full listing of where we are right now with the GLSL program
Step_06.glsl差异 ← What we changed to get here
第7步-支持调整窗口大小#
如果需要调整窗口大小,该怎么办?首先启用大小调整:
您需要在窗口的 __init__ :
    def __init__(self, width, height, title):
        super().__init__(width, height, title, resizable=True)
那么我们需要重写 Window.resize 方法还可以调整shader玩具的大小:
    def on_resize(self, width: int, height: int):
        super().on_resize(width, height)
        self.shadertoy.resize((width, height))
第7步: Python ← Full listing of where we are right now with the Python program
Step_07.差异 ← What we changed to get here
第8步-支持滚动#
如果我们想要在屏幕上滚动该怎么办?有一个不能滚动的图形用户界面吗?
首先,我们将为屏幕的滚动部分(精灵)添加一个摄像头,并为非滚动的图形用户界面部分添加另一个摄像头。此外,我们还将创建一些文本,将其作为图形用户界面的内容显示在屏幕上。
 1    def __init__(self, width, height, title):
 2        super().__init__(width, height, title, resizable=True)
 3
 4        # The shader toy and 'channels' we'll be using
 5        self.shadertoy = None
 6        self.channel0 = None
 7        self.channel1 = None
 8        self.load_shader()
 9
10        # Sprites and sprite lists
11        self.player_sprite = None
12        self.wall_list = arcade.SpriteList()
13        self.player_list = arcade.SpriteList()
14        self.bomb_list = arcade.SpriteList()
15        self.physics_engine = None
16
17        # Create cameras used for scrolling
18        self.camera_sprites = arcade.camera.Camera2D()
19        self.camera_gui = arcade.camera.Camera2D()
20
21        self.generate_sprites()
22
23        # Our sample GUI text
24        self.score_text = arcade.Text("Score: 0", 10, 10, arcade.color.WHITE, 24)
25
26        self.background_color = arcade.color.ARMY_GREEN
接下来,我们需要画画并使用摄像机。这使我们的着色器变得复杂,因为它不关心滚动,所以我们必须传递给它一个不受相机位置影响的位置。因此,我们把它减去。
 1    def on_draw(self):
 2        # Use our scrolled camera
 3        self.camera_sprites.use()
 4
 5        # Select the channel 0 frame buffer to draw on
 6        self.channel0.use()
 7        self.channel0.clear()
 8        # Draw the walls
 9        self.wall_list.draw()
10
11        self.channel1.use()
12        self.channel1.clear()
13        # Draw the bombs
14        self.bomb_list.draw()
15
16        # Select this window to draw on
17        self.use()
18        # Clear to background color
19        self.clear()
20
21        # Calculate the light position. We have to subtract the camera position
22        # from the player position to get screen-relative coordinates.
23        p = (self.player_sprite.position[0] - self.camera_sprites.left,
24             self.player_sprite.position[1] - self.camera_sprites.bottom)
25
26        # Set the uniform data
27        self.shadertoy.program['lightPosition'] = p
28        self.shadertoy.program['lightSize'] = 300
29
30        # Run the shader and render to the window
31        self.shadertoy.render()
32
33        # Draw the walls
34        self.wall_list.draw()
35
36        # Draw the player
37        self.player_list.draw()
38
39        # Switch to the un-scrolled camera to draw the GUI with
40        self.camera_gui.use()
41        # Draw our sample GUI text
42        self.score_text.draw()
当我们更新时,我们需要将摄像头滚动到用户所在的位置:
1    def on_update(self, delta_time):
2        """ Movement and game logic """
3
4        # Call update on all sprites (The sprites don't do much in this
5        # example though.)
6        self.physics_engine.update()
7        # Scroll the screen to the player
8        self.scroll_to_player()
我们需要实现 scroll_to_player 我们自己的方法。
首先,我们进口侏儒的 Vec2 类来加快数学运算的实现速度:
import random
from pyglet.math import Vec2

import arcade
from arcade.experimental import Shadertoy
然后,我们实现 MyGame.scroll_to_player 方法:
 1    def scroll_to_player(self, speed=CAMERA_SPEED):
 2        """
 3        Scroll the window to the player.
 4
 5        if CAMERA_SPEED is 1, the camera will immediately move to the desired position.
 6        Anything between 0 and 1 will have the camera move to the location with a smoother
 7        pan.
 8        """
 9
10        position = (self.player_sprite.center_x, self.player_sprite.center_y)
11        self.camera_sprites.position = arcade.math.lerp_2d(self.camera_sprites.position, position, CAMERA_SPEED)
最后,当我们调整窗口大小时,我们必须调整相机的大小:
1    def on_resize(self, width: int, height: int):
2        super().on_resize(width, height)
3        self.camera_sprites.match_screen(and_projection=True)
4        self.camera_gui.match_screen(and_projection=True)
5        self.shadertoy.resize((width, height))
第八步 Python ← Full listing of where we are right now with the Python program
Step_08.py差异 ← What we changed to get here
目录学#
在我写这篇教程之前,我不知道这些阴影是如何制作的。我找到了示例代码 Simple 2d Ray-Cast Shadow JT,这让我非常缓慢地弄清楚如何投射阴影。