用Arade的图形用户界面制作菜单#
本教程将展示如何使用大多数arcade的gui窗口小部件。
第一步:打开一扇窗#
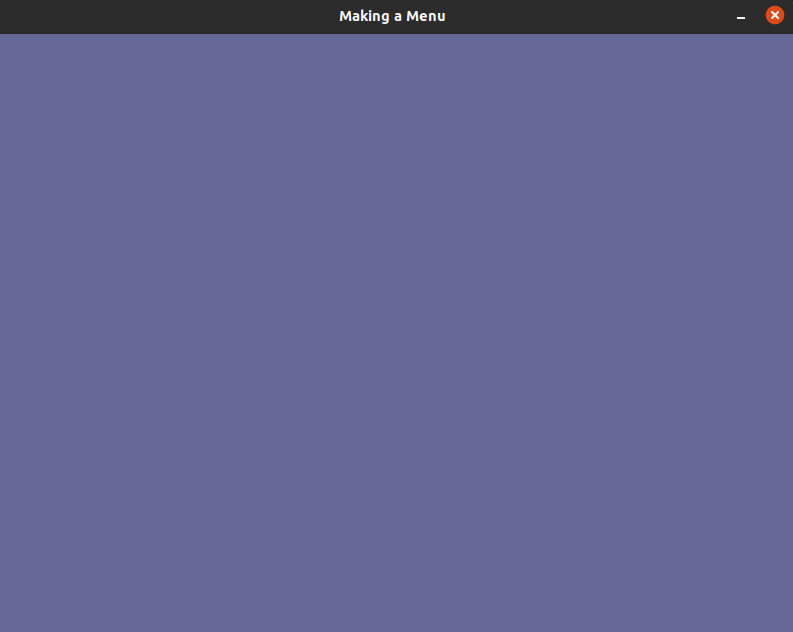
首先,让我们开始一个带有视图的空白窗口。
 1"""
 2Menu.
 3
 4Shows the usage of almost every gui widget, switching views and making a modal.
 5"""
 6import arcade
 7
 8# Screen title and size
 9SCREEN_WIDTH = 800
10SCREEN_HEIGHT = 600
11SCREEN_TITLE = "Making a Menu"
12
13
14class MainView(arcade.View):
15    """ Main application class."""
16
17    def __init__(self):
18        super().__init__()
19
20    def on_show_view(self):
21        """ This is run once when we switch to this view """
22        arcade.set_background_color(arcade.color.DARK_BLUE_GRAY)
23
24    def on_draw(self):
25        """ Render the screen. """
26        # Clear the screen
27        self.clear()
28
29
30def main():
31    window = arcade.Window(SCREEN_WIDTH, SCREEN_HEIGHT, SCREEN_TITLE, resizable=True)
32    main_view = MainView()
33    window.show_view(main_view)
34    arcade.run()
35
36
37if __name__ == "__main__":
38    main()
步骤2:切换到菜单视图#
在本节中,我们将把窗口的当前视图切换到菜单视图。
进口商品#
首先,我们将导入街机图形用户界面:
Shows the usage of almost every gui widget, switching views and making a modal.
"""
修改主视图#
我们将添加一个按钮来更改视图。要绘制按钮,我们需要一个 UIManager 。
    """This is the class where your normal game would go."""

    def __init__(self):
        super().__init__()
在初始化管理器之后,我们需要在显示视图时启用它,在隐藏视图时禁用它。
    def on_show_view(self):
        """ This is run once when we switch to this view """
        arcade.set_background_color(arcade.color.DARK_BLUE_GRAY)

        # Enable the UIManager when the view is showm.
        self.manager.enable()
    def on_hide_view(self):
        # Disable the UIManager when the view is hidden.
        self.manager.disable()
我们还需要将菜单的子菜单绘制在 on_draw 。
画经理的孩子#def on_draw(self): """ Render the screen. """ # Clear the screen self.clear() # Draw the manager. self.manager.draw()
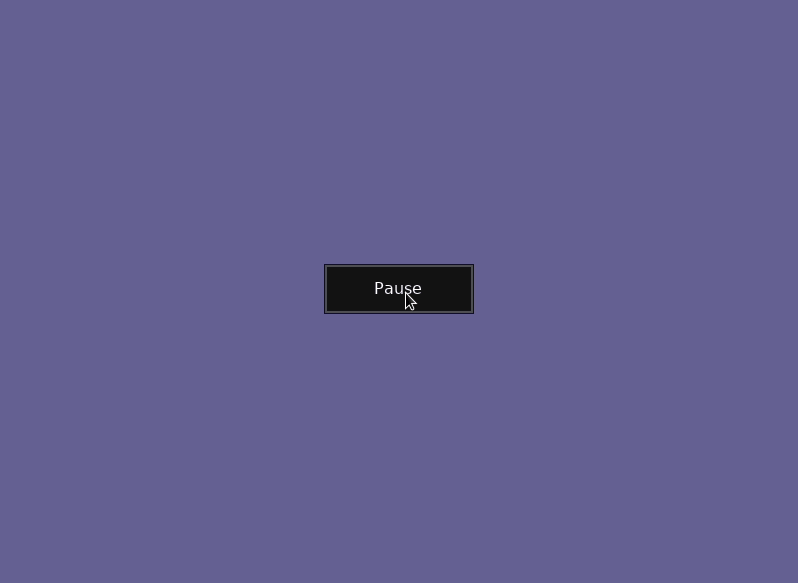
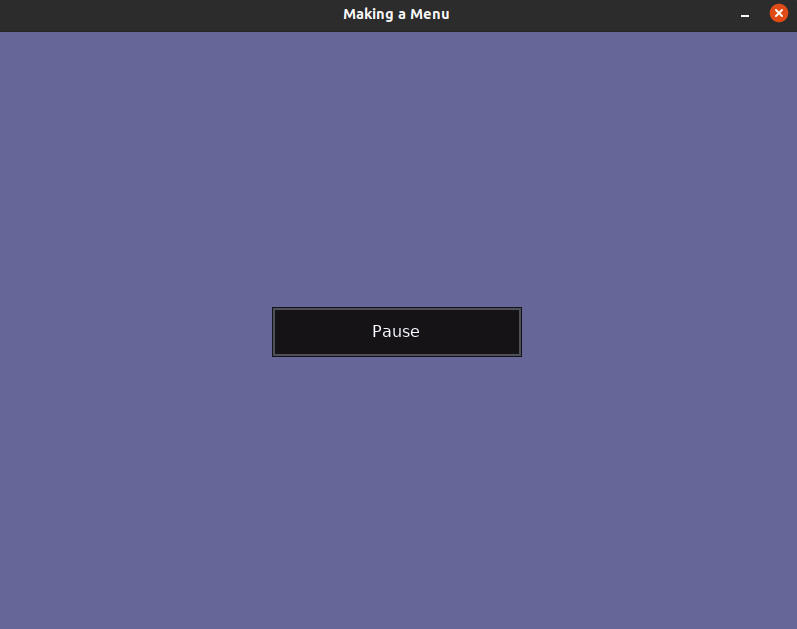
现在我们已经成功地设置了管理器,剩下的就是添加按钮了。我们正在使用 UIAnchorLayout 来定位按钮。我们还设置了一个在单击按钮时调用的函数。
正在初始化按钮#self.manager = arcade.gui.UIManager() switch_menu_button = arcade.gui.UIFlatButton(text="Pause", width=250) # Initialise the button with an on_click event. @switch_menu_button.event("on_click") def on_click_switch_button(event): # Passing the main view into menu view as an argument. menu_view = MenuView(self) self.window.show_view(menu_view) # Use the anchor to position the button on the screen. self.anchor = self.manager.add(arcade.gui.UIAnchorLayout()) self.anchor.add( anchor_x="center_x", anchor_y="center_y",
节目单#
MENU_02.py完整列表 ← Where we are right now
Menu_02.py差异 ← What we changed to get here
步骤3:设置菜单视图#
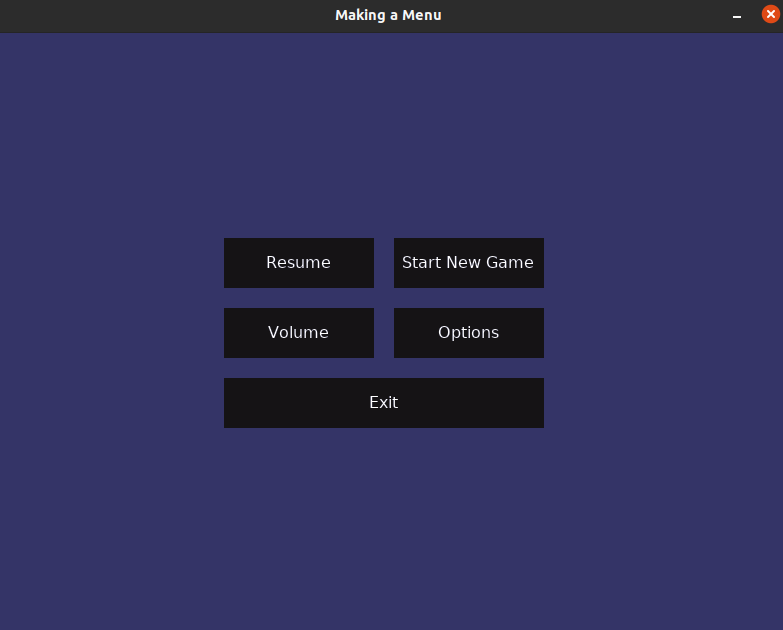
在本步骤中,我们将设置实际菜单的显示按钮。本节中编写的代码是为 MenuView
节目单#
MENU_03.py完整列表 ← Where we are right now
MENU_03.py差异 ← What we changed to get here
步骤4:配置菜单按钮#
我们基本上为以下项添加了事件侦听器 on_click 为了纽扣。
添加 on_click 恢复回调,开始新游戏,退出#
首先,我们将添加要恢复的事件侦听器、START_NEW_GAME和EXIT按钮,因为它们没有太多需要解释的内容。
        self.main_view = main_view

        @resume_button.event("on_click")
        def on_click_resume_button(event):
            # Pass already created view because we are resuming.
            self.window.show_view(self.main_view)

        @start_new_game_button.event("on_click")
        def on_click_start_new_game_button(event):
            # Create a new view because we are starting a new game.
            main_view = MainView()
            self.window.show_view(main_view)

        @exit_button.event("on_click")
添加 on_click 音量和选项的回调#
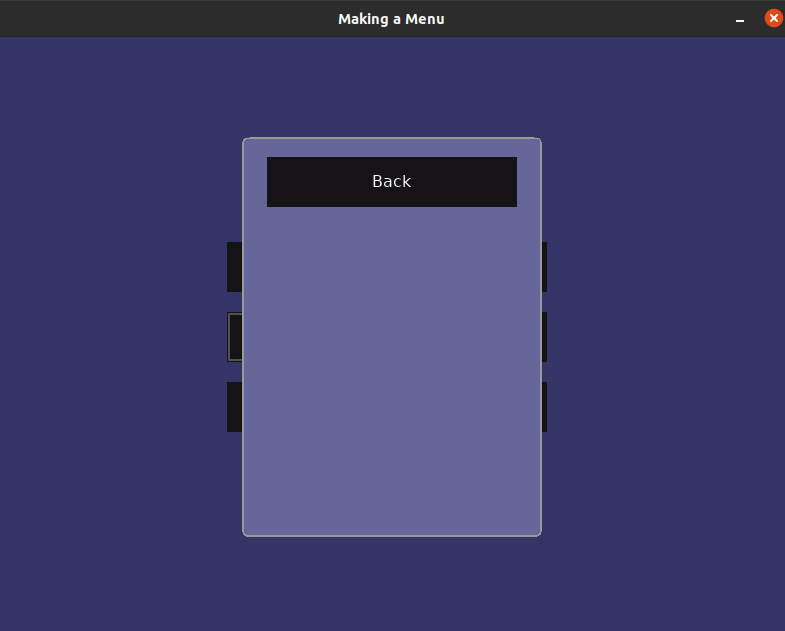
现在我们需要为音量和选项实现一个实际的菜单,因此我们必须创建一个充当窗口的类。vbl.使用 UIMouseFilterMixin 我们捕捉到为父母发生的所有事件,而不对它们做出任何反应。从而使其表现为窗口/视图。
class SubMenu(arcade.gui.UIMouseFilterMixin, arcade.gui.UIAnchorLayout):
    """Acts like a fake view/window."""

    def __init__(self, ):
        super().__init__(size_hint=(1, 1))

        # Setup frame which will act like the window.
        frame = self.add(arcade.gui.UIAnchorLayout(width=300, height=400, size_hint=None))
        frame.with_padding(all=20)

        # Add a background to the window.
        frame.with_background(texture=arcade.gui.NinePatchTexture(
            left=7,
            right=7,
            bottom=7,
            top=7,
            texture=arcade.load_texture(
                ":resources:gui_basic_assets/window/dark_blue_gray_panel.png"
            )
        ))

        back_button = arcade.gui.UIFlatButton(text="Back", width=250)
        # The type of event listener we used earlier for the button will not work here.
        back_button.on_click = self.on_click_back_button

        # Internal widget layout to handle widgets in this class.
        widget_layout = arcade.gui.UIBoxLayout(align="left", space_between=10)

        widget_layout.add(back_button)

        frame.add(child=widget_layout, anchor_x="center_x", anchor_y="top")

    def on_click_back_button(self, event):
        # Removes the widget from the manager.
        # After this the manager will respond to its events like it previously did.
        self.parent.remove(self)
我们现在得到了一个假的窗口。现在,我们将其与音量和选项按钮配对,以便在单击它们时触发它。
            arcade.exit()

        @volume_button.event("on_click")
        def on_click_volume_button(event):
            volume_menu = SubMenu()
            self.manager.add(
                volume_menu,
                layer=1
            )

        @options_button.event("on_click")
        def on_click_options_button(event):
            options_menu = SubMenu()
            self.manager.add(
                options_menu,
节目单#
MENU_04.py完整列表 ← Where we are right now
MENU_04.py差异 ← What we changed to get here
步骤5:最终确定假窗口,也称为子菜单#

我们最终敲定菜单,或者你可以称之为最后一步!
添加标题标签#
我们将添加一个 UILabel 这就解释了菜单。 UISpace 是一个可以用来在某些小工具周围添加空间的小工具,您可以将其颜色设置为背景颜色,使其看起来不可见。
        back_button = arcade.gui.UIFlatButton(text="Back", width=250)
        # The type of event listener we used earlier for the button will not work here.
        back_button.on_click = self.on_click_back_button
将其添加到小部件布局中。
        style_dict = {"press": pressed_style, "normal": default_style, "hover": default_style, "disabled": default_style}
        # Configuring the styles is optional.
        slider = arcade.gui.UISlider(value=50, width=250, style=style_dict)
添加输入字段#
我们将使用 UIInputText 若要添加输入字段,请执行以下操作。这个 with_border() 函数用颜色(默认参数为黑色)、黑色(默认参数为2px)和厚度(2px)在小部件周围创建边框。将这个添加到标题标签的正下方。
title_label = arcade.gui.UILabel(text=title, align="center", font_size=20, multiline=False)
将其添加到小部件布局中。
        style_dict = {"press": pressed_style, "normal": default_style, "hover": default_style, "disabled": default_style}
        # Configuring the styles is optional.
        slider = arcade.gui.UISlider(value=50, width=250, style=style_dict)
如果您在我们定义 input_text 变量时,我们将 text 参数与我们的 input_text_default 争论。我们基本上是在我们的子菜单中添加了这些参数,这样音量和选项按钮都可以使用,并带有关于它们名称的文本。对于那些跳过这一部分的人,我们将在最后一次重复这一点:P.
添加下拉菜单#
我们使用以下命令添加一个下拉列表 UIDropdown 。
        toggle_group = arcade.gui.UIBoxLayout(vertical=False, space_between=5)
        toggle_group.add(toggle)
将其添加到小部件布局中。
widget_layout.add(title_label)
添加滑块#
最终的小部件。在街机游戏中你可以使用 UISlider 来实现滑块。有一个设置滑块样式的功能,该功能也适用于 UIFlatButton 和 UITextureButton 。
# Create dropdown with a specified default.
将其添加到小部件布局中。
        widget_layout.add(title_label_space)
        widget_layout.add(input_text_widget)
最后的润色#
正如我们前面提到的,向类解释这些参数的用法。我们基本上使用了它们,所以选项和音量都可以使用,因为我们希望这两个选项都有不同的文本。对于那些逐行阅读了完整教程的人来说,他们永远不会知道。:D.我们还建议查看本节的完整代码。
节目单#
MENU_05.py完整列表 ← Where we are right now
MENU_05.py差异 ← What we changed to get here