小精灵#
arcade.AnimatedTimeBasedSprite#
- class arcade.AnimatedTimeBasedSprite(filename: Optional[str] = None, scale: float = 1, image_x: float = 0, image_y: float = 0, image_width: float = 0, image_height: float = 0, center_x: float = 0, center_y: float = 0, _repeat_count_x=1, _repeat_count_y=1)[源代码]#
支持动画的Platform游戏的Sprite。这些可以由平铺地图编辑器自动创建。
arcade.AnimatedWalkingSprite#
arcade.AnimationKeyframe#
- class arcade.AnimationKeyframe(tile_id: int, duration: int, texture: arcade.texture.Texture)[源代码]#
用于动画精灵。
arcade.PyMunk#
arcade.Sprite#
- class arcade.Sprite(filename: Optional[str] = None, scale: float = 1, image_x: float = 0, image_y: float = 0, image_width: float = 0, image_height: float = 0, center_x: float = 0, center_y: float = 0, repeat_count_x: int = 1, repeat_count_y: int = 1, flipped_horizontally: bool = False, flipped_vertically: bool = False, flipped_diagonally: bool = False, hit_box_algorithm: Optional[str] = 'Simple', hit_box_detail: float = 4.5, texture: Optional[arcade.texture.Texture] = None, angle: float = 0)[源代码]#
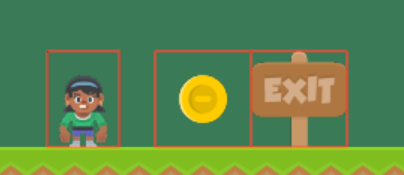
类,该类表示屏幕上的“精灵”。大多数游戏都以精灵为中心。有关如何使用此类的示例,请参阅:https://api.arcade.academy/en/latest/examples/index.html#sprites
- 参数
filename (str) -- 表示精灵的图像的文件名。
scale (float) -- 放大或缩小图像。比例为1.0表示无。
image_x (float) -- 精灵板内精灵的X偏移量。
image_y (float) -- 精灵板内精灵的Y偏移。
image_width (float) -- 精灵的宽度
image_height (float) -- 精灵的高度
center_x (float) -- 精灵的位置
center_y (float) -- 精灵的位置
flipped_horizontally (bool) -- 镜像精灵图像。沿垂直轴向左/向右翻转。
flipped_vertically (bool) -- 沿水平轴向上/向下翻转图像。
flipped_diagonally (bool) -- 转置图像,将其沿对角线翻转。
hit_box_algorithm (str) -- “无”、“无”、“简单”或“详细”之一。默认为‘Simple’。使用‘Simple’表示
PhysicsEngineSimple,PhysicsEnginePlatformer,并为PymunkPhysicsEngine。texture (Texture) -- 直接指定纹理。
angle (float) -- 精灵的初始旋转(以度为单位
这将忽略所有点击框和图像大小参数。
- 参数
hit_box_detail (float) -- 浮动,默认为4.5。与‘Detail’连用表示命中空格
- 属性:
- Alpha
精灵的透明度。0表示不可见,255表示不透明。
- 角度
以度为单位的旋转角度。精灵以逆时针方向旋转。
- 弧度
以弧度为单位的旋转角度。精灵以逆时针方向旋转。
- 底部
使用底部坐标设置/查询精灵位置。这将是精灵底部的‘y’。
- boundary_left
在运动中使用。移动子画面的左边界。
- boundary_right
在运动中使用。移动子画面的右边界。
- boundary_top
在运动中使用。移动子画面的上边界。
- boundary_bottom
在运动中使用。移动子画面的底部边界。
- center_x
精灵中心的X位置
- center_y
精灵中心的Y位置
- change_x
X方向上的移动向量。
- change_y
Y方向上的运动矢量。
- change_angle
改变旋转方向。
- 颜色
为精灵上色
- collision_radius
用作快速检查,以查看此项目是否与其他项目足够近。如果此检查有效,我们将执行更慢、更准确的检查。您可能不想使用此字段。取而代之的是,在点击框中设置点数。
- cur_texture_index
正在使用的当前纹理的索引。
- 导轨
精灵的唯一标识符。在调试时很有用。
- 高度
精灵的高度。
- 力
应用于精灵的力。与PyMunk一起用于物理时非常有用。
- hit_box
用于碰撞检测的相对于精灵中心的点。Arcade默认通过包含图像的“简单”命中框算法创建一个命中框。如果您正在创建一个坡道或制作更好的点击盒,您可以自定义设置这些。
- 左边
使用左坐标设置/查询精灵位置。这将是精灵左侧的‘x’。
- 职位
带有精灵所在位置(x,y)的列表。
- 正确的
使用正确的坐标设置/查询精灵位置。这将是精灵右侧的‘y=x’。
- sprite_lists
此精灵所属的所有精灵列表的列表。
- 织构
arcade.Texture用当前纹理初始化。设置新纹理会 not 更新精灵的命中框。这可以通过以下方式完成my_sprite.hit_box = my_sprite.texture.hit_box_points。新纹理将在当前center_x/center_y上居中。- 纹理
与此子画面关联的纹理列表。
- 塔顶
使用顶部坐标设置/查询精灵位置。这将是精灵顶部的‘y’。
- 比例尺
放大或缩小图像。比例1.0是原始大小,0.5是高度和宽度的1/2。
- 速度
X,y的变化,表示为列表。(0,0)不会移动。
- 宽度
精灵的宽度
这是很常见的超越 update 方法,并提供有关移动或其他精灵更新的机制。
- append_texture(texture: arcade.texture.Texture)[源代码]#
将新纹理附加到可应用于该精灵的纹理列表中。
- 参数
texture (arcade.Texture) -- 要添加到可用纹理列表的纹理
- collides_with_list(sprite_list: SpriteList) list[源代码]#
检查当前精灵是否与列表中的任何其他精灵重叠
- 参数
sprite_list (SpriteList) -- 要检查的SpriteList
- 返回
原始SpriteList中所有重叠的Sprite的SpriteList
- 返回类型
- collides_with_point(point: Union[Tuple[float, float], List[float]]) bool[源代码]#
检查点是否在当前精灵中。
- 参数
point (Point) -- 指向检查。
- 返回
如果点包含在精灵的边界内,则为True。
- 返回类型
- collides_with_sprite(other: arcade.sprite.Sprite) bool[源代码]#
将检查一个精灵是否与另一个精灵重叠(碰撞)。
- property collision_radius: float#
获取碰撞半径。
注解
最终碰撞检查是通过在GET_POINTS/SET_POINTS中设置的几何体完成的。这些点在check_for_collision函数中使用。此COLLECT_RADIUS变量用作“预检查”。我们使用Collision_RADIUS执行超快检查,查看精灵是否接近。如果它们是碰撞的,那么我们观察它们是否真的碰撞的几何图形和图形。
- draw(*, filter=None, pixelated=None, blend_function=None)[源代码]#
画出精灵。
- 参数
filter -- 设置OpenGL滤镜的可选参数,如 gl.GL_NEAREST 以避免平滑。
pixelated --
True对于像素化和False用于平滑内插。用于设置Filter=GL_NEAREST的快捷方式。blend_function -- 设置用于绘制精灵列表的OpenGL混合函数的可选参数,例如‘arcade.Window.ctx.BLEND_Additive’或‘arcade.Window.ctx.BLEND_DEFAULT’
- draw_hit_box(color: Union[Tuple[int, int, int], List[int], Tuple[int, int, int, int]] = (0, 0, 0), line_thickness: float = 1)[源代码]#
画一个精灵的命中盒。
‘点击框’绘图被缓存,所以如果您稍后更改颜色/线条粗细,它将不会被缓存。
- 参数
color -- 方框的颜色
line_thickness -- 盒子应该有多厚?
- face_point(point: Union[Tuple[float, float], List[float]])[源代码]#
将精灵朝向一个点。假设精灵图像朝上。
- 参数
point (Point) -- 指着面向……。
- forward(speed: float = 1.0)[源代码]#
向前调整精灵的移动向量。此方法并不实际移动精灵,只是获取当前的change_x/change_y并按给定的速度进行调整。
- 参数
speed -- 速度系数
- get_adjusted_hit_box() Sequence[Union[Tuple[float, float], List[float]]][源代码]#
获取构成精灵矩形的命中框的点,包括旋转和缩放。
- get_hit_box() Sequence[Union[Tuple[float, float], List[float]]][源代码]#
使用Hit_box属性获取或设置精灵的命中框。假设精灵的中心位于(0,0),则指定命中框。指定命中框,如:
mySprite.hit_box = [[-10, -10], [10, -10], [10, 10]]
指定未对平移、旋转或缩放进行调整的点击框。你可以通过以下方式获得调整后的点击框
arcade.Sprite.get_adjusted_hit_box。
- property pymunk: arcade.sprite.PyMunk#
获取或设置Pymunk属性对象。这是由金龟子物理引擎使用的。
- register_physics_engine(physics_engine)[源代码]#
在精灵上注册一个物理引擎。只有当您实际上需要引用精灵本身中的物理引擎时,才需要这样做。它没有其他目的。
注册的物理引擎可以通过
physics_engines属性。例如,它可以是金龟子的物理引擎,也可以是您定制的引擎。
- register_sprite_list(new_list: SpriteList)[源代码]#
将此子画面注册为属于列表。当调用Kill()时,我们将自动从列表中删除自己。
- rescale_relative_to_point(point: Union[Tuple[float, float], List[float]], factor: float) None[源代码]#
相对于不同于其中心的点重新缩放精灵。
- reverse(speed: float = 1.0)[源代码]#
向后调整精灵的移动向量。此方法并不实际移动精灵,只是获取当前的change_x/change_y并按给定的速度进行调整。
- 参数
speed -- 速度系数
- set_hit_box(points: Sequence[Union[Tuple[float, float], List[float]]])[源代码]#
设置一个精灵的命中盒。点击框应该相对于精灵的中心,并且比例应为1.0。将使用GET_ADJUST_HIT_BOX缩放点。
- strafe(speed: float = 1.0)[源代码]#
横向调整精灵的移动向量。此方法并不实际移动精灵,只是获取当前的change_x/change_y并按给定的速度进行调整。
- 参数
speed -- 速度系数
- update_animation(delta_time: float = 0.016666666666666666)[源代码]#
覆盖此选项以添加将更改显示的图像的代码,以便可以为精灵设置动画。
- 参数
delta_time (float) -- 自上次更新以来的时间。
arcade.SpriteCircle#
arcade.SpriteSolidColor#
arcade.get_distance_between_sprites#
- arcade.get_distance_between_sprites(sprite1: arcade.sprite.Sprite, sprite2: arcade.sprite.Sprite) float[源代码]#
返回两个给定子画面中心之间的距离


