使用形状文件遮罩栅格
使用 rasterio 具有 fiona ,打开形状文件、读取几何图形和屏蔽在形状文件中定义的多边形之外的栅格区域很简单。
import fiona
import rasterio
import rasterio.mask

with fiona.open("tests/data/box.shp", "r") as shapefile:
    shapes = [feature["geometry"] for feature in shapefile]
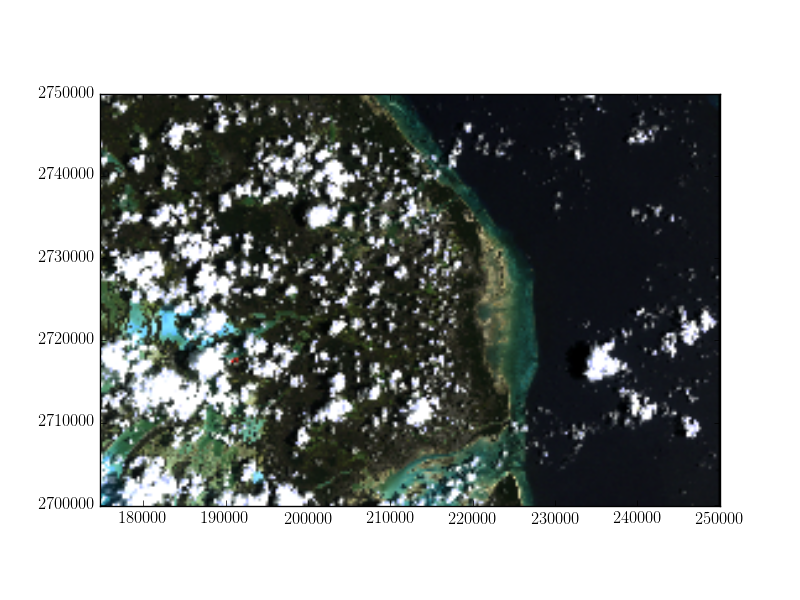
这个形状文件包含一个多边形,一个靠近栅格中心的框,因此在本例中,我们的功能列表是一个元素长。
with rasterio.open("tests/data/RGB.byte.tif") as src:
    out_image, out_transform = rasterio.mask.mask(src, shapes, crop=True)
    out_meta = src.meta
使用 plot 和 imshow 从 matplotlib ,我们可以看到由原始栅格上覆盖的红色形状文件定义的区域。
将形状文件中的特征作为栅格上的遮罩应用,会将特征之外的所有像素设置为零。自从 crop=True 在本例中,栅格的范围也设置为形状文件中特征的范围。然后,我们可以使用更新的空间转换和栅格高度和宽度将遮罩栅格写入新文件。
out_meta.update({"driver": "GTiff",
                 "height": out_image.shape[1],
                 "width": out_image.shape[2],
                 "transform": out_transform})

with rasterio.open("RGB.byte.masked.tif", "w", **out_meta) as dest:
    dest.write(out_image)