工作坊
研讨会文档演示了几个示例,说明如何利用GeoNode-Project来根据您的业务扩展/定制GeoNode的功能。涵盖的主题包括以下内容:
1-使用geonode-project自定义GeoNode
2-自定义外观
3-创建您的ResourceBase元数据
4-创建您自己的Django应用程序
5-添加自定义模型
6-权限和接口
7-部署地理节点
1-使用geonode-project自定义GeoNode
在本例中,克隆GeoNode-Project以创建一个模板实例,示例中的睡觉将在该实例上构建。
1-假设您已经安装了GeoNode-Core,首先我们需要创建一个GeoNode-Project模板,这可以通过以下命令实现:
$ django-admin.py startproject my_geonode --template=https://github.com/GeoNode/geonode-project/archive/master.zip -e py,rst,json,yml,ini,env,sample -n Dockerfile
这里,django-admin与startproject选项一起使用来创建my_geonode项目,复制作为GeoNode-project Github repo传递的模板。它还包括“py、rst、json、yml、ini、env、sample”扩展名
2-克隆完成后,下一步是安装我们刚刚下载的GeoNode-Project,如下所示:
$ pip install -e my_geonode
3-使用摊铺机安装Geoserver,如下所示
$ cd /home/geonode/my_geonode
$ paver setup
4-注意local_settings.py配置文件中提到的GeoNode数据库连接参数。如果未找到,请复制local_settings.py.sample并将其重命名为local_settings.py,然后使用psql创建所需的用户并授予所需的权限,如下所示:
$ su postgres
$ createdb geonode
$ psql
    postgres=# CREATE USER geonode WITH PASSWORD 'geonode';
    CREATE ROLE
    postgres=# GRANT ALL PRIVILEGES ON DATABASE "geonode" to geonode;
    GRANT
    postgres=# \q
警告
在执行以下命令之前,不要忘记退出postgres用户
5-使用铺路器运行GeoNode
$ cd /home/geonode/my_geonode
$ paver start
注解
您可能会看到此警告消息:您有132个未应用的迁移。在您应用以下应用程序的迁移之前,您的项目可能无法正常工作:帐户、actistream、admin、agon_rating、公告、auth、头像、base、内容类型、Dialogos、文档、收藏夹、geonode_client、geonode_hemes、组、监护人、邀请、图层、地图、mapstore2_Adapter、监控、OAuth2_Provider、People、pinax_Notification、服务、会话、站点、社交帐户、标签、品味、上传运行‘python manage.py Migrate’来应用它们。
这意味着您有一些SQL语句尚未执行,您需要先运行“Migrate”来同步您的数据库,然后再运行“paver start”,如下所示:
$ python manage.py migrate
$ paver start
警告
如果遇到此消息,请执行以下操作: (Invalid HTTP_HOST header: '0.0.0.0:8000'. You may need to add u'0.0.0.0' to ALLOWED_HOSTS) 它可以在settings.py文件中修复。您需要添加: ALLOWED_HOSTS = ['0.0.0.0'] 在settings.py中
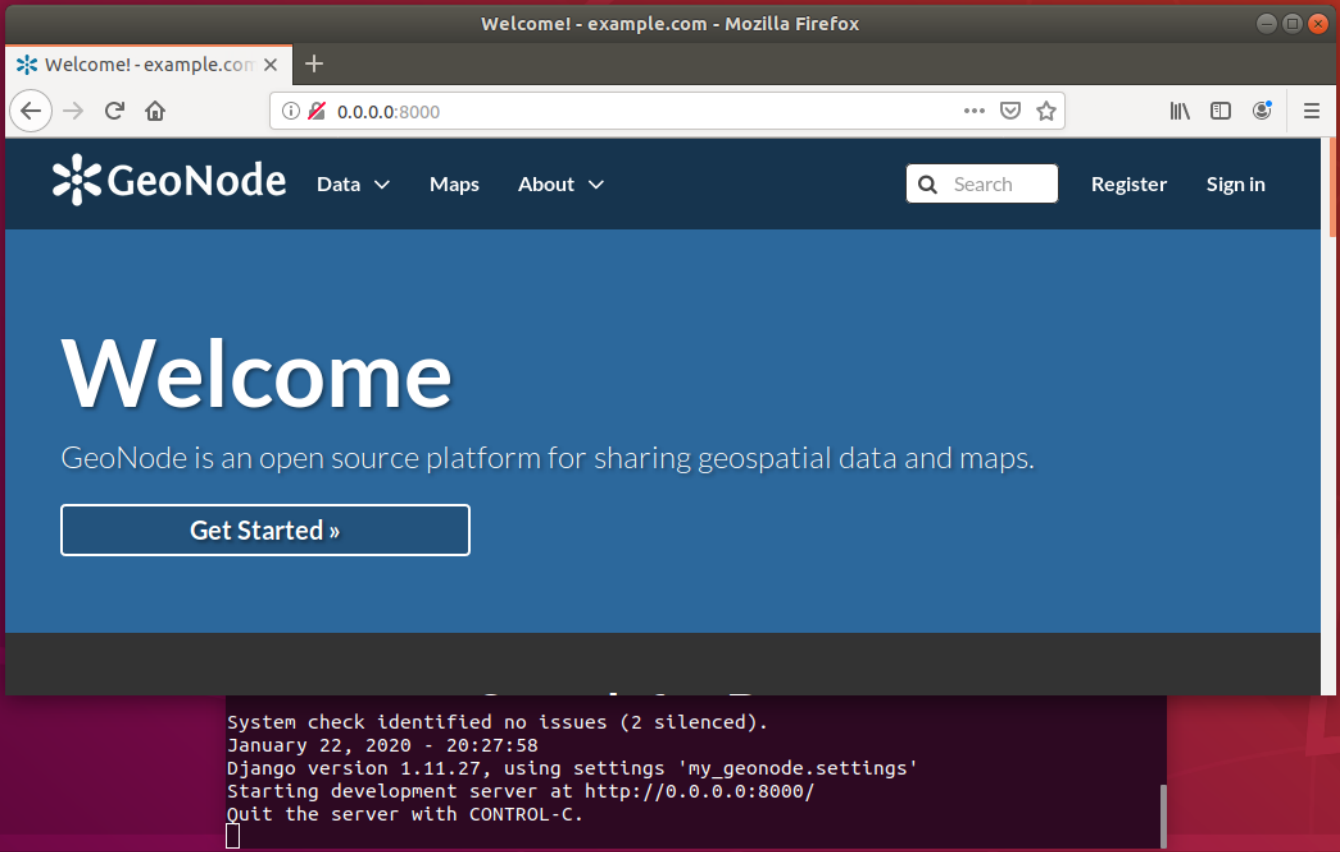
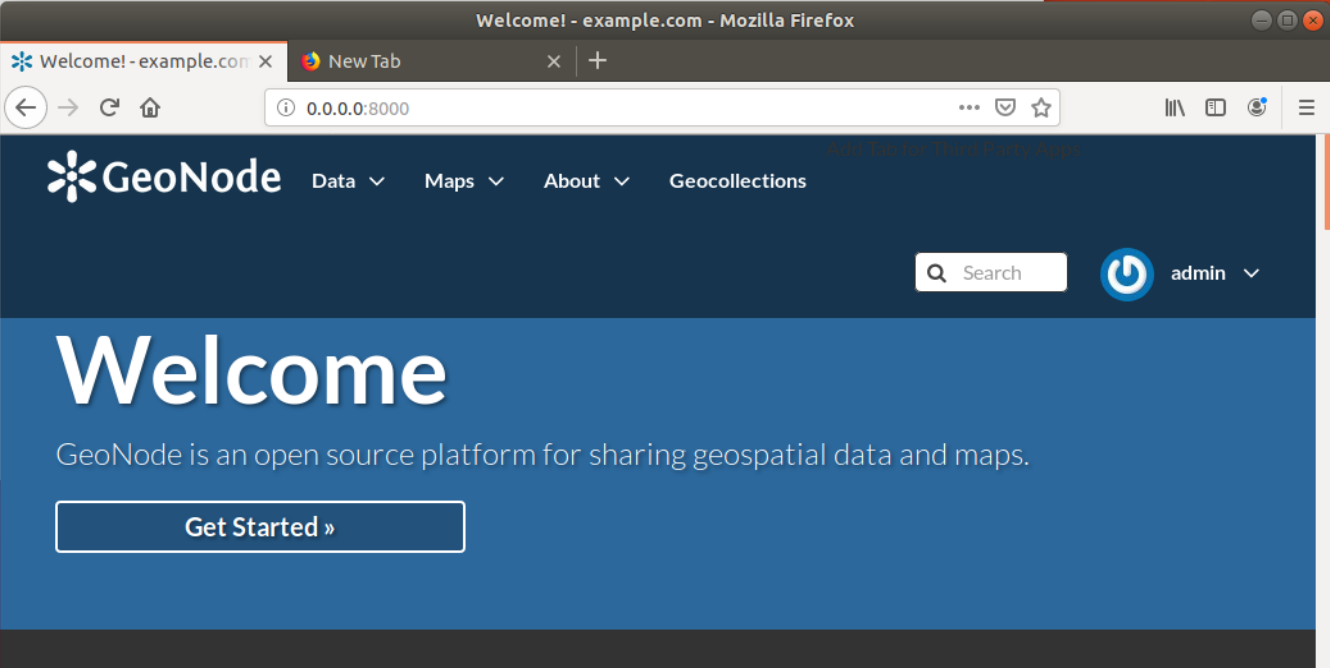
6-完成上一步操作后,可以访问0.0.0.0:8000查看GeoNode的GUI。但是,我们仍然没有从GUI登录的帐户。这可以使用“摊铺机同步”来完成。该命令将创建与最新装置的同步,并使用默认密码“admin”创建超级用户“admin”
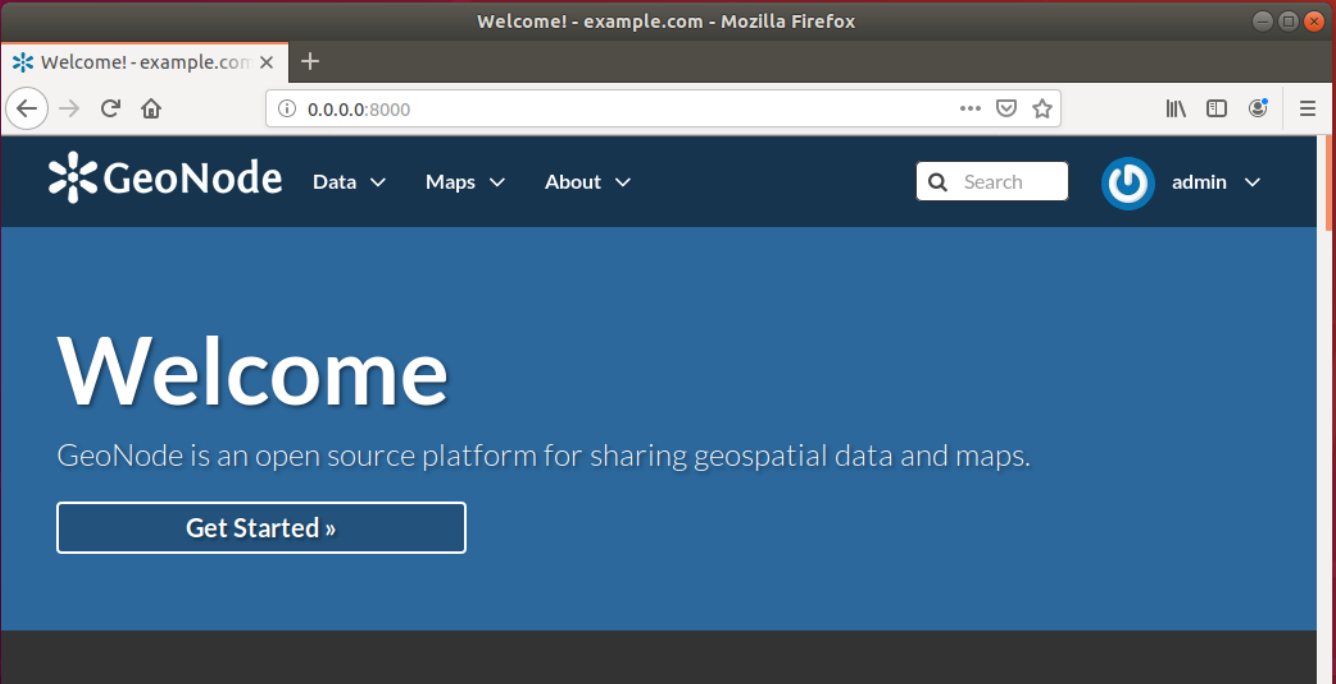
7-使用创建的帐户通过localhost:8000或0.0.0.0:8000从GUI登录
2-自定义外观
在本节中,我们将更改GeoNode的外观,特别是我们将进行一些自定义,以帮助理解模板继承是如何工作的,以及如何向GeoNode添加新内容。这些更改将包括主页、顶部菜单、页脚和通用GeoNode页面。
主页:
geonode-project提供了一些预定义的模板来更改主页和一般站点内容。
在“my_geonode/my_geonode/plates”目录中,我们可以编辑site_index.html。
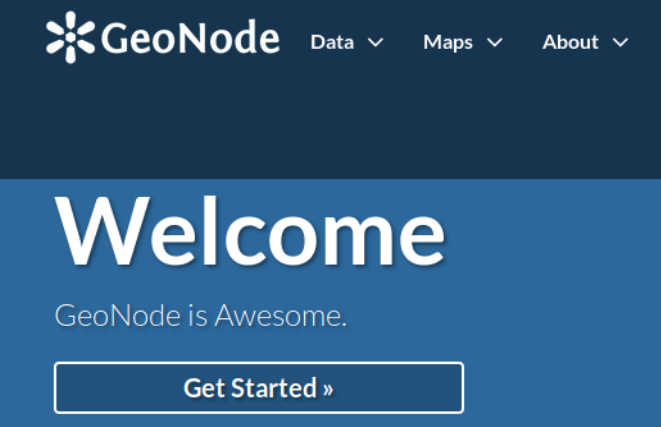
尝试编辑页面中“Jumbotron”框的内容,保存并刷新浏览器以查看更改。
主题:
要更改geonode项目的主题,我们可以操作“my_geonode/my_geonode/静电/css”文件夹中的sitebase.css文件。
该文件为空,因此我们可以使用浏览器的开发人员工具检查主页的元素,并在其中定义CSS规则。
例如,如果我们想要更改巨型加速器的背景,可以在此文件中添加
.home .jumbotron { background: red }
然后,一旦我们刷新了浏览器,我们应该会看到如下所示的更改:
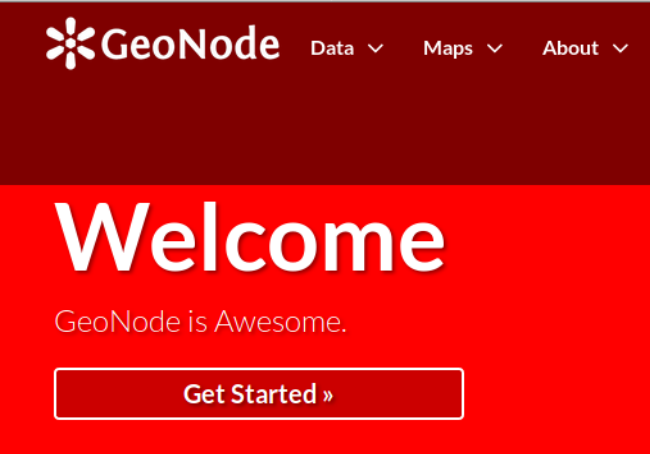
添加 ".home" 类是必需的,以便使规则优先于GeoNode的规则。我们可以通过查看开发者控制台中的元素来看到这一点。
顶部菜单:
现在我们可以进行一些更改,这些更改将应用于整个站点。我们可以在顶部菜单栏中添加地理集合条目。
编辑Templates文件夹中的site_base.html文件,并从以下位置取消注释调整文本的列表项:
{% comment %}
Add Tab for Third Party Apps
<li>
 <a href="{{ PROJECT_ROOT }}app">App</a>
</li>
{% endcomment %}
收件人:
<li>
 <a href="{{ PROJECT_ROOT }}/geocollections">Geocollections</a>
</li>
在浏览器刷新时,您将在导航栏中看到一个新条目,该条目对整个站点都是持久的。
GeoNode常规页面
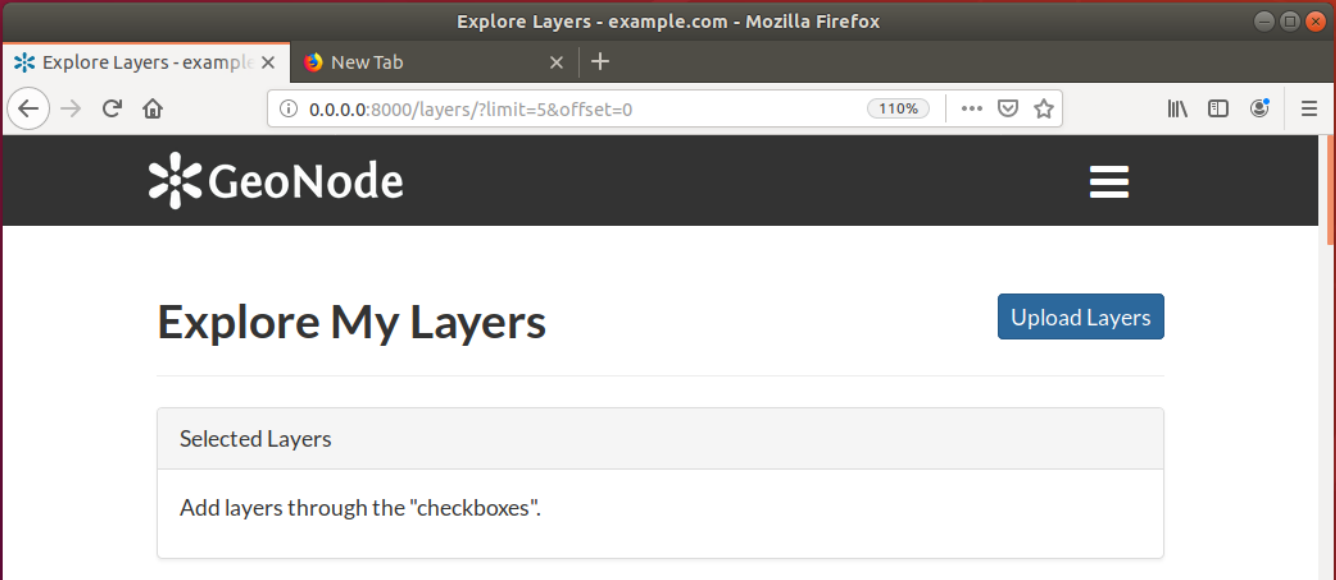
正如您在Templates文件夹中看到的,只有site_index.html和site_base.html文件。为了自定义另一个GeoNode页面(例如,Layers List页面),您需要重新创建GeoNode Templates文件夹的相同文件夹结构,并添加同名文件。
对于Layers列表页面,我们可以在模板目录中创建名为“Layers”的目录,在Layers中创建名为“layer_list.html”的文件。在此文件中所做的更改只会影响图层列表页面。
mkdir -p my_geonode/templates/layers/

cp geonode/geonode/layers/templates/layers/layer_list.html  my_geonode/templates/layers/layer_list.html

vim my_geonode/templates/layers/layer_list.html
例如,将页面标题更改为:
<h2 class="page-title">{% trans "Explore My Layers" %}</h2>
然后刷新浏览器以查看更新。
修改功能
在本节中,我们将修补GeoNode的ResourceBase并更新模板,以便向元数据架构中再添加一个字段。
我们将向ResourceBase模型添加DOI字段并修改模板,以便在元数据向导和层详细信息页面中显示新字段。
注解
确保位于“my_geonode”目录中以执行以下命令
元数据的定制可以从核心“geonode/geonode/base/model s.py”中定义的模型来实现,如下所示:
# internal fields
uuid = models.CharField(max_length=36)
owner = models.ForeignKey(
    settings.AUTH_USER_MODEL,
    blank=True,
    null=True,
    related_name='owned_resource',
    verbose_name=_("Owner"))
contacts = models.ManyToManyField(
    settings.AUTH_USER_MODEL,
    through='ContactRole')
title = models.CharField(_('title'), max_length=255, help_text=_(
    'name by which the cited resource is known'))
alternate = models.CharField(max_length=128, null=True, blank=True)
date = models.DateTimeField(
    _('date'),
    default=now,
    help_text=date_help_text)
date_type = models.CharField(
    _('date type'),
    max_length=255,
    choices=VALID_DATE_TYPES,
    default='publication',
    help_text=date_type_help_text)
edition = models.CharField(
    _('edition'),
    max_length=255,
    blank=True,
    null=True,
    help_text=edition_help_text)
abstract = models.TextField(
    _('abstract'),
    max_length=2000,
    blank=True,
    help_text=abstract_help_text)
purpose = models.TextField(
    _('purpose'),
    max_length=500,
    null=True,
    blank=True,
    help_text=purpose_help_text)
maintenance_frequency = models.CharField(
    _('maintenance frequency'),
    max_length=255,
    choices=UPDATE_FREQUENCIES,
    blank=True,
    null=True,
    help_text=maintenance_frequency_help_text)
要直接向ResourceBase类添加字段而不实际修改它,可以通过“my_geonode/my_geonode/apps.py”文件完成
“Ready”方法在初始化时调用,当前可用于以多种方式调整您的应用程序
class AppConfig(BaseAppConfig):

    name = "my_geonode"
    label = "my_geonode"

    def ready(self):
        super(AppConfig, self).ready()
        run_setup_hooks()
现在我们将“patch_resource_base”方法添加到AppConfig中,并从Ready方法执行,如下所示:
from django.db import models
from django.utils.translation import ugettext_lazy as _


class AppConfig(BaseAppConfig):

    name = "my_geonode"
    label = "my_geonode"

    def _get_logger(self):
        import logging
        return logging.getLogger(self.__class__.__module__)

    def patch_resource_base(self, cls):
        self._get_logger().info("Patching Resource Base")
        doi_help_text = _('a DOI will be added by Admin before publication.')
        doi = models.TextField(
            _('DOI'),
            blank=True,
            null=True,
            help_text=doi_help_text)
        cls.add_to_class('doi', doi)

    def ready(self):
        super(AppConfig, self).ready()
        run_setup_hooks()

        from geonode.base.models import ResourceBase
        self.patch_resource_base(ResourceBase)
注解
您需要执行如下迁移:-将字段DOI添加到资源库
运行python manage.py迁移后:
Running migrations:
Applying announcements.0002_auto_20200119_1257... OK
Applying base.0031_resourcebase_doi... OK
Applying people.0027_auto_20200119_1257... OK
到目前为止,我们已经修补了数据库。但是,这还不够,因为我们仍然需要显示添加的字段。
让我们扩展默认模板,以便可以显示新添加的字段
覆盖“元数据向导模板”页
与我们之前在Templates目录中所做的类似,我们将需要在“my_geonode/my_geonode/plates”下创建“layout”目录。此目录将包含来自“geonode/src/geonode/geonode/layers/templates/layouts/panels.html”的副本,如下所示:
$ mkdir -p my_geonode/templates/layouts
$ cp ~/geonode/src/geonode/geonode/layers/templates/layouts/panels.html  my_geonode/templates/layouts/panels.html
$ vim my_geonode/templates/layouts/panels.html
在panels.html中,我们将添加一个带有文本输入的新div,如下所示:
{{ layer_form.data_quality_statement }}
 </div>
      <div>
          <span><label for="{{ layer_form.doi|id }}">{{ layer_form.doi.label }}</label></span>
          <input id="id_resource-doi" name="resource-doi"
                type="text"
                class="has-external-popover"
                data-container="body"
                data-content="a DOI will be added by Admin before publication." data-html="true" data-placement="right"
                placeholder="a DOI will be added by Admin before publication."
                value="{{ layer_form.doi.value }}">
      </div>
 </div>
此外,我们将覆盖图层详细信息模板页面,如下所示:
mkdir -p my_geonode/templates/base

cp /home/geo/Envs/geonode/src/geonode/geonode/base/templates/base/_resourcebase_info_panel.html my_geonode/templates/base/

vim my_geonode/templates/base/_resourcebase_info_panel.html
<dd><a href="/groups/group/{{ resource.group.name }}/activity/">{{ group }}</a> </dd>

<dt>DOI</dt>
 <dd>{{ resource.doi }}</dd>

</dl>
现在,从图层详细信息页面,您可以看到每个图层的DOI元数据条目

3-创建您自己的Django应用程序
在本节中,我们将演示如何使用Django工具创建和设置自定义应用程序的框架。该应用程序将为我们的GeoNode添加地理收集功能。
Geocolltions应用程序允许在单个页面中显示按GeoNode组分组的资源和用户。我们可以将任意资源分配给地理集合、组和名称,这些资源也将用于构建专用URL。
注解
确保位于“my_geonode”目录中以执行以下命令
创建Django应用程序
Django为我们提供了创建应用程序的便捷命令。我们已经使用startproject创建了geonode-project,现在我们可以使用StartApp创建应用程序了。
Python manage.py StartApp地理集合
这将创建一个名为geocolltions的文件夹,其中包含空模型和视图。
我们需要将新应用程序添加到项目的installed_apps中。在“my_geonode/settings.py”第54行中更改:
INSTALLED_APPS += (PROJECT_NAME,) to be: INSTALLED_APPS += (PROJECT_NAME, 'geocollections',)
添加自定义模型
在本节中,我们将添加一个自定义模型和相关逻辑,如下所示:
添加新模型
添加URL和视图
添加管理面板
添加模板
vim geocollections/models.py
from django.db import models

from geonode.base.models import ResourceBase
from geonode.groups.models import GroupProfile


class Geocollection(models.Model):
    """
    A collection is a set of resources linked to a GeoNode group
    """
    group = models.ForeignKey(GroupProfile, related_name='group_collections')
    resources = models.ManyToManyField(ResourceBase, related_name='resource_collections')
    name = models.CharField(max_length=128, unique=True)
    slug = models.SlugField(max_length=128, unique=True)

    def __unicode__(self):
        return self.name
此时,我们需要要求Django创建数据库表。Django从1.8版开始就嵌入了迁移机制,我们需要使用它们来更改数据库的状态。
注解
确保位于“my_geonode”目录中以执行以下命令
python manage.py makemigrations

# the above command informs you with the migrations to be executed on the database

python manage.py migrate
接下来,我们将使用Django通用视图来显示集合的详细信息。在views.py文件中添加以下代码:
vim geocollections/views.py
from django.views.generic import DetailView

from .models import Geocollection

class GeocollectionDetail(DetailView):
    model = Geocollection
添加URL配置
为了访问创建的视图,我们还需要URL映射。我们可以创建一个urls.py文件,其中包含到我们的通用视图的url映射:
vim geocollections/urls.py
from django.conf.urls import url

from .views import GeocollectionDetail

urlpatterns = [
    url(r'^(?P<slug>[-\w]+)/$',
        GeocollectionDetail.as_view(),
        name='geocollection-detail'),
]
我们还需要在项目URL中注册应用程序URL。因此,让我们修改“my_geonode”urls.py文件,添加以下内容:
vim my_geonode/urls.py
...
urlpatterns += [
## include your urls here
    url(r'^geocollections/', include('geocollections.urls')),
]
...
启用管理面板
我们需要一个可以创建地理集合的用户界面。Django使这变得非常简单,我们只需要admin.py文件,如下所示:
vim geocollections/admin.py
from django.contrib import admin

from .models import Geocollection


class GeocollectionAdmin(admin.ModelAdmin):
    prepopulated_fields = {"slug": ("name",)}
    filter_horizontal = ('resources',)

admin.site.register(Geocollection, GeocollectionAdmin)
现在,我们可以访问管理页面并从那里创建地理集合,如下所示:
添加模板
现在,我们需要在其中渲染地理收集详细信息的模板。让我们在“my_geonode/plates”目录中创建一个geocolltions目录,其中包含一个名为geocolltion_Detail.html的文件:
mkdir -p my_geonode/templates/geocollections/

vim my_geonode/templates/geocollections/geocollection_detail.html
{% extends "geonode_base.html" %}
{% block body %}
    <h2>Geocollection {{ object.name }}</h2>
    <p>Group: {{ object.group.title }}</p>
    <p>Resources:</p>
    <ul>
        {% for resource in object.resources.all %}
            <li>{{ resource.title }}</li>
        {% endfor %}
    </ul>
{% endblock %}
要检查结果,请在geonode UI界面中创建一个组,然后加载一个或多个图层/文档
登录到管理面板->地理集合并创建地理集合
请访问http://localhost:8000/geocollections/<the-name-of-the-created-geocollection>并查看结果。

现在您了解了如何自定义html模板,以便可以根据您的喜好调整此页面。
权限和API
在本节中,我们将添加一些更高级的逻辑,如权限和API。GeoNode中的权限通过Django-Guardian进行管理,Django-Guardian是一个允许设置对象级权限的库(Django具有表级授权)。
这些API是通过django-taatypie实现的。
将涵盖的主题包括:
关于可以查看地理集合的人员的权限
如何添加模板化和js以在我们的地理收集详细信息页面中嵌入权限UI
为JSON序列化可搜索端点提供服务的API
权限逻辑(权限对象)
我们需要将权限对象添加到数据库。我们可以通过将下面的元类添加到Geocolect模型来做到这一点,Guardian将为我们创建对象。
vim geocollections/models.py
class Meta:
    permissions = (
        ('view_geocollection', 'Can view geocollection'),
    )
然后运行“python manage.py makemigations”和“python manage.py Migrate”来安装它们
Permissions logic (set_default)
让我们添加一个方法,该方法将用于设置地理集合的默认权限。我们可以将此逻辑添加到Geocollect模型中,但也可以是类似于它在GeoNode中实现方式的通用混合。
vim geocollections/models.py
from django.contrib.auth.models import Group
from django.contrib.auth import get_user_model
from django.contrib.contenttypes.models import ContentType
from django.conf import settings
from guardian.shortcuts import assign_perm

def set_default_permissions(self):
        """
        Set default permissions.
        """

        self.remove_object_permissions()

        # default permissions for anonymous users
        anonymous_group, created = Group.objects.get_or_create(name='anonymous')

        if settings.DEFAULT_ANONYMOUS_VIEW_PERMISSION:
            assign_perm('view_geocollection', anonymous_group, self)

        # default permissions for group members
        assign_perm('view_geocollection', self.group, self)
权限逻辑(方法)
现在我们需要一种添加一般权限的方法,我们希望能够将查看权限分配给组和单个用户。我们可以将此添加到我们的地理收集模型中
vim geocollections/models.py
def set_permissions(self, perm_spec):
    anonymous_group = Group.objects.get(name='anonymous')
    self.remove_object_permissions()
    if 'users' in perm_spec and "AnonymousUser" in perm_spec['users']:
        assign_perm('view_geocollection', anonymous_group, self)
    if 'users' in perm_spec:
        for user, perms in perm_spec['users'].items():
            user = get_user_model().objects.get(username=user)
            assign_perm('view_geocollection', user, self)
    if 'groups' in perm_spec:
        for group, perms in perm_spec['groups'].items():
            group = Group.objects.get(name=group)
            assign_perm('view_geocollection', group, self)
def remove_object_permissions(self):
    from guardian.models import UserObjectPermission, GroupObjectPermission
    UserObjectPermission.objects.filter(content_type=ContentType.objects.get_for_model(self),
                                        object_pk=self.id).delete()
    GroupObjectPermission.objects.filter(content_type=ContentType.objects.get_for_model(self),
                                         object_pk=self.id).delete()
权限逻辑(views.py)
我们现在可以在views.py中添加一个视图来接收和设置我们的权限:
vim geocollections/views.py
import json
from django.core.exceptions import PermissionDenied
from django.http import HttpResponse
from django.contrib.auth import get_user_model
User = get_user_model()
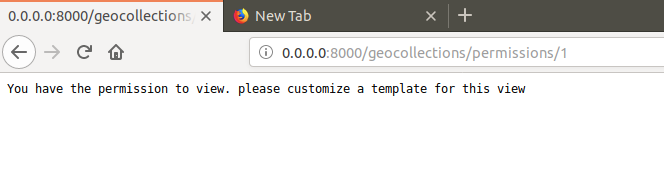
def geocollection_permissions(request, collection_id):
collection = Geocollection.objects.get(id=collection_id)
user = User.objects.get(id=request.user.id)
if user.has_perm('view_geocollection', collection):
return HttpResponse(
'You have the permission to view. please customize a template for this view'',
content_type='text/plain')
if request.method == 'POST':
success = True
message = "Permissions successfully updated!"
try:
permission_spec = json.loads(request.body)
collection.set_permissions(permission_spec)
return HttpResponse(
json.dumps({'success': success, 'message': message}),
status=200,
content_type='text/plain'
)
except:
success = False
message = "Error updating permissions :("
return HttpResponse(
json.dumps({'success': success, 'message': message}),
status=500,
content_type='text/plain'
)
权限逻辑(Url)
最后,我们需要一个url来将客户端映射到urls.py中的视图。
vim geocollections/urls.py
from django.conf.urls import url

from .views import GeocollectionDetail, geocollection_permissions

urlpatterns = [
    url(r'^(?P<slug>[-\w]+)/$',
        GeocollectionDetail.as_view(),
        name='geocollection-detail'),

    url(r'^permissions/(?P<collection_id>\d+)$',
        geocollection_permissions,
        name='geocollection_permissions'),
]
将使用地理集合的ID调用此URL,该ID将传递给视图以获取权限。
警告
关于客户端部分需要注意的一点是,服务器端逻辑只是实现权限所必需的一个部分。
一份必要事项的核对表:
可以嵌入geocollect_Detail.html中的模板片段,您可以复制和简化:_permission_form.html和_permissions.html(在geonode/plates中)
一个javascript文件,它将收集权限设置并将其发送到服务器,您可以复制并简化:_permission_form_js.html(在geonode/plates中)
API
GeoNode API系统允许轻松插入新的API。本节演示所需的步骤:
我们首先需要在地理收集应用程序中创建一个api.py文件。
vim geocollections/api.py
import json
from tastypie.resources import ModelResource
from tastypie import fields
from tastypie.constants import ALL_WITH_RELATIONS, ALL

from geonode.api.api import ProfileResource, GroupResource
from geonode.api.resourcebase_api import ResourceBaseResource

from .models import Geocollection
class GeocollectionResource(ModelResource):

    users = fields.ToManyField(ProfileResource, attribute=lambda bundle: bundle.obj.group.group.user_set.all(), full=True)
    group = fields.ToOneField(GroupResource, 'group', full=True)
    resources = fields.ToManyField(ResourceBaseResource, 'resources', full=True)

    class Meta:
        queryset = Geocollection.objects.all().order_by('-group')
        ordering = ['group']
        allowed_methods = ['get']
        resource_name = 'geocollections'
        filtering = {
            'group': ALL_WITH_RELATIONS,
            'id': ALL
        }
API授权
我们希望API尊重我们的自定义权限,只需在api.py的开头添加以下内容即可轻松实现:
vim geocollections/api.py
from tastypie.authorization import DjangoAuthorization
from guardian.shortcuts import get_objects_for_user

class GeocollectionAuth(DjangoAuthorization):

    def read_list(self, object_list, bundle):
        permitted_ids = get_objects_for_user(
            bundle.request.user,
            'geocollections.view_geocollection').values('id')

        return object_list.filter(id__in=permitted_ids)

    def read_detail(self, object_list, bundle):
        return bundle.request.user.has_perm(
            'view_geocollection',
            bundle.obj)
下面是GeocollectionResource元类:
authorization = GeocollectionAuth()
为我们的API添加URL
为了发布我们的API,我们需要一个url,我们希望该url出现在GeoNode的/API域下。
我们API的最终url必须是/api/geocolltions。
我们可以通过在“my_geonode/urls.py”文件中添加以下行,将url注入GeoNode API:
vim my_geonode/urls.py
from geonode.api.urls import api

from geocollections.api import GeocollectionResource

api.register(GeocollectionResource())
并在urlpattern中添加以下内容:
url(r'', include(api.urls)),
最终结果将是:
from django.conf.urls import url, include
from django.views.generic import TemplateView

from geonode.urls import urlpatterns

from geonode.api.urls import api
from geocollections.api import GeocollectionResource

api.register(GeocollectionResource())

urlpatterns += [
## include your urls here
url(r'', include(api.urls)),
url(r'^geocollections/', include('geocollections.urls')),
]
让我们测试一下API的权限
我们可以通过在命令行手动设置权限来测试API上的权限,并检查API是否尊重它。
使用跑步 python manage.py shell 从我们的“my_geonode”文件夹中,它打开一个geonode shell。
烫发规格可能如下所示:
perms = {
'users': {
'AnonymousUser': ['view_geocollection'],
'alessio': ['view_geocollection']}
}
我们可以通过以下方式分配权限:
from geocollections.models import Geocollection

Geocollection.objects.first().set_permissions(perms)
我们的http://localhost:8000/api/geocollections现在应该列出地理集合。
如果您从权限中删除“匿名用户”行,并重新分配权限,它将消失。
perms = {
'users': {
'alessio': ['view_geocollection']
}
部署地理节点
到目前为止,我们演示了如何在dev模式下修改、扩展和样式化GeoNode,但现在可以开始生产了。在本节中,我们将阐明如何执行以下操作:
提交您在GitHub上的工作
设置您的服务器
设置您的GeoNode以进行生产
Push to GitHub将您的代码保存在远程存储库中总是一个很好的做法,GithHub是其中一个选项,也是使用最多的。
假设您已经有了一个GitHub帐户,并且已经安装了Git并使用您的姓名和电子邮件进行了配置。
我们将只将my_geonode文件夹推送到GitHub,正如我们之前所知,GeoNode对我们来说是一个依赖项,我们只需重新安装它,就像它在服务器上一样。
将代码推送到GitHub的步骤:
在GitHub中创建一个空存储库并复制其地址
在my_geonode中,运行git init以初始化空存储库
使用添加您的远程存储库地址
git remote add yourname yourremoteaddress编辑.gitignore添加所有*.pyc文件
git add *要添加my_geonode的所有内容,请执行以下操作git commit -m 'initial import'要进行初始提交,请执行以下操作git push yourname master要将代码推送到GitHub存储库,请执行以下操作
设置服务器
在服务器上部署GeoNode项目有多种选择。在本节中,我们将解释如何使用系统范围的安装将其部署在Ubuntu服务器18.04上
注解
要快速安装,请按照http://docs.geonode.org/en/master/install/core/index.html上的安装文档操作
Setup our my_geonode
我们现在需要按照以下步骤安装开发的“my_geonode”项目:
从您的存储库(在您喜欢的文件夹中)克隆Git
sudo pip install -e my_geonode根据需要编辑设置
编辑
/etc/apache2/sites-enabled/geonode.conf将WSGI路径替换为my_geonode/my_geonode/wsgi.py文件使用如下目录将Apache权限添加到“my_geonode”文件夹
<Directory "/path/to/my_geonode/">
  Order allow,deny
  Require all granted
</Directory>
测试您的服务器。