
以 Python 制作附加元件 (QGIS3)
增进 QGIS 功能的最佳方法,就是使用附加元件。你也可以使用 Python 来写一个,从只有一个按钮到复杂的功能面板,都可任君挑选。本教学会介绍设计附加元件的大致流程,包括设置开发环境、打造使用者介面,以及撰写程式码与 QGIS 互动。有关较为基础的部分,请参阅 Python 程式设计入门 (QGIS3) 。
注解
如果您正在构建一个新插件,我强烈建议您构建一个处理插件,而不是本教程中描述的GUI插件。有关详细信息,请参见 构建处理插件(QGIS3) 。
内容说明
我们要开发一个简单的附加元件,名为 Save Attributes,它可以让使用者任意挑选一个向量图层,把它的属性另存为 CSV 档。
取得工具
Qt 创作者
Qt 是一套软体开发框架,用于设计在 Windows、Mac、Linux 或是其他行动作业系统上执行的软体。QGIS 本身就是用 Qt 框架打造的,所以我们在这里要使用一个称为 Qt Creator 的程式来设计我们附加元件的介面。
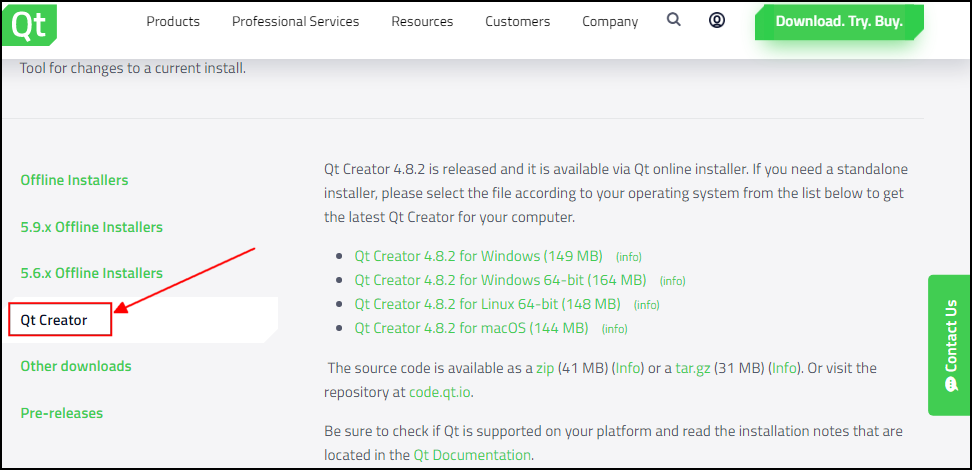
从 Qt离线安装程序 。下载并安装 Qt Creator 安装程序。确保在下载页面上选择 Qt Creator。 请注意,您将必须创建一个免费的Qt帐户来安装该软件包。
注解
Windows上用于QGIS的OSGeo4w安装程序包括 Qt Designer 程序的副本,该程序是 Qt Creator 的轻量级版本,非常适合构建插件。您可以跳过Qt Creator的下载,而从C:\ OSGeo4W64 \ bin \ qgis-designer中使用它。
Qt 的 Python Bindings
由于我们要使用 Python 来设计附加元件,因此得安装 Qt 的 Python 捆绑,以便在 Python 中可以轻松使用 Qt 的功能。安装它们的方法将取决于您使用的平台。对于构建插件,我们需要 pyrcc5 命令行工具。
Windows
Windows上的QGIS安装中包含相关的python 捆绑。但是要从plugin文件夹中使用它们,我们需要指出QGIS安装的路径。
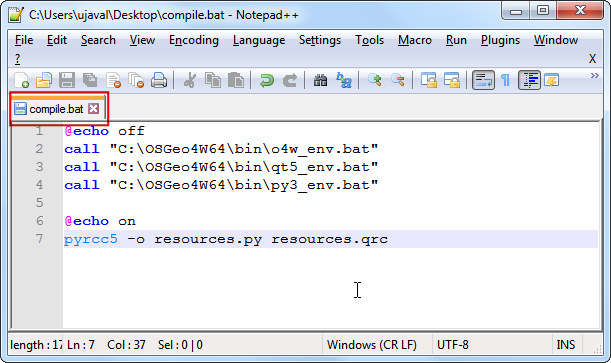
创建具有以下内容的Windows批处理文件(扩展名为.bat),并将其保存为计算机上的 compile.bat 。稍后我们将把该文件复制到plugin文件夹。如果您在其他路径下安装了QGIS,则将 C:\ OSGeo4W64 \ bin \ 替换为您的路径。
@echo off
call "C:\OSGeo4W64\bin\o4w_env.bat"
call "C:\OSGeo4W64\bin\qt5_env.bat"
call "C:\OSGeo4W64\bin\py3_env.bat"

@echo on
pyrcc5 -o resources.py resources.qrc
Mac
安装 Homebrew 套件管理员,然后使用以下指令安装 PyQt 套件:
brew install pyqt
- Linux
在你的发行版中寻找并安装
python-qt5组件。在 Ubuntu 和其他基于 Debian 的发行版中,可以使用如下指令:
sudo apt-get install python-qt5
注解
您可能会发现QGIS已经安装了此软件包。
文本编辑器或 Python IDE
任何类型的软件开发都需要一个好的文本编辑器。如果您已经拥有喜欢的文本编辑器或IDE(集成开发环境),则可以在本教程中使用它。否则,每个平台都会为文本编辑器提供多种免费或付费选项。选择一个适合您的需求即可。
本教学中使用的是 Windows 版本的 Notepad++ 编辑器。
Windows
Notepad++ 是一款好用且免费的编辑器,可安装于 Windows 下。下载并安装 Notepad++ editor。
注解
如果您使用的是Notepad ++,请确保转到 。Python对空格非常敏感,此设置将确保制表符和空格得到正确处理。
操作流程
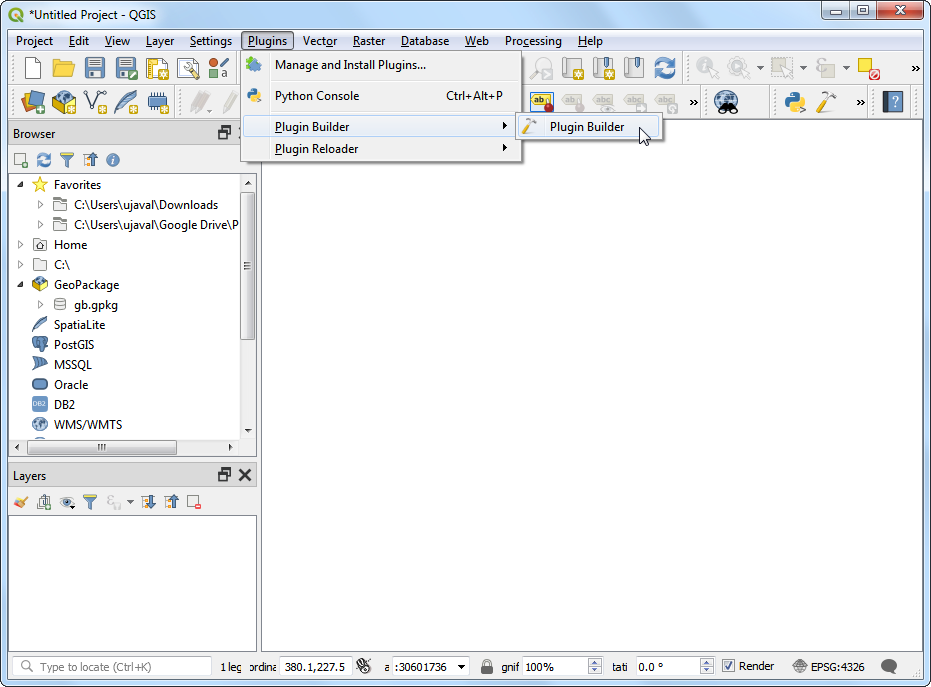
开启 QGIS,转到 。
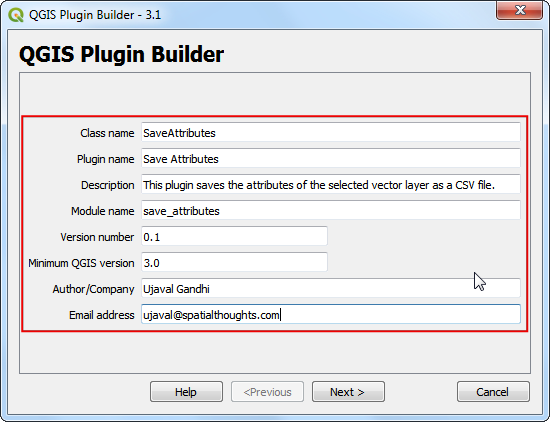
您将看到带有表单的 QGIS Plugin Builder 对话框。您可以在表单中填写与我们的插件有关的详细信息。Class name 将是包含插件逻辑的Python类的名称。这也是包含所有插件文件的文件夹的名称。输入
SaveAttributes作为类名。 Plugin name 是插件将在插件管理器中显示的名称。输入名称为Save Attributes。在 Description 字段中添加描述。模块名称将是该插件的主要python文件的名称。 输入为save_attributes。保留版本号不变,并在相应的字段中输入您的姓名和电子邮件地址。点击 Next 。
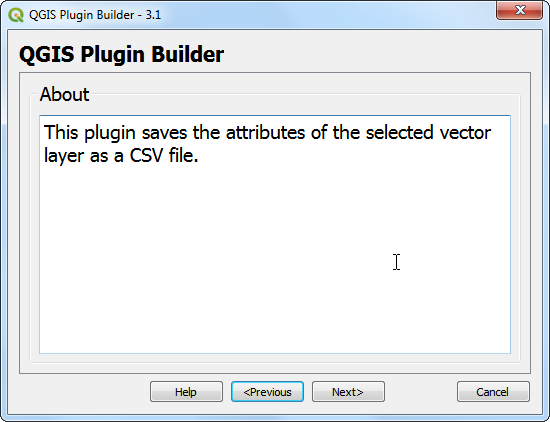
在 About 对话框中输入插件的简短说明,然后单击 Next 。
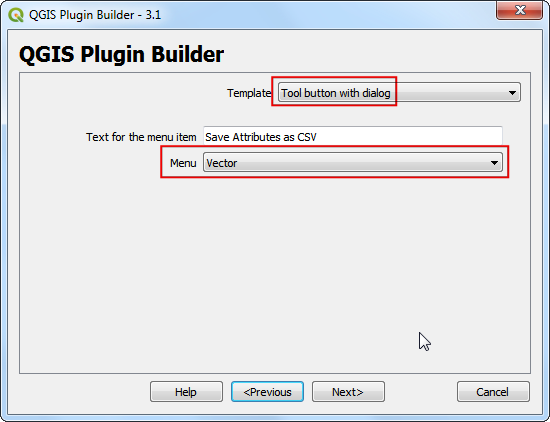
从 Template selector 中选择
带有对话框的工具按钮。菜单项值的文本将是用户如何在QGIS菜单中找到您的插件的方式。将其输入为将属性另存为CSV。 Menu 字段将决定您的插件项在QGIS中的添加位置。由于我们的插件用于矢量数据,因此选择矢量。 点击 Next 。
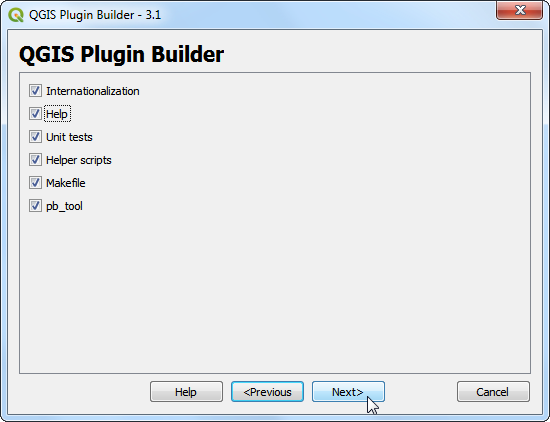
插件构建器将提示您输入要生成的文件类型。保留默认选择,然后单击 Next 。
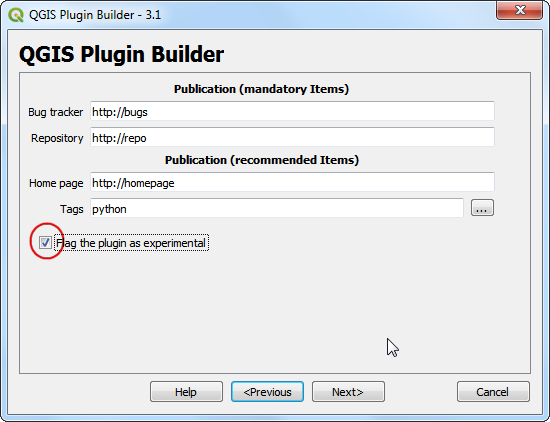
由于我们不打算发布该插件,因此您可以将 Bug tracker , Repository 和 Home page 的默认值保留为默认值。在底部的复选框中标记 Flag the plugin as experimental ,然后单击 Next 。
系统将提示您选择插件的目录。现在,将其保存到您可以在计算机上轻松找到的目录,然后单击 Generate 。
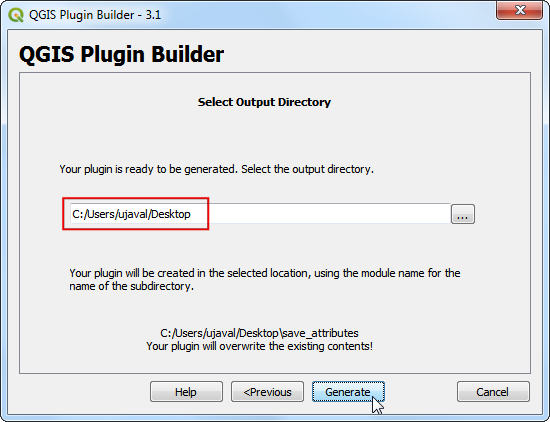
接下来,按 generate 按钮。创建插件模板后,您将看到一个确认对话框。
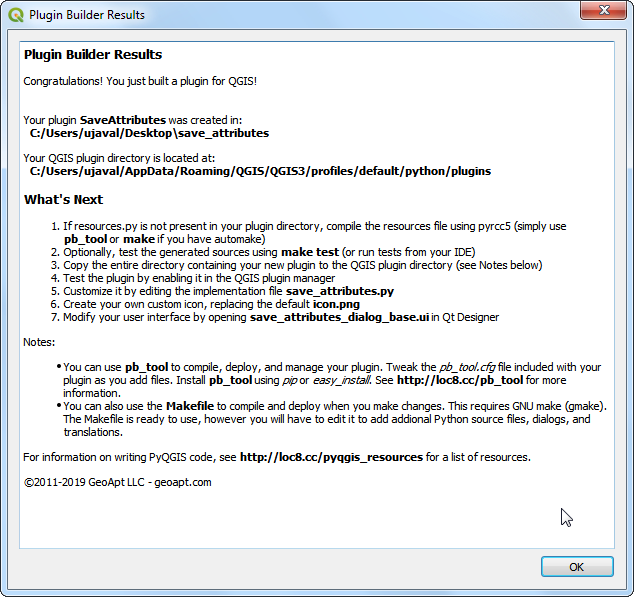
注解
您可能会提示您在路径中找不到pyrcc5。您可以忽略此消息。
在使用新创建的插件之前,我们需要编译由Plugin Builder创建的
resources.qrc文件。该文件是 Qt资源系统 的一部分,该文件引用了插件中使用的所有二进制文件。对于此插件,它将仅具有插件图标。编译此文件将生成可在插件中使用的应用程序代码,而与插件运行的平台无关。请遵循特定于平台的说明进行此步骤。
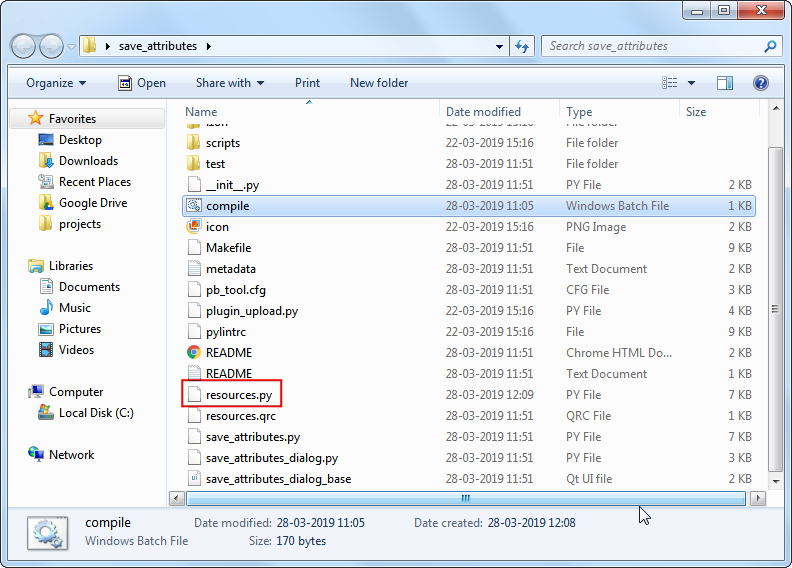
Windows
现在,您可以将 compile.bat 文件(在开始时的 Python Bindings for Qt 部分创建)复制到插件文件夹。复制后,双击该文件以运行它。如果运行成功,您将在文件夹中看到一个名为 resources.py 的新文件。
注解
如果此步骤失败,则可以启动 cmd.exe 并使用 `` cd`` 命令浏览到插件文件夹。通过运行 compile.bat 运行批处理文件以查看错误。
Mac 和 Linux
您将需要先安装 pb_tool 。打开一个终端并通过pip安装它。
sudo pip3 install pb_tool
打开终端并转到插件目录并输入 pb_tool compile 。这将运行我们作为 Python Bindings for Qt 的 pyrcc5 命令。
pb_tool compile
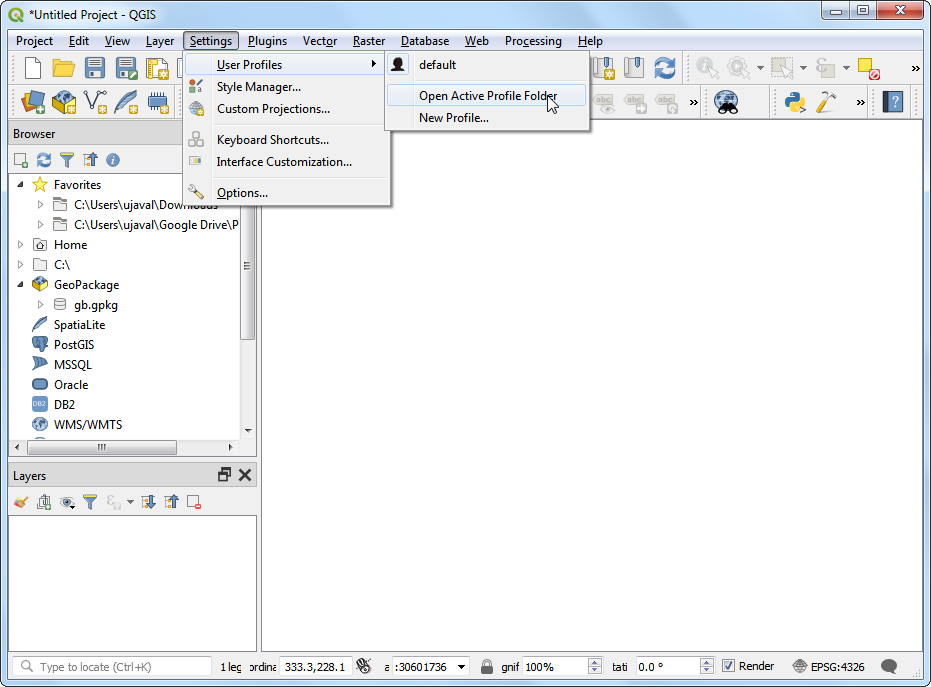
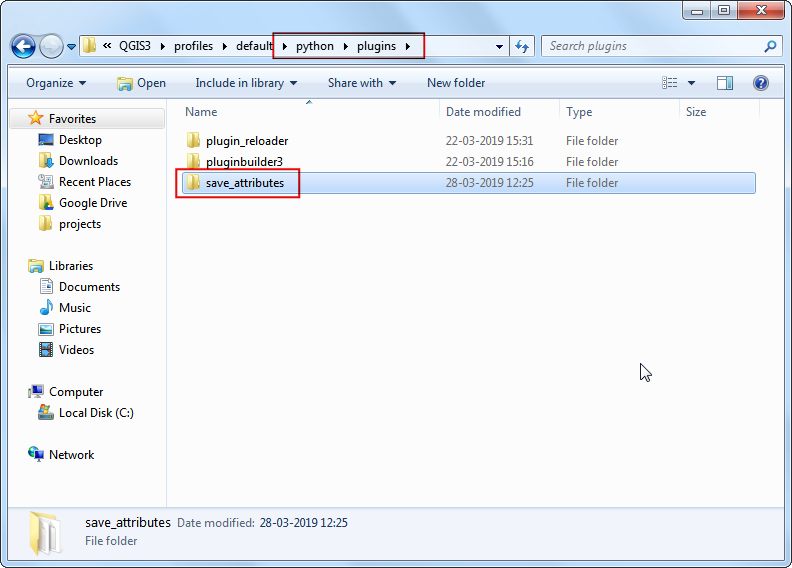
QGIS中的插件存储在一个特殊的文件夹中。我们必须先将插件目录复制到该文件夹,然后才能使用它。在QGIS中,转到 ,找到当前的配置文件文件夹。
在配置文件文件夹中,将plugin文件夹复制到 子文件夹。
现在,我们准备开始看看我们创建的全新插件。关闭QGIS,然后再次启动。转到 ,然后在 Installed 选项卡中启用
保存属性插件。
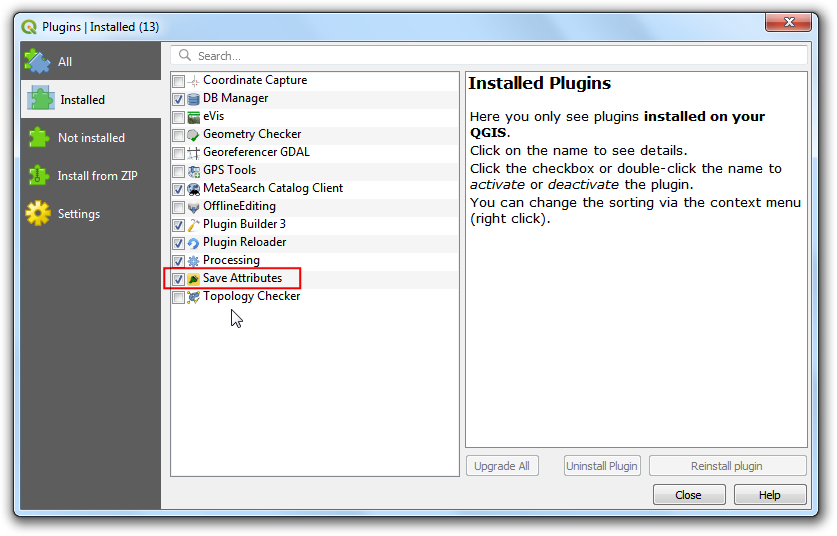
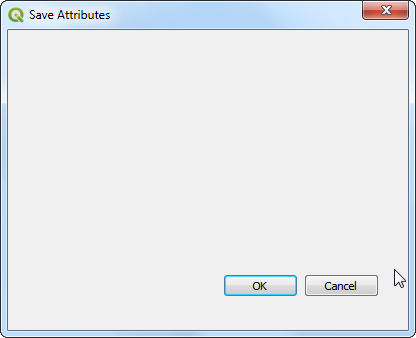
您会注意到插件工具栏中有一个新图标,并且在 下有一个新菜单项。选择它以启动插件对话框。

你会看到一个叫做 Save Attributes 的视窗出现。可以关掉了。
现在,我们将设计对话框并向其中添加一些用户界面元素。打开
Qt Creator程序并转到 。
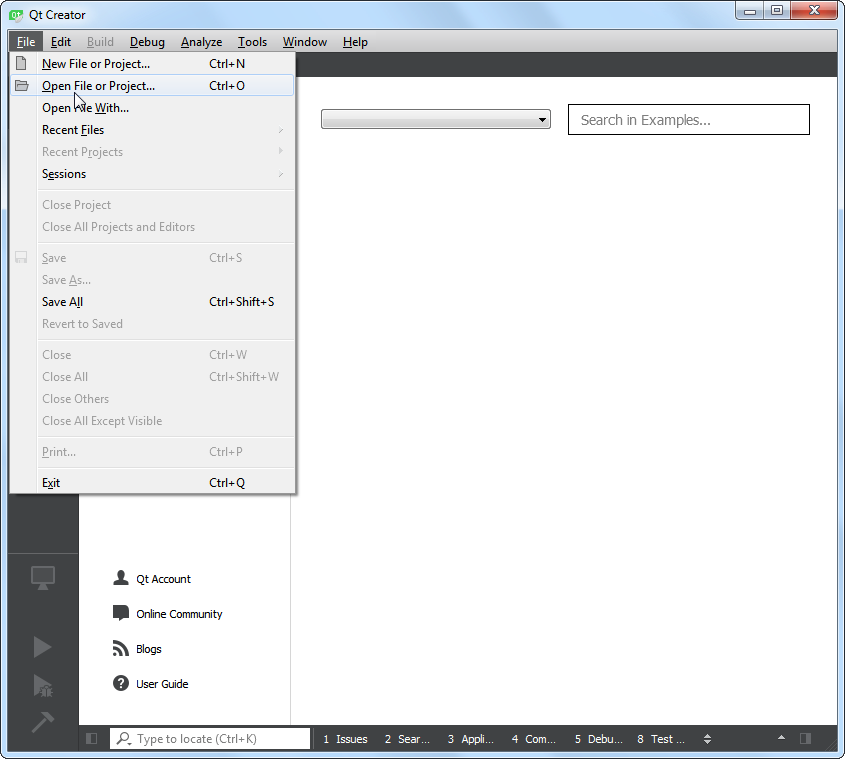
前往附加元件的资料夹,选择档案
save_attributes_dialog_base.ui,然后按 Open 。
注解
Windows隐藏了 AppData 文件夹,因此您可能在文件选择器对话框中看不到它。您可以从其父目录的 File name 提示符下输入 AppData 以将其打开。
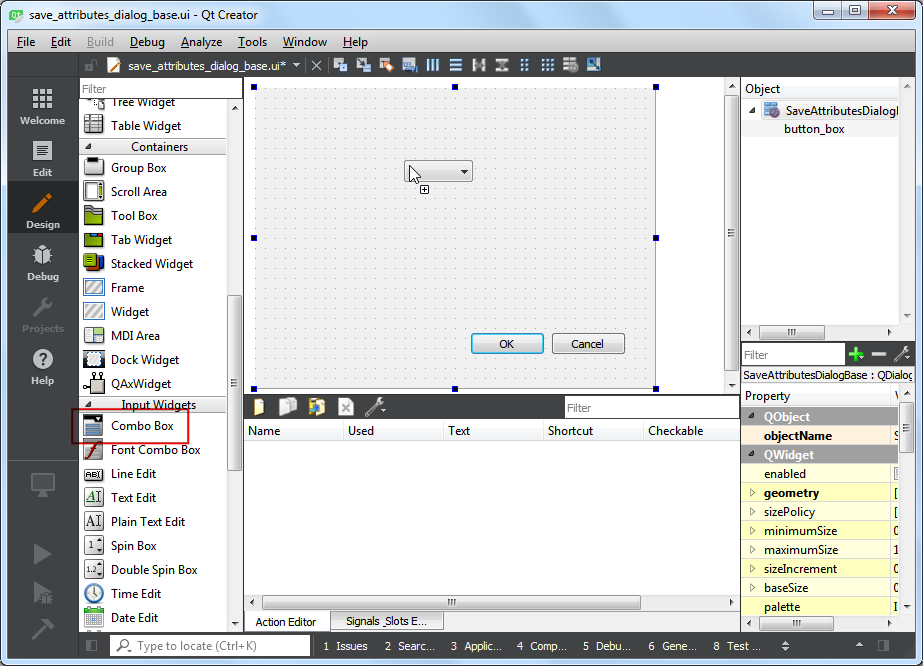
附加元件的空白视窗就会在这里出现。你可以从左边的面板中拖曳加入视窗中的一些元件,这里我们要加上 Input Widgets 中的 Combo Box (组合框),把它拖曳到附加元件的视窗中。
调整组合框的大小,然后再从 Display Widget 中拖曳一个 Label 到视窗上。
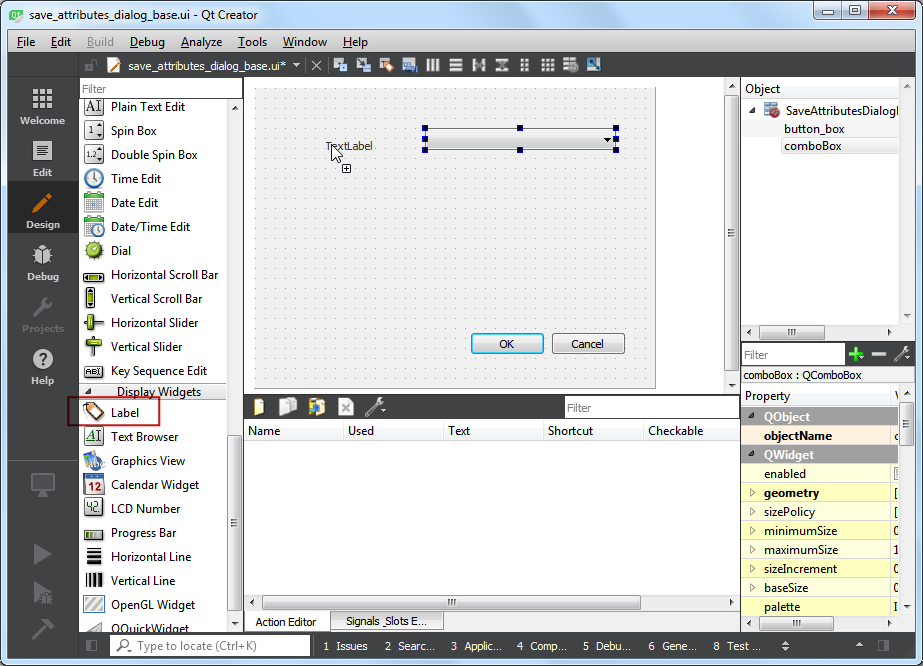
单击标签文本并输入
Select a layer。
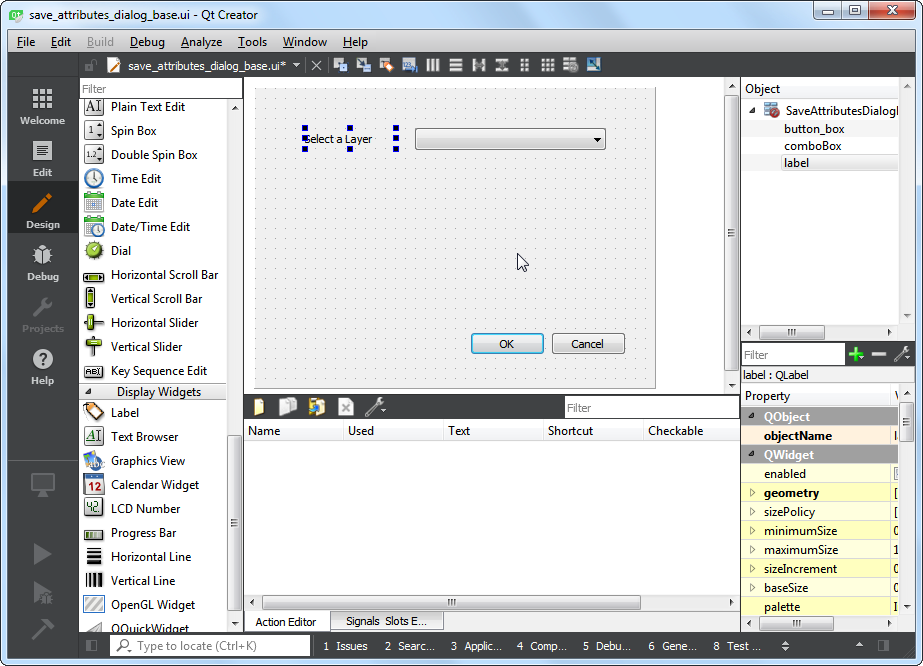
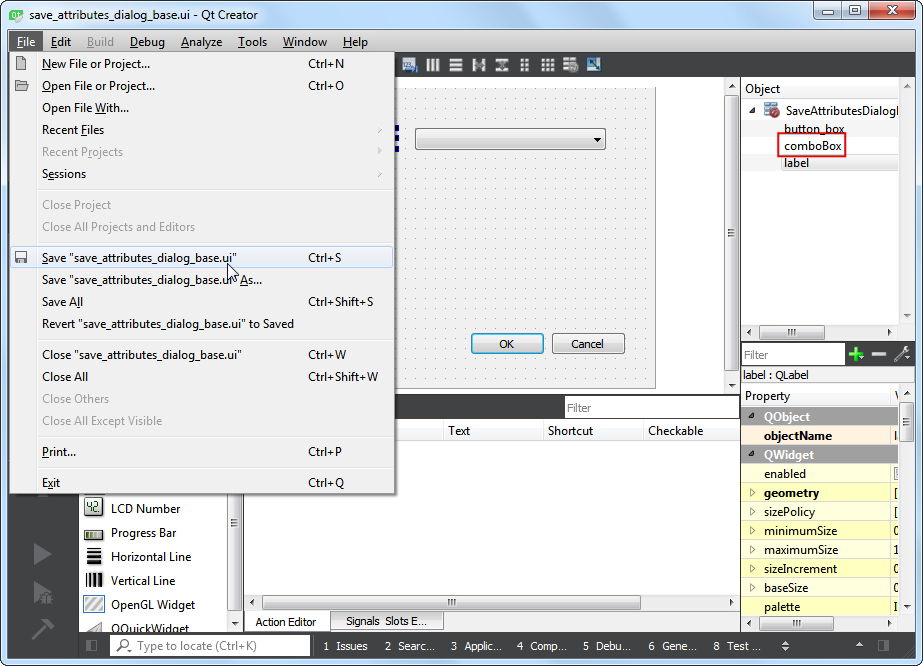
选择 ,以储存档案。注意组合框目前的物件名称为
comboBox,如果要使用 Python 操作物件,我们需要记住物件的名称才行。
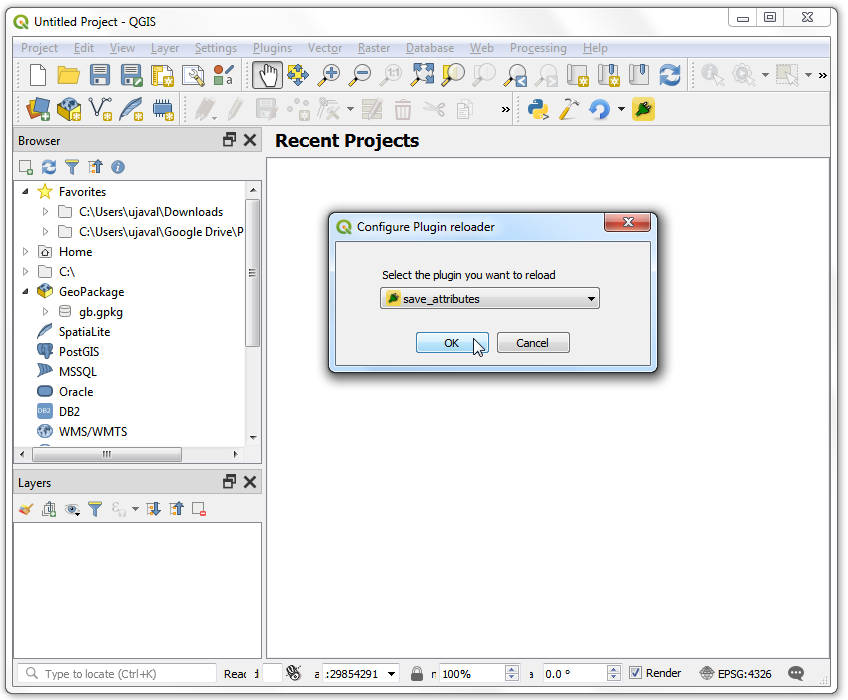
让我们重新加载插件,以便我们可以在对话框窗口中看到更改。转到 。在 Configure Plugin reloader 对话框中选择
保存属性。
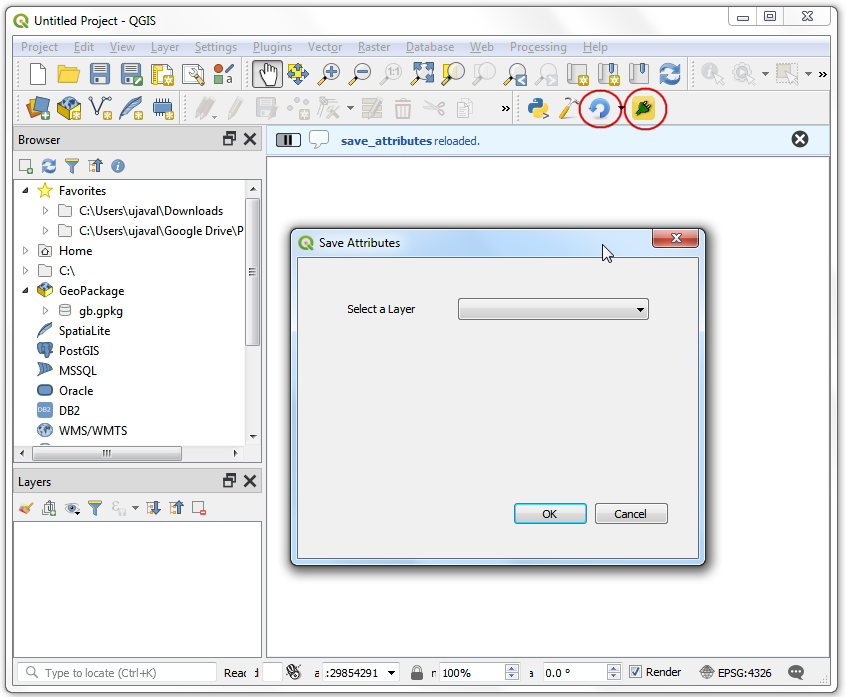
点击 Reload plugin 按钮以加载最新版本的插件。单击 Save Attributes as CSV 按钮以打开新设计的对话框。
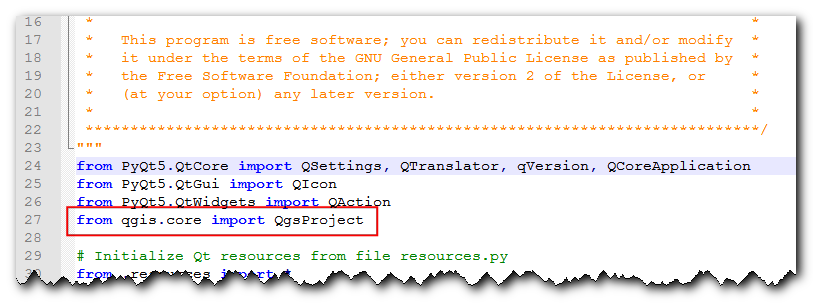
让我们向插件添加一些逻辑,该逻辑将使用QGIS中加载的图层填充组合框。转到插件目录,然后在文本编辑器中加载文件
save_attributes.py。 首先,在文件顶部插入其他导入内容:from qgis.core import QgsProject
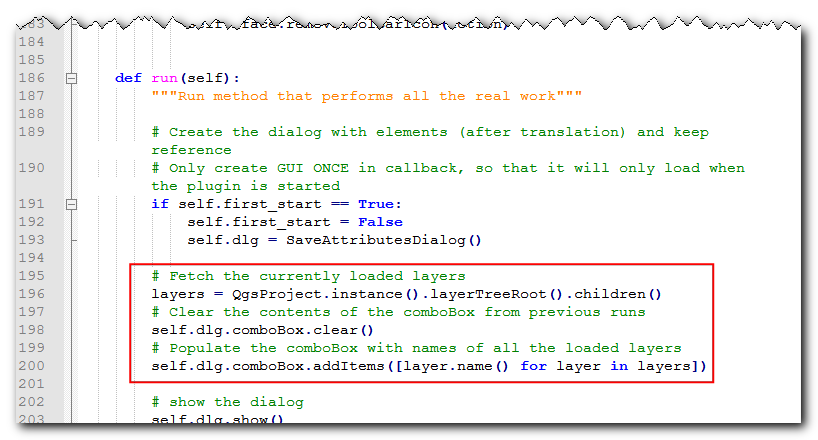
然后向下滚动到末尾并找到run(self)方法。单击工具栏按钮或选择插件菜单项时,将调用此方法。在该方法的开头添加以下代码。这段代码获取了QGIS中加载的图层,并将其从插件对话框添加到
comboBox对象中。# Fetch the currently loaded layers layers = QgsProject.instance().layerTreeRoot().children() # Clear the contents of the comboBox from previous runs self.dlg.comboBox.clear() # Populate the comboBox with names of all the loaded layers self.dlg.comboBox.addItems([layer.name() for layer in layers])
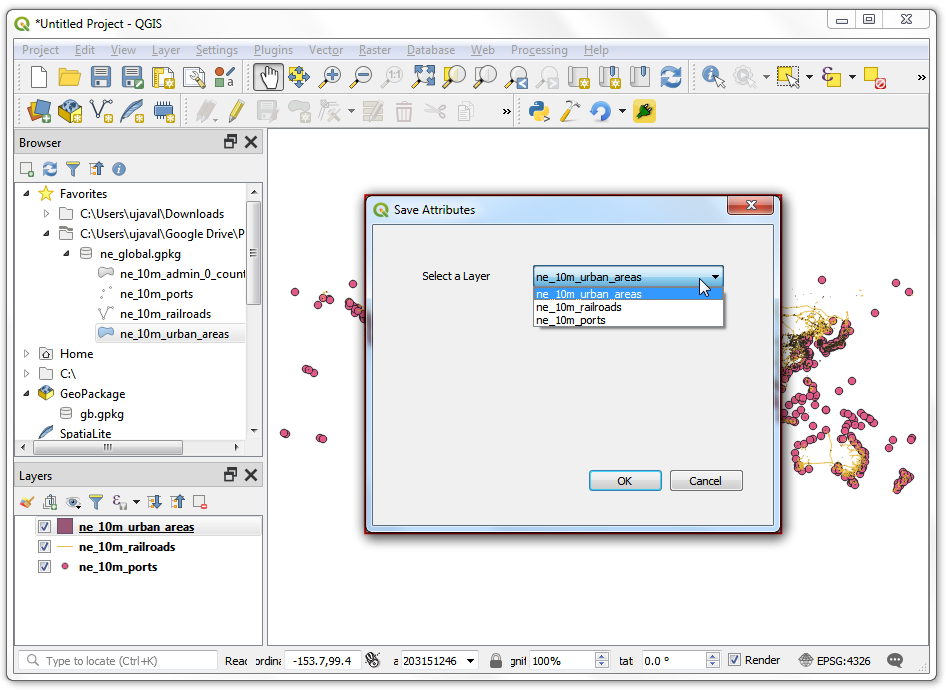
返回QGIS主窗口,通过单击 Reload plugin 按钮重新加载插件。要测试此新功能,我们必须在QGIS中加载一些图层。加载完某些图层后,请通过以下步骤启动插件 。您将看到我们的组合框现在已填充QGIS中加载的图层名称。
让我们把剩下的使用者介面元素也添加进来。切换回 Qt Creator 然后载入
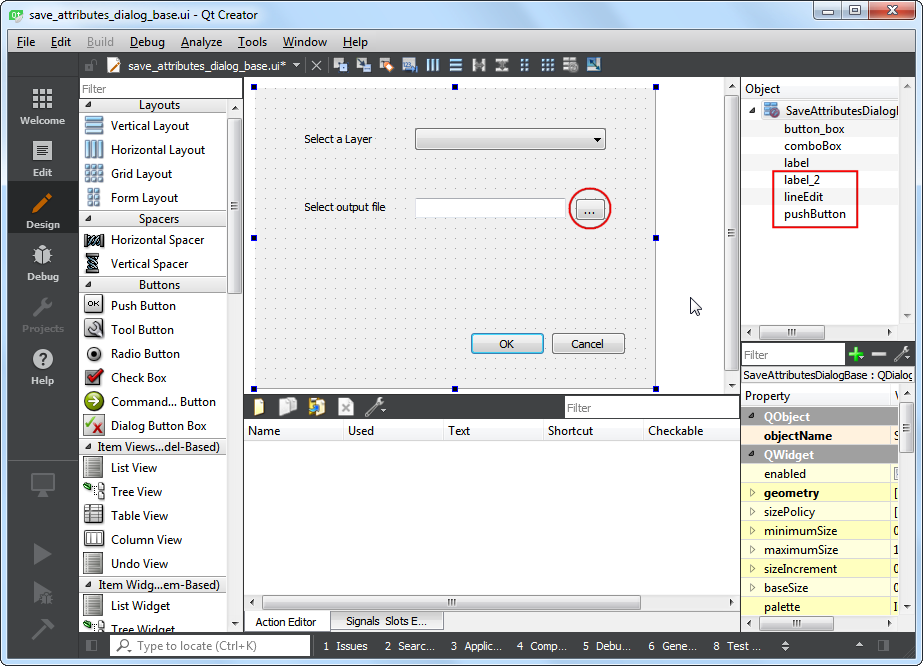
save_attributes_dialog_base.ui,再从 Display Widget 加入一个Label,然后文字改为Select output file,接着从 Input Widget 加入LineEdit,他显示用户选择的输出文件路径;再从 Button 加入一个Push Button(按钮),然后把按钮的标签改为...。注意,我们将不得不使用与之交互的小部件的对象名称。最后保存文件。
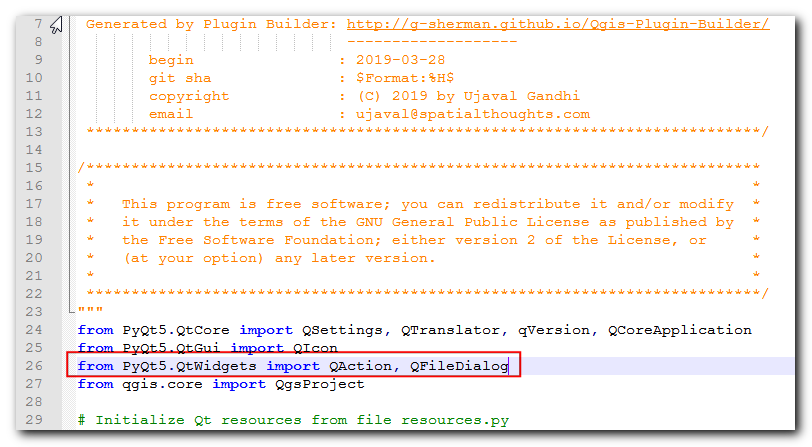
现在,当用户单击 `` …`` 按钮并在行编辑小部件中显示选择路径时,我们将添加python代码以打开文件浏览器。在文本编辑器中打开
save_attributes.py文件。将QFileDialog添加到文件顶部的QtWidgets导入列表中。
使用以下代码添加一个名为
select_output_file的新方法。此代码将打开文件浏览器,并使用用户选择的文件路径填充行编辑小部件。注意,getSaveFileName如何返回带有文件名和使用的过滤器的元组。
def select_output_file(self):
  filename, _filter = QFileDialog.getSaveFileName(
    self.dlg, "Select   output file ","", '*.csv')
  self.dlg.lineEdit.setText(filename)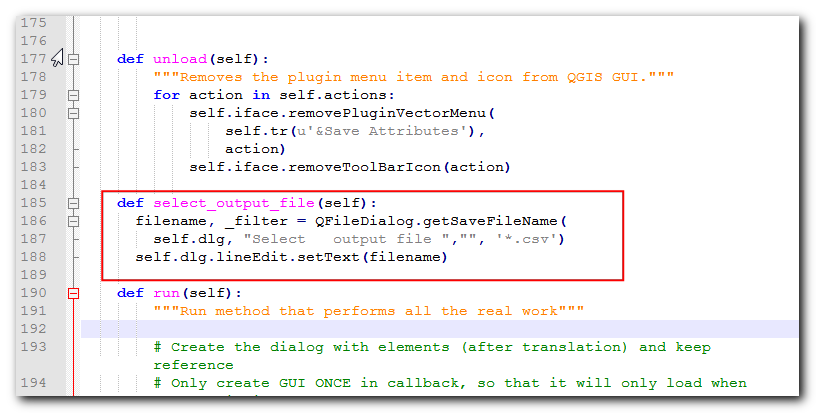
现在我们需要添加代码,以便单击 `` …`` 按钮时,将调用
select_output_file方法。向下滚动到run方法,并在初始化对话框的代码块中添加以下行。该代码会将select_output_file方法连接到按钮小部件的clicked信号。
self.dlg.pushButton.clicked.connect(self.select_output_file)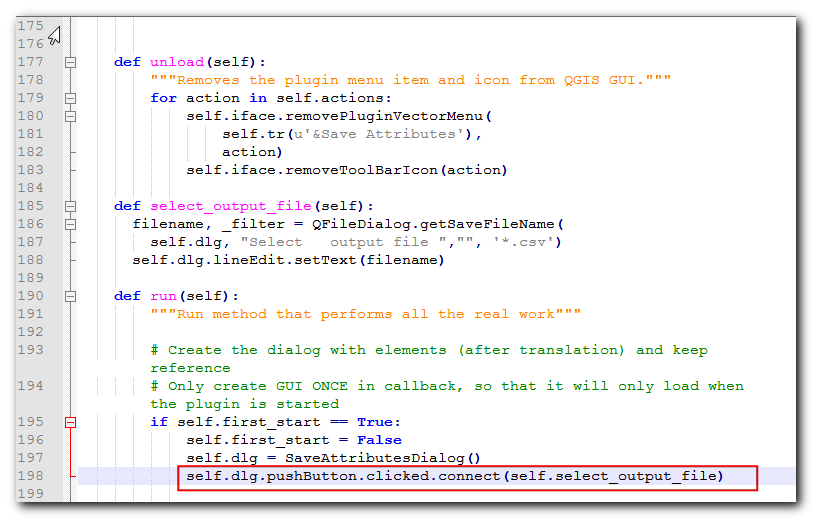
返回QGIS,重新加载插件并运行它。如果一切顺利,您将可以单击
...按钮并从磁盘中选择一个输出文本文件。

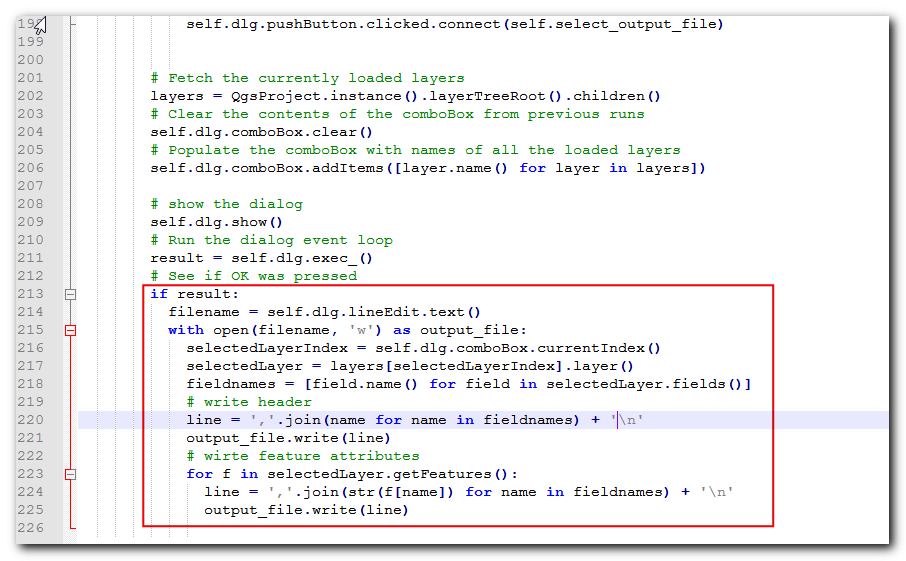
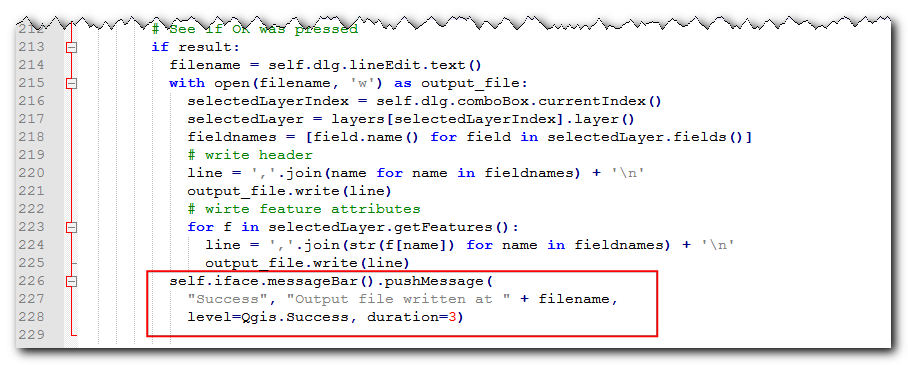
当按下 OK 时,什么事都不会发生。这是因为我们还没有加上把属性的资讯转存到文字档内的城市部分。我们现在已经有所需的所有元素来做到这件事了,请前往
run的方法,其中会看到一个pass,再把它以如下的程式码取代。这段程式码的解释可在 Python 程式设计入门 (QGIS3) 中找到。filename = self.dlg.lineEdit.text() with open(filename, 'w') as output_file: selectedLayerIndex = self.dlg.comboBox.currentIndex() selectedLayer = layers[selectedLayerIndex].layer() fieldnames = [field.name() for field in selectedLayer.fields()] # write header line = ','.join(name for name in fieldnames) + '\n' output_file.write(line) # wirte feature attributes for f in selectedLayer.getFeatures(): line = ','.join(str(f[name]) for name in fieldnames) + '\n' output_file.write(line)
我们还有最后一件事要补充。当操作成功完成时,我们应该向用户指示相同的内容。在QGIS中向用户发送通知的首选方法是通过
self.iface.messageBar().pushMessage()``方法。在文件顶部的 ``qgis.core导入列表中添加Qgis,并在run方法的末尾添加以下代码。
self.iface.messageBar().pushMessage( "Success", "Output file written at " + filename, level=Qgis.Success, duration=3)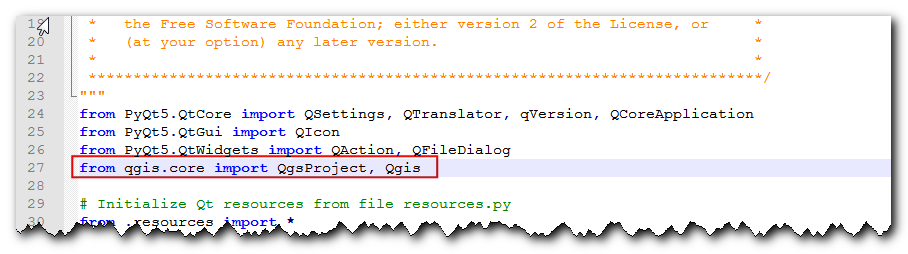
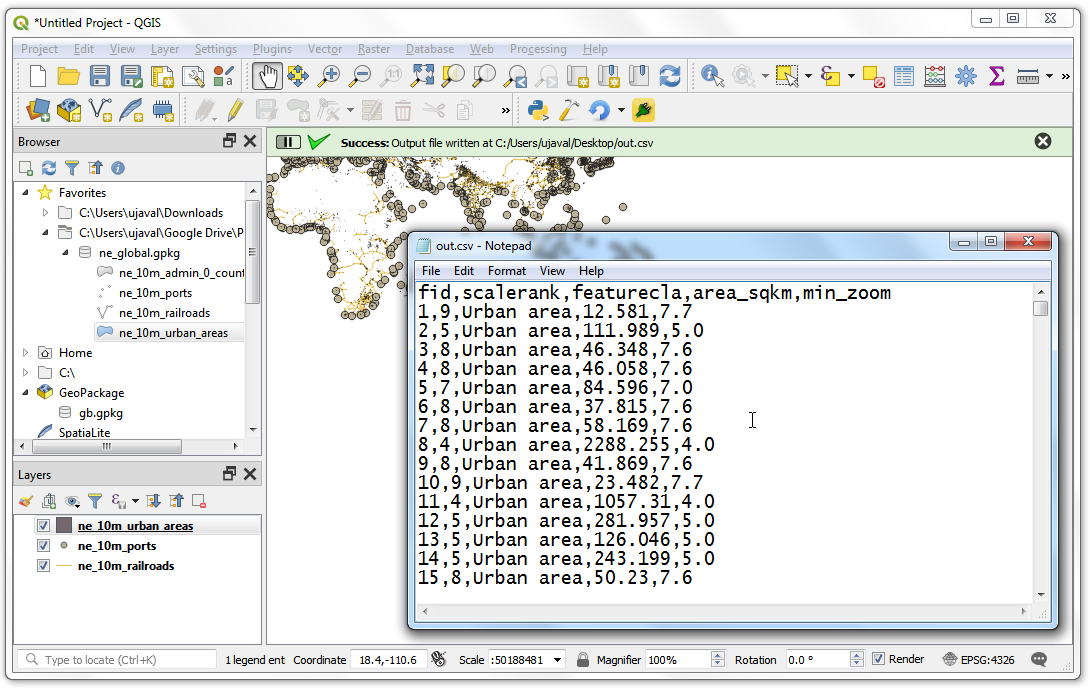
现在我们的插件已经准备好了。重新加载插件并尝试一下。您会发现所选的输出文本文件将具有矢量层的属性。
您可以压缩插件目录并与您的用户共享。他们可以将内容解压缩到其插件目录中,然后试用您的插件。如果这是一个真正的插件,则可以将其上传到 QGIS插件存储库 ,以便所有QGIS用户都可以找到并下载您的插件。
注解
本附加元件仅供示范使用,请勿任意出版或上传至 QGIS 附加元件储存库。
以下放上完整的 save_attributes.py 档做为参考。
# -*- coding: utf-8 -*-
"""
/***************************************************************************
SaveAttributes
A QGIS plugin
This plugin saves the attributes of the selected vector layer as a CSV file.
Generated by Plugin Builder: http://g-sherman.github.io/Qgis-Plugin-Builder/
-------------------
begin : 2019-03-28
git sha : $Format:%H$
copyright : (C) 2019 by Ujaval Gandhi
email : ujaval@spatialthoughts.com
***************************************************************************/
/***************************************************************************
* *
* This program is free software; you can redistribute it and/or modify *
* it under the terms of the GNU General Public License as published by *
* the Free Software Foundation; either version 2 of the License, or *
* (at your option) any later version. *
* *
***************************************************************************/
"""
from PyQt5.QtCore import QSettings, QTranslator, qVersion, QCoreApplication
from PyQt5.QtGui import QIcon
from PyQt5.QtWidgets import QAction, QFileDialog
from qgis.core import QgsProject, Qgis
# Initialize Qt resources from file resources.py
from .resources import *
# Import the code for the dialog
from .save_attributes_dialog import SaveAttributesDialog
import os.path
class SaveAttributes:
"""QGIS Plugin Implementation."""
def __init__(self, iface):
"""Constructor.
:param iface: An interface instance that will be passed to this class
which provides the hook by which you can manipulate the QGIS
application at run time.
:type iface: QgsInterface
"""
# Save reference to the QGIS interface
self.iface = iface
# initialize plugin directory
self.plugin_dir = os.path.dirname(__file__)
# initialize locale
locale = QSettings().value('locale/userLocale')[0:2]
locale_path = os.path.join(
self.plugin_dir,
'i18n',
'SaveAttributes_{}.qm'.format(locale))
if os.path.exists(locale_path):
self.translator = QTranslator()
self.translator.load(locale_path)
if qVersion() > '4.3.3':
QCoreApplication.installTranslator(self.translator)
# Declare instance attributes
self.actions = []
self.menu = self.tr(u'&Save Attributes')
# Check if plugin was started the first time in current QGIS session
# Must be set in initGui() to survive plugin reloads
self.first_start = None
# noinspection PyMethodMayBeStatic
def tr(self, message):
"""Get the translation for a string using Qt translation API.
We implement this ourselves since we do not inherit QObject.
:param message: String for translation.
:type message: str, QString
:returns: Translated version of message.
:rtype: QString
"""
# noinspection PyTypeChecker,PyArgumentList,PyCallByClass
return QCoreApplication.translate('SaveAttributes', message)
def add_action(
self,
icon_path,
text,
callback,
enabled_flag=True,
add_to_menu=True,
add_to_toolbar=True,
status_tip=None,
whats_this=None,
parent=None):
"""Add a toolbar icon to the toolbar.
:param icon_path: Path to the icon for this action. Can be a resource
path (e.g. ':/plugins/foo/bar.png') or a normal file system path.
:type icon_path: str
:param text: Text that should be shown in menu items for this action.
:type text: str
:param callback: Function to be called when the action is triggered.
:type callback: function
:param enabled_flag: A flag indicating if the action should be enabled
by default. Defaults to True.
:type enabled_flag: bool
:param add_to_menu: Flag indicating whether the action should also
be added to the menu. Defaults to True.
:type add_to_menu: bool
:param add_to_toolbar: Flag indicating whether the action should also
be added to the toolbar. Defaults to True.
:type add_to_toolbar: bool
:param status_tip: Optional text to show in a popup when mouse pointer
hovers over the action.
:type status_tip: str
:param parent: Parent widget for the new action. Defaults None.
:type parent: QWidget
:param whats_this: Optional text to show in the status bar when the
mouse pointer hovers over the action.
:returns: The action that was created. Note that the action is also
added to self.actions list.
:rtype: QAction
"""
icon = QIcon(icon_path)
action = QAction(icon, text, parent)
action.triggered.connect(callback)
action.setEnabled(enabled_flag)
if status_tip is not None:
action.setStatusTip(status_tip)
if whats_this is not None:
action.setWhatsThis(whats_this)
if add_to_toolbar:
# Adds plugin icon to Plugins toolbar
self.iface.addToolBarIcon(action)
if add_to_menu:
self.iface.addPluginToVectorMenu(
self.menu,
action)
self.actions.append(action)
return action
def initGui(self):
"""Create the menu entries and toolbar icons inside the QGIS GUI."""
icon_path = ':/plugins/save_attributes/icon.png'
self.add_action(
icon_path,
text=self.tr(u'Save Attributes as CSV'),
callback=self.run,
parent=self.iface.mainWindow())
# will be set False in run()
self.first_start = True
def unload(self):
"""Removes the plugin menu item and icon from QGIS GUI."""
for action in self.actions:
self.iface.removePluginVectorMenu(
self.tr(u'&Save Attributes'),
action)
self.iface.removeToolBarIcon(action)
def select_output_file(self):
filename, _filter = QFileDialog.getSaveFileName(
self.dlg, "Select output file ","", '*.csv')
self.dlg.lineEdit.setText(filename)
def run(self):
"""Run method that performs all the real work"""
# Create the dialog with elements (after translation) and keep reference
# Only create GUI ONCE in callback, so that it will only load when the plugin is started
if self.first_start == True:
self.first_start = False
self.dlg = SaveAttributesDialog()
self.dlg.pushButton.clicked.connect(self.select_output_file)
# Fetch the currently loaded layers
layers = QgsProject.instance().layerTreeRoot().children()
# Clear the contents of the comboBox and lineEdit from previous runs
self.dlg.comboBox.clear()
self.dlg.lineEdit.clear()
# Populate the comboBox with names of all the loaded layers
self.dlg.comboBox.addItems([layer.name() for layer in layers])
# show the dialog
self.dlg.show()
# Run the dialog event loop
result = self.dlg.exec_()
# See if OK was pressed
if result:
filename = self.dlg.lineEdit.text()
with open(filename, 'w') as output_file:
  selectedLayerIndex = self.dlg.comboBox.currentIndex()
  selectedLayer = layers[selectedLayerIndex].layer()
  fieldnames = [field.name() for field in selectedLayer.fields()]
  # write header
  line = ','.join(name for name in fieldnames) + '\n'
  output_file.write(line)
  # wirte feature attributes
  for f in selectedLayer.getFeatures():
    line = ','.join(str(f[name]) for name in fieldnames) + '\n'
    output_file.write(line)
self.iface.messageBar().pushMessage(
  "Success", "Output file written at " + filename,
  level=Qgis.Success, duration=3)