7. 与python集成
本页提供了一些将mappyfile集成到基于python的工作流中的示例。
7.1. 显示几何图形
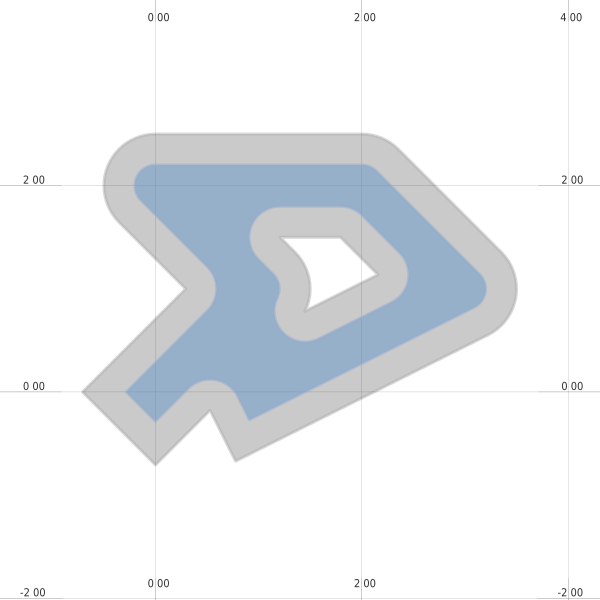
下面的示例重新创建了 `Shapely documentation <https://pypi.python.org/pypi/Shapely>`_中使用的示例图像.
请参阅 geometry.py 和 geometry.map .
mapfile["size"] = [600, 600]
7.1.1. 扩张
def dilation(mapfile):
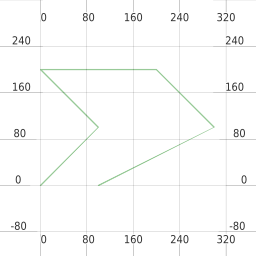
line = LineString([(0, 0), (1, 1), (0, 2), (2, 2), (3, 1), (1, 0)])
ll = mappyfile.find(mapfile["layers"], "name", "line")
ll["features"][0]["wkt"] = line.wkt
dilated = line.buffer(0.5, cap_style=3)
pl = mappyfile.find(mapfile["layers"], "name", "polygon")
pl["features"][0]["wkt"] = dilated.wkt
mapfile["extent"] = " ".join(map(str, dilated.buffer(0.8).bounds))
return dilated
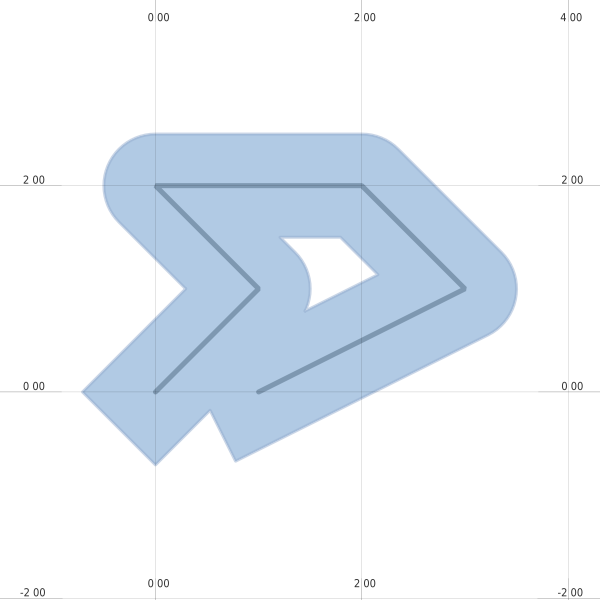
7.1.2. 侵蚀
def erosion(mapfile, dilated):
    """
    We will continue to work with the modified Mapfile
    If we wanted to start from scratch we could simply reread it
    """
    ll = mappyfile.find(mapfile["layers"], "name", "line")
    ll["status"] = "OFF"

    pl = mappyfile.find(mapfile["layers"], "name", "polygon")

    # make a deep copy of the polygon layer in the Map
    # so any modification are made to this layer only
    pl2 = deepcopy(pl)

    pl2["name"] = "newpolygon"
    mapfile["layers"].append(pl2)

    dilated = dilated.buffer(-0.3)
    pl2["features"][0]["wkt"] = dilated.wkt

    style = pl["classes"][0]["styles"][0]
    style["color"] = "#999999"
    style["outlinecolor"] = "#b2b2b2"