 Source
备注
单击 here 下载完整的示例代码或通过活页夹在浏览器中运行此示例
利用滚珠算法估计背景强度
滚球算法在曝光不均匀的情况下估计灰度图像的背景强度。它经常被用于生物医学图像处理中,并由Stanley R.Sternberg于1983年首次提出 1.
该算法起到了过滤器的作用,非常直观。我们认为图像是一个表面,它有单位大小的块堆叠在彼此的顶部,而不是每个像素。块的数量以及因此的表面高度由像素的强度决定。为了获得所需(像素)位置的背景强度,我们设想在所需位置将一个球淹没在表面下。一旦它完全被块覆盖,球的顶点就决定了该位置的背景强度。然后我们就可以 roll 这个球在表面下盘旋,以获得整个图像的背景值。
SCHKIT-IMAGE实现了滚球算法的一个通用版本,它允许你不仅使用球,而且可以使用任意形状作为内核,并在n维图像上工作。这允许您直接过滤RGB图像或沿任何(或所有)空间维度过滤图像堆栈。
- 1
斯坦利·R·斯特恩伯格“生物医学图像处理。”计算机1(1983):22-34。 DOI:10.1109/MC.1983.1654163
经典滚球
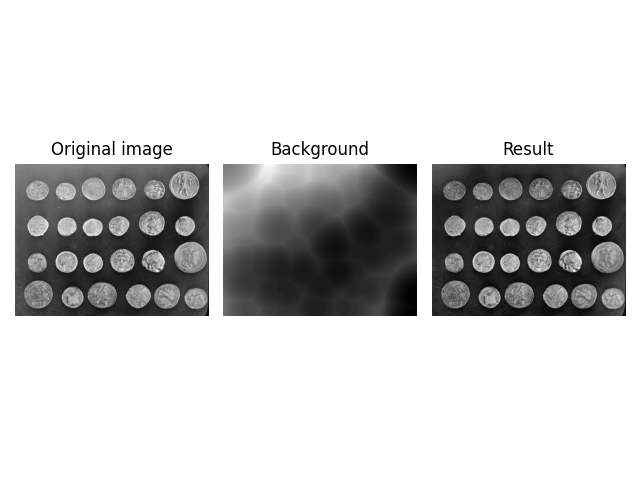
在SCRKIT-IMAGE中,滚球算法假设你的背景具有低强度(黑色),而特征具有高强度(白色)。如果您的图像是这种情况,您可以直接使用滤镜,如下所示:
import imageio
import matplotlib.pyplot as plt
import numpy as np

from skimage import (
    data, restoration, util
)


def plot_result(image, background):
    fig, ax = plt.subplots(nrows=1, ncols=3)

    ax[0].imshow(image, cmap='gray')
    ax[0].set_title('Original image')
    ax[0].axis('off')

    ax[1].imshow(background, cmap='gray')
    ax[1].set_title('Background')
    ax[1].axis('off')

    ax[2].imshow(image - background, cmap='gray')
    ax[2].set_title('Result')
    ax[2].axis('off')

    fig.tight_layout()


image = data.coins()

background = restoration.rolling_ball(image)

plot_result(image, background)
plt.show()
白色背景
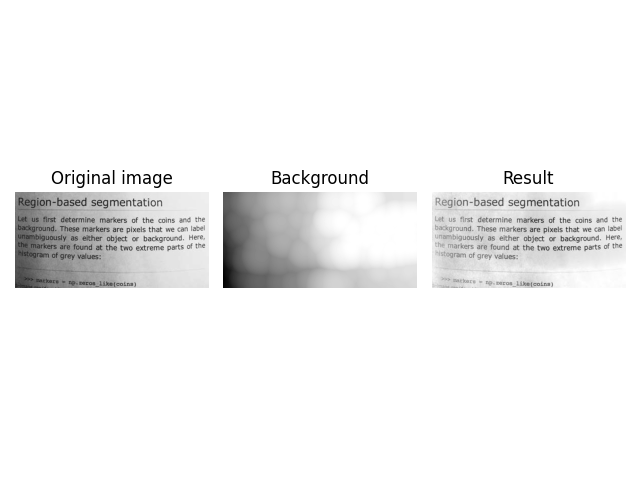
如果在明亮的背景上有暗特征,则需要在将图像传递到算法之前反转图像,然后反转结果。这可以通过以下方式实现:
image = data.page()
image_inverted = util.invert(image)

background_inverted = restoration.rolling_ball(image_inverted, radius=45)
filtered_image_inverted = image_inverted - background_inverted
filtered_image = util.invert(filtered_image_inverted)
background = util.invert(background_inverted)

fig, ax = plt.subplots(nrows=1, ncols=3)

ax[0].imshow(image, cmap='gray')
ax[0].set_title('Original image')
ax[0].axis('off')

ax[1].imshow(background, cmap='gray')
ax[1].set_title('Background')
ax[1].axis('off')

ax[2].imshow(filtered_image, cmap='gray')
ax[2].set_title('Result')
ax[2].axis('off')

fig.tight_layout()

plt.show()
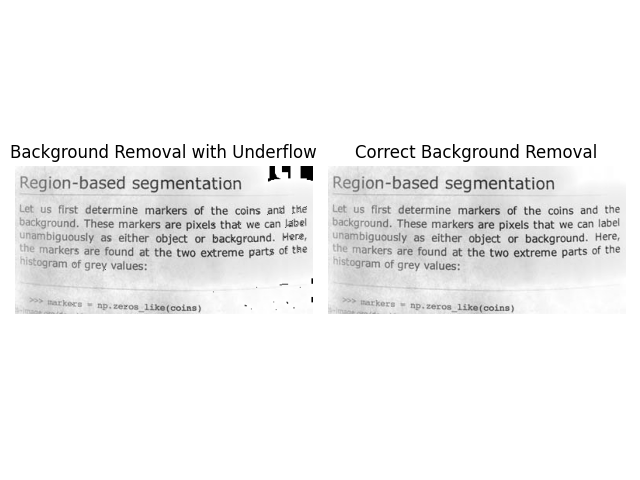
在减去明亮的背景时,请注意不要成为整数下溢的受害者。例如,此代码看起来是正确的,但可能会受到下溢的影响,从而导致不需要的构件。您可以在可视化的右上角看到这一点。
image = data.page()
image_inverted = util.invert(image)

background_inverted = restoration.rolling_ball(image_inverted, radius=45)
background = util.invert(background_inverted)
underflow_image = image - background  # integer underflow occurs here

# correct subtraction
correct_image = util.invert(image_inverted - background_inverted)

fig, ax = plt.subplots(nrows=1, ncols=2)

ax[0].imshow(underflow_image, cmap='gray')
ax[0].set_title('Background Removal with Underflow')
ax[0].axis('off')

ax[1].imshow(correct_image, cmap='gray')
ax[1].set_title('Correct Background Removal')
ax[1].axis('off')

fig.tight_layout()

plt.show()
图像数据类型
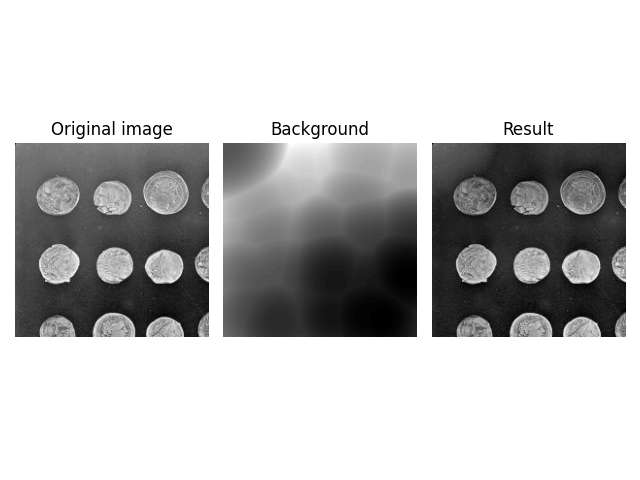
rolling_ball 可以处理数据类型以外的 np.uint8 。您可以以相同的方式将它们传递到函数中。
image = data.coins()[:200, :200].astype(np.uint16)

background = restoration.rolling_ball(image, radius=70.5)
plot_result(image, background)
plt.show()
但是,如果您使用的浮点图像已标准化为 [0, 1] 。在这种情况下,球将比图像强度大得多,这可能会导致意外的结果。
image = util.img_as_float(data.coins()[:200, :200])

background = restoration.rolling_ball(image, radius=70.5)
plot_result(image, background)
plt.show()
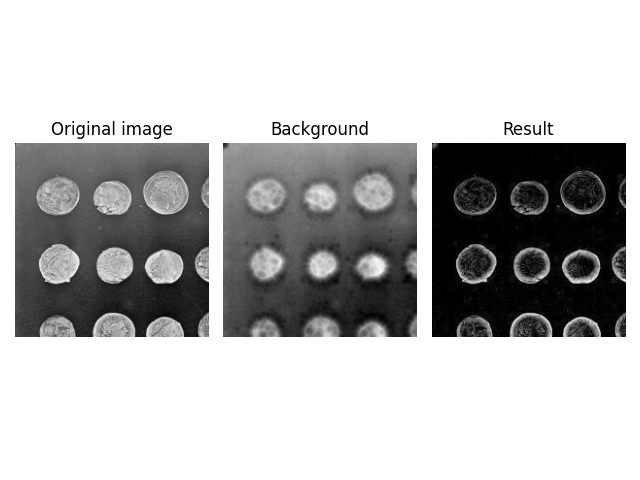
因为 radius=70.5 远大于图像的最大亮度时,有效核大小显著减小,即仅为小帽(大约 radius=10 )在图像中滚来滚去。你可以找到这种奇怪效果的复制品 Advanced Shapes 下面一节。
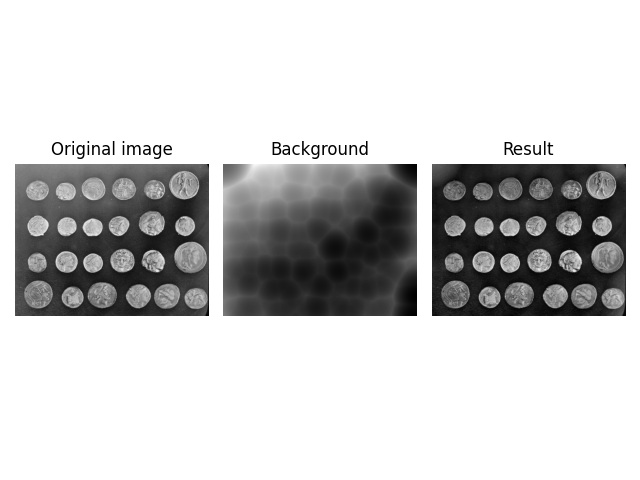
要获得预期的结果,需要降低内核的强度。属性手动指定内核来完成此操作 kernel 论点。
注:半径等于椭圆的半轴长度,即 half 一个完整的轴线。因此,内核形状乘以2。
normalized_radius = 70.5 / 255
image = util.img_as_float(data.coins())
kernel = restoration.ellipsoid_kernel(
    (70.5 * 2, 70.5 * 2),
    normalized_radius * 2
)

background = restoration.rolling_ball(
    image,
    kernel=kernel
)
plot_result(image, background)
plt.show()
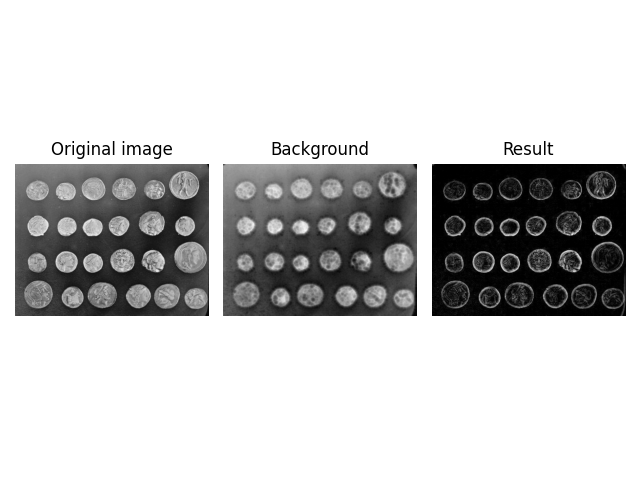
高级造型
默认情况下, rolling_ball 使用球状内核(惊喜)。有时,这可能过于有限--如上例所示--因为与空间维度相比,强度维度具有不同的比例,或者因为图像维度可能具有不同的含义--一个可能是图像堆栈中的堆栈计数器。
为了解释这一点, rolling_ball 有一个 kernel 参数,它允许您指定要使用的内核。内核必须与图像具有相同的维度(注:维度,而不是形状)。为了帮助创建它,由提供了两个默认内核 skimage 。 ball_kernel 指定球形内核并用作默认内核。 ellipsoid_kernel 指定椭球体形状的内核。
image = data.coins()
kernel = restoration.ellipsoid_kernel(
    (70.5 * 2, 70.5 * 2),
    70.5 * 2
)

background = restoration.rolling_ball(
    image,
    kernel=kernel
)
plot_result(image, background)
plt.show()

您还可以使用 ellipsoid_kernel 以重新创建先前意外的结果,并查看有效(空间)过滤器大小是否减小。
image = data.coins()

kernel = restoration.ellipsoid_kernel(
    (10 * 2, 10 * 2),
    255 * 2
)

background = restoration.rolling_ball(
    image,
    kernel=kernel
)
plot_result(image, background)
plt.show()
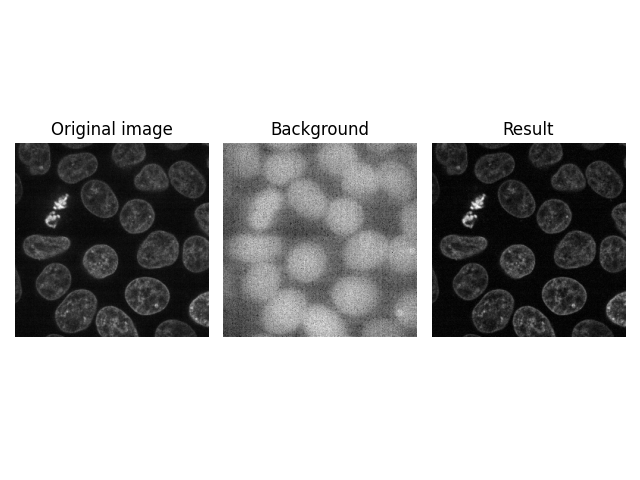
更高维度
的另一个功能 rolling_ball 您可以将其直接应用于更高维度的图像,例如,在共焦显微镜下获得的z-叠层图像。内核维度的数量必须与图像维度匹配,因此内核形状现在是3维的。
image = data.cells3d()[:, 1, ...]
background = restoration.rolling_ball(
    image,
    kernel=restoration.ellipsoid_kernel(
        (1, 21, 21),
        0.1
    )
)

plot_result(image[30, ...], background[30, ...])
plt.show()
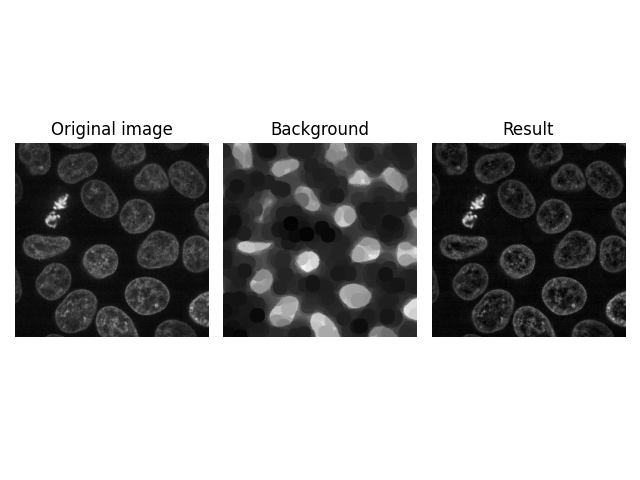
核大小为1不会沿该轴过滤。换句话说,上面的滤镜分别应用于堆栈中的每个图像。
但是,也可以通过指定1以外的值来同时过滤所有3个维度。
image = data.cells3d()[:, 1, ...]
background = restoration.rolling_ball(
    image,
    kernel=restoration.ellipsoid_kernel(
        (5, 21, 21),
        0.1
    )
)

plot_result(image[30, ...], background[30, ...])
plt.show()

另一种可能性是沿平面轴(z堆叠轴)过滤单个像素。
image = data.cells3d()[:, 1, ...]
background = restoration.rolling_ball(
    image,
    kernel=restoration.ellipsoid_kernel(
        (100, 1, 1),
        0.1
    )
)

plot_result(image[30, ...], background[30, ...])
plt.show()
脚本的总运行时间: (0分27.009秒)