 Source
备注
单击 here 下载完整的示例代码或通过活页夹在浏览器中运行此示例
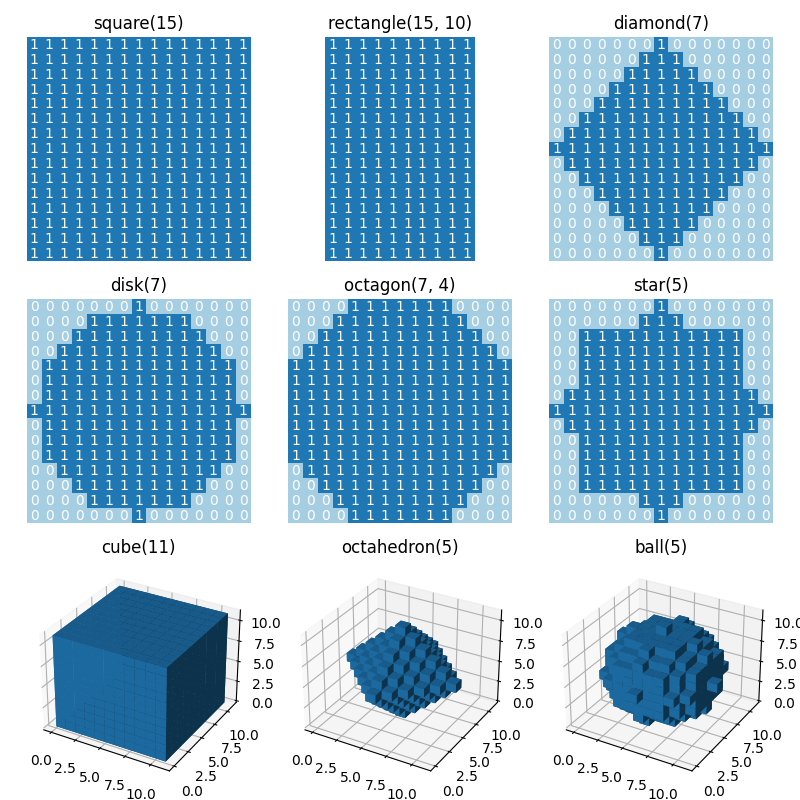
生成结构化元素
此示例说明如何在 skimage.morphology 以生成结构化元素。每个绘图的标题指示函数的调用。
import numpy as np
import matplotlib.pyplot as plt
from mpl_toolkits.mplot3d import Axes3D

from skimage.morphology import (square, rectangle, diamond, disk, cube,
                                octahedron, ball, octagon, star)

# Generate 2D and 3D structuring elements.
struc_2d = {
    "square(15)": square(15),
    "rectangle(15, 10)": rectangle(15, 10),
    "diamond(7)": diamond(7),
    "disk(7)": disk(7),
    "octagon(7, 4)": octagon(7, 4),
    "star(5)": star(5)
}

struc_3d = {
    "cube(11)": cube(11),
    "octahedron(5)": octahedron(5),
    "ball(5)": ball(5)
}

# Visualize the elements.
fig = plt.figure(figsize=(8, 8))

idx = 1
for title, struc in struc_2d.items():
    ax = fig.add_subplot(3, 3, idx)
    ax.imshow(struc, cmap="Paired", vmin=0, vmax=12)
    for i in range(struc.shape[0]):
        for j in range(struc.shape[1]):
            ax.text(j, i, struc[i, j], ha="center", va="center", color="w")
    ax.set_axis_off()
    ax.set_title(title)
    idx += 1

for title, struc in struc_3d.items():
    ax = fig.add_subplot(3, 3, idx, projection=Axes3D.name)
    ax.voxels(struc)
    ax.set_title(title)
    idx += 1

fig.tight_layout()
plt.show()
脚本的总运行时间: (0分3.152秒)