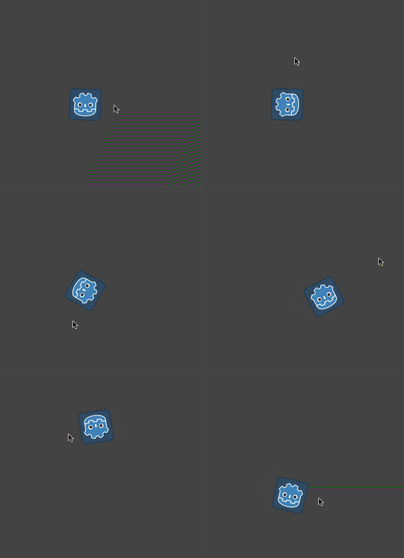
二维运动概述
介绍
每个初学者都在那里:“我该如何移动我的角色?”根据你制作的游戏的风格,你可能有特殊的要求,但一般来说,大多数二维游戏的移动都是基于少量的设计。
我们将使用 KinematicBody2D 对于这些示例,但原则也适用于其他节点类型(area2d、rigidbody2d)。
安装程序
下面的每个示例都使用相同的场景设置。从一开始 KinematicBody2D 有两个孩子: Sprite 和 CollisionShape2D . 你可以使用godot图标(“icon.png”)作为精灵的纹理,或者使用你拥有的任何其他二维图像。
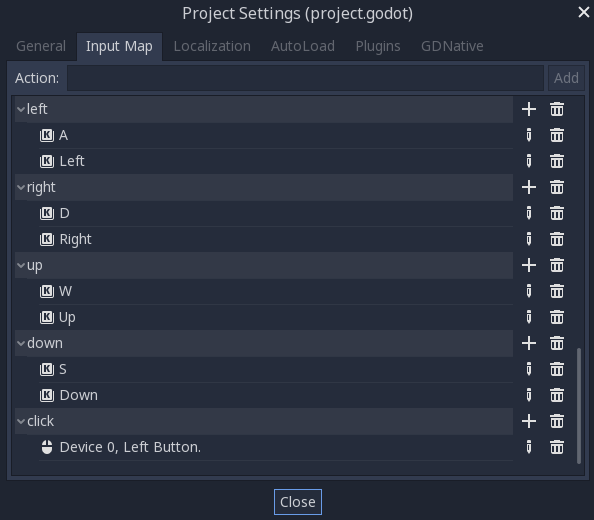
正常开放 Project -> Project Settings 并选择“输入地图”选项卡。添加以下输入操作(请参见 InputEvent 详细信息:

8向移动
在这种情况下,您希望用户按四个方向键(向上/左/向下/右或W/A/S/D),然后沿选定的方向移动。“8向移动”这个名字来源于这样一个事实,即玩家可以同时按两个键沿对角线移动。

向运动体添加脚本并添加以下代码:
extends KinematicBody2D

export (int) var speed = 200

var velocity = Vector2()

func get_input():
    velocity = Vector2()
    if Input.is_action_pressed('right'):
        velocity.x += 1
    if Input.is_action_pressed('left'):
        velocity.x -= 1
    if Input.is_action_pressed('down'):
        velocity.y += 1
    if Input.is_action_pressed('up'):
        velocity.y -= 1
    velocity = velocity.normalized() * speed

func _physics_process(delta):
    get_input()
    velocity = move_and_slide(velocity)
using Godot;
using System;

public class Movement : KinematicBody2D
{
    [Export] public int Speed = 200;

    Vector2 velocity = new Vector2();

    public void GetInput()
    {
        velocity = new Vector2();

        if (Input.IsActionPressed("right"))
            velocity.x += 1;

        if (Input.IsActionPressed("left"))
            velocity.x -= 1;

        if (Input.IsActionPressed("down"))
            velocity.y += 1;

        if (Input.IsActionPressed("up"))
            velocity.y -= 1;

        velocity = velocity.Normalized() * Speed;
    }

    public override void _PhysicsProcess(float delta)
    {
        GetInput();
        velocity = MoveAndSlide(velocity);
    }
}
在 get_input() 函数我们检查四个关键事件,并将它们相加得到速度矢量。这样做的好处是使两个相反的键互相抵消,但也会由于两个方向被加在一起而导致对角线移动更快。
如果我们 归一化 速度,这意味着我们设置了 长度 到 1 ,并乘以所需速度。
小技巧
如果您以前从未使用过矢量数学,或者需要刷新,您可以在Godot中看到矢量用法的解释。 矢量数学 .
旋转+移动
这种运动有时被称为“小行星式”,因为它类似于经典的街机游戏。按左/右键旋转角色,同时向上/向下将其向前或向后移动到所面向的任何方向。

extends KinematicBody2D

export (int) var speed = 200
export (float) var rotation_speed = 1.5

var velocity = Vector2()
var rotation_dir = 0

func get_input():
    rotation_dir = 0
    velocity = Vector2()
    if Input.is_action_pressed('right'):
        rotation_dir += 1
    if Input.is_action_pressed('left'):
        rotation_dir -= 1
    if Input.is_action_pressed('down'):
        velocity = Vector2(-speed, 0).rotated(rotation)
    if Input.is_action_pressed('up'):
        velocity = Vector2(speed, 0).rotated(rotation)

func _physics_process(delta):
    get_input()
    rotation += rotation_dir * rotation_speed * delta
    velocity = move_and_slide(velocity)
using Godot;
using System;

public class Movement : KinematicBody2D
{
    [Export] public int Speed = 200;
    [Export] public float RotationSpeed = 1.5f;

    Vector2 velocity = new Vector2();
    int rotationDir = 0;

    public void GetInput()
    {
        rotationDir = 0;
        velocity = new Vector2();

        if (Input.IsActionPressed("right"))
            rotationDir += 1;

        if (Input.IsActionPressed("left"))
            rotationDir -= 1;

        if (Input.IsActionPressed("down"))
            velocity = new Vector2(-Speed, 0).Rotated(Rotation);

        if (Input.IsActionPressed("up"))
            velocity = new Vector2(Speed, 0).Rotated(Rotation);

        velocity = velocity.Normalized() * Speed;
    }

    public override void _PhysicsProcess(float delta)
    {
        GetInput();
        Rotation += rotationDir * RotationSpeed * delta;
        velocity = MoveAndSlide(velocity);
    }
}
这里我们添加了两个新变量来跟踪我们的旋转方向和速度。再次,同时按下两个键将取消并导致不旋转。旋转直接应用于身体的 rotation 财产。
为了设置速度,我们使用 Vector2.rotated() 方法,使其指向与主体相同的方向。 rotated() 是一个有用的向量函数,可以在许多情况下使用,否则需要应用三角函数。
旋转+移动(鼠标)
这种运动方式是前一种运动的变体。这一次,方向由鼠标位置而不是键盘设置。角色将始终“查看”鼠标指针。但是,前进/后退输入保持不变。

extends KinematicBody2D

export (int) var speed = 200

var velocity = Vector2()

func get_input():
    look_at(get_global_mouse_position())
    velocity = Vector2()
    if Input.is_action_pressed('down'):
        velocity = Vector2(-speed, 0).rotated(rotation)
    if Input.is_action_pressed('up'):
        velocity = Vector2(speed, 0).rotated(rotation)

func _physics_process(delta):
    get_input()
    velocity = move_and_slide(velocity)
using Godot;
using System;

public class Movement : KinematicBody2D
{
    [Export] public int Speed = 200;

    Vector2 velocity = new Vector2();

    public void GetInput()
    {
        LookAt(GetGlobalMousePosition());
        velocity = new Vector2();

        if (Input.IsActionPressed("down"))
            velocity = new Vector2(-Speed, 0).Rotated(Rotation);

        if (Input.IsActionPressed("up"))
            velocity = new Vector2(Speed, 0).Rotated(Rotation);

        velocity = velocity.Normalized() * Speed;
    }

    public override void _PhysicsProcess(float delta)
    {
        GetInput();
        velocity = MoveAndSlide(velocity);
    }
}
这里我们用的是 Node2D look_at() 方法将玩家指向给定位置。如果没有此功能,您可以通过如下设置角度获得相同的效果:
rotation = get_global_mouse_position().angle_to_point(position)
var rotation = GetGlobalMousePosition().AngleToPoint(Position);
单击并移动
最后一个示例仅使用鼠标控制字符。点击屏幕将使玩家移动到目标位置。

extends KinematicBody2D

export (int) var speed = 200

var target = Vector2()
var velocity = Vector2()

func _input(event):
    if event.is_action_pressed('click'):
        target = get_global_mouse_position()

func _physics_process(delta):
    velocity = (target - position).normalized() * speed
    # rotation = velocity.angle()
    if (target - position).length() > 5:
        velocity = move_and_slide(velocity)
using Godot;
using System;

public class Movement : KinematicBody2D
{
    [Export] public int Speed = 200;

    Vector2 target = new Vector2();
    Vector2 velocity = new Vector2();

    public override void _Input(InputEvent @event)
    {
        if (@event.IsActionPressed("click"))
        {
            target = GetGlobalMousePosition();
        }
    }

    public override void _PhysicsProcess(float delta)
    {
        velocity = (target - Position).Normalized() * Speed;
        // Rotation = velocity.Angle();
        if ((target - Position).Length() > 5)
        {
            velocity = MoveAndSlide(velocity);
        }
    }
}
注意 length() 移动前检查我们做的。如果没有这个测试,身体在到达目标位置时会“抖动”,因为它会稍微移过位置并试图向后移动,只会移动得太远并重复。
取消注释 rotation 如果你愿意的话,线条也会使身体指向运动的方向。
小技巧
这种技术也可以作为“跟随”字符的基础。这个 target 位置可以是要移动到的任何对象的位置。